background image

2

PART 1 • English

1.0 InTRoduCTIon

1.1 safety Instructions

do noT InsTAll YouR RECEIvER:
 In a closed or poorly ventilated cabinet; directly on top of or under any other equipment; on a surface 
which might obstruct the ventilation slots.

do noT EXPosE ThE RECEIvER oR ITs ACCEssoRIEs:

„

„

To direct sunlight or any other equipment that generates heat; to rain or intense 
moisture; to intense vibration and to any shock which may cause permanent damage 
to your receiver or to any magnetic objects, such as loudspeakers, transformers, etc.

„

„

Do not use a damaged power cord. It may cause a fire or an electric shock. Do not 
touch a power cord with wet hands. It may cause an electric shock.

„

„

When the receiver is not used for a long period of time, you should unplug the power 
cord from the wall socket.

„

„

Do not use alcohol or ammonia based liquids to clean the receiver. If you wish, you 
may clean your receiver with a soft lint-free cloth slightly made damp with a mild soap 
solution, and only after disconnecting from the mains voltage supply. Make sure no 
foreign objects fall through the ventilation slots because this could cause fire or an 
electric shock.

„

„

Do not place any objects on top of the receiver because this might prevent proper 
cooling of the components inside.

safety Precautions

„

„

Never try to open the receiver. It is dangerous to touch the inside of the receiver 
due to high voltages and possible electrical hazards. Opening the receiver will 
void the warranty of the product. Refer all maintenance or servicing to suitably 
qualified personnel.

„

„

When you are connecting cables, be sure that the receiver is disconnected from the 
mains supply voltage. Wait a few seconds after switching off the receiver before you 
move the receiver or disconnect any equipment.

„

„

It is a necessity that you only use an approved extension and compatible wiring that 
is suitable for the electrical power consumption of the installed equipment. Please 
ensure that the electrical power supply corresponds with the voltage on the electrical 
identification plate at the back of the receiver.

If the receiver does not operate normally even after strictly following the instructions in this user 
manual, it is recommended to consult your dealer.

1.2 storage

Your receiver and its accessories are stored and delivered in a packaging designed to protect against 
electric shocks and moisture. When unpacking it, make sure that all the parts are included and keep 
the packaging away from children. When transporting the receiver from one place to another or if you 
are returning it under warranty conditions, make sure to repack the receiver in its original packaging 

Summary of Contents for PRIMA VI

Page 1: ...enungsanleitung Manuel d Utilisateur Manuale Utente Manual del usuario Manual do Utilizador Felhasználói kézikönyv Instrukcja obsługi Ръководство на потребителя Digital Terrestrial HD Receiver PRIMA VI Picture similar ...

Page 2: ......

Page 3: ......

Page 4: ... audio language 8 6 4 Teletext 8 6 5 Subtitles 8 6 6 Timeshift 9 6 7 EPG Electronic Programme Guide 9 6 8 Instant Recording 9 7 0 Main Menu 9 7 1 Edit Channel 9 7 2 Installation 12 7 3 System Setup 12 7 4 Tools 15 7 5 Games 16 7 6 Media 16 8 0 Troubleshooting 18 9 0 Technical Specifications 20 STRONG declares that this item complies with the basic requirements and other relevant regulations of dir...

Page 5: ...nt proper cooling of the components inside Safety Precautions Never try to open the receiver It is dangerous to touch the inside of the receiver due to high voltages and possible electrical hazards Opening the receiver will void the warranty of the product Refer all maintenance or servicing to suitably qualified personnel When you are connecting cables be sure that the receiver is disconnected fro...

Page 6: ...types of batteries If rechargeable accumulators instead of batteries are going to be used e g NiMH we recommend using types with low self discharge to ensure long time operation of your remote control 1 5 Usage of external USB devices It is recommended to use USB 2 0 storage devices or higher If your device is not compatible to USB 2 0 specifications recording playback and other multimedia functio...

Page 7: ...eiver with your TV set using an HDMI cable 5 TV SCART To connect your receiver with your TV set using a SCART cable 6 Audio R L out To connect your receiver to an analogue audio amplifier 7 Power Cord Your receiver requires a supply voltage of 220 240 V AC Auto selectable 50 60 Hz 5 Please ensure the local power specification meets these requirements before connecting your receiver to the wall out...

Page 8: ...to the ANT IN connector on the back of the receiver Use a properly shielded antenna cable and suitable connectors The ANT OUT connector allows you to loop the antenna signal to a second receiver or TV set Please consider that the looped signal might be too weak if you use an active antenna If the signals at your location are too weak to receive proper signals with an indoor antenna we recommend us...

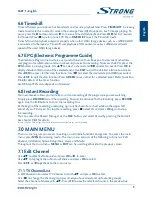
Page 9: ...vice such as a USB2 0 HDD is connected to the receiver Timeshift recording and playback of HD content requires a sufficient read write speed of the used USB storage device 4 0 Starting up for the first time When you use your receiver for the first time the Welcome Easy install menu appears Use pq to move the highlight to the setting you wish to alter and use tu to change values Start by selecting ...

Page 10: ... press OK to start scanning The receiver will search for all available channels now Once scanning is finished the receiver switches to viewing mode If the Welcome menu does not appear after switching on the receiver the first time reset the receiver to factory settings by pressing the MENU button and selecting Load Factory Setting in the submenu Tools DEFAULT PIN 1234 5 0 Quick guide to using your...

Page 11: ...Press INFO three times for technical details about the current channel Event information is displayed when available Availability depends on broadcast 6 3 Selection of audio language Some channels support a choice of audio formats and or languages To select another audio stream press AUDIO in viewing mode A list with available audio streams will now be displayed Use pq to select the desired stream...

Page 12: ...ty of EPG data depends on broadcast 6 8 Instant Recording Your new receiver allows you to make an instant recording of the programme you are watching Simply press RECORD to start the recording To enter the duration for the recording press RECORD again Use the 0 9 buttons to enter the recording time At the begin of the recording a recording sign will be shown for a short while on the upper left cor...

Page 13: ...to save the changes or No to discard 7 1 1 3 Skipping channels Channels marked with Skip will be skipped when zapping channels with the pq buttons The channels will still be available from the channel list To mark channels for skipping press GREEN while in TV Channel List The Skip symbol on the top of the screen will move up to indicate that the Skip function is selected Use pq to select a channel...

Page 14: ...d Select Yes to delete the marked channels or No to cancel 7 1 2 Radio Channel List Basically the operation of the Radio Channel List is the same as in the TV Channel List The only difference is that in Radio Channel List there is no video information so it will always display the radio background on the preview screen 7 1 3 Delete all Use this menu to delete all stored channels Select Delete All ...

Page 15: ...an active antenna Select Off for passive antennas When set to On 5 V will be present on the ANT IN connector of the receiver Press EXIT to leave the Antenna Power menu 7 2 4 LCN Logical Channel Numbering If LCN Logical Channel Numbering is activated and an LCN signal is provided by the operator channels will be stored in an operator defined order Set LCN to On to activate operator defined channel ...

Page 16: ...on a 4 3 TV and 16 9 use this setting for 16 9 TV sets Connection Use this option to select the connection to your TV set Select HDMI or TV SCART If connection type HDMI is selected then only the CVBS signal is available on the TV SCART Digital Audio Output Toggles between PCM and Bitstream output When PCM is selected all digital audio will be converted to stereo audio Bitstream enables you to lis...

Page 17: ...t saving your settings move the highlight to Cancel 7 3 5 Parental Lock This menu allows you to protect the installation menu and or channels with a PIN code You can also enter a new PIN code in the Parental Lock menu Use pq to select Parental Lock from the System Setup menu and press OK to proceed You will be asked to enter your PIN code DEFAULT PIN 1234 Menu Lock Locks the installation menu You ...

Page 18: ...ware upgrade function An Over The Air update might not be available in your region Please visit our website www strong tv or contact your local service hotline for more information about this option 7 4 4 Upgrade by USB This feature allows you to upgrade receiver software via the USB port When new software is available for your receiver it can be downloaded from our website www strong tv Place the...

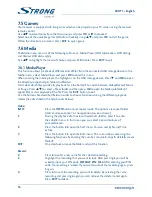
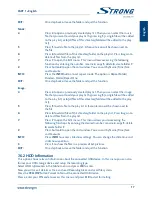
Page 19: ...lder subfolder if applicable or start playback of the file Press the EXIT button to exit Use the buttons like described below in order to choose functions during the different playback modes like described in the help banner below Video INFO Press the INFO button to set repeat mode The options are repeat folder folder icon repeat once 1 or no repetition no icon shown 1 During the playback of a mov...

Page 20: ...y pressing 5 a single file will be added to the play list or 6 all files of this directory folder will be added to the play list 5 Press 5 to add a file to the play list A favourite icon will be shown next to the file 6 Press 6 to add all files of this directory folder to the play list Press 6 again to delete all files from the play list 7 Press 7 to open the Edit menu This menu allows you to acce...

Page 21: ...ayed on screen If it is not press INFO Time Shift to Record If set to On the timeshifted part will be included in your recording when you start to record the current programme PS Record Select between On or Off When Off is selected recordings will also include subtitles and Teletext when available Record to PS mode On allows recordings without these extras which will need less space on your USB de...

Page 22: ...urn on plug Aim remote at front panel Check for obstructions Replace remote batteries Forgotten PIN code Forgotten channel lock code Default PIN is 1234 Contact local Service Hotline or send email to our Support via www strong tv After moving the receiver to another room area you are no longer able to receive digital reception Antenna signals are too weak The signal strength quality might be less ...

Page 23: ... Laboratories Tuner Front End DVB T UHF VHF Tuner Input frequency range 174 230 MHz VHF and 470 862 MHz UHF Loop through frequency range 47 862 MHz Input signal level 20 84 dBm Memory and System Flash memory 4 Mbytes SDRAM 64 Mbytes Multimedia Video playback MPEG 1 and MPEG 2 encoded mpg VOB AVI MKV TS M2T M2TS MPEG 4 and MOV Audio playback MP3 and OGG Picture view BMP and JPEG STRONG cannot guara...

Page 24: ...0 240 V AC SMPS 50 60 Hz Power Consumption 3 40 W typ 12 00 W max Power consumption in Standby 0 32 W Operating Temperature 0 40 C Storage Temperature 30 80 C Operating Humidity Range 10 85 RH Non condensing Size WxDxH in mm 138 x 112 x 40 Net weight 0 33 kg ...

Page 25: ...22 PART 1 English ...

Reviews: