7
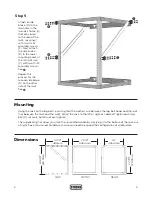
Step 5
Secure each 22U rack rail (B+C+E)
with two 10-32 assembly screws
(F) as shown. See
.
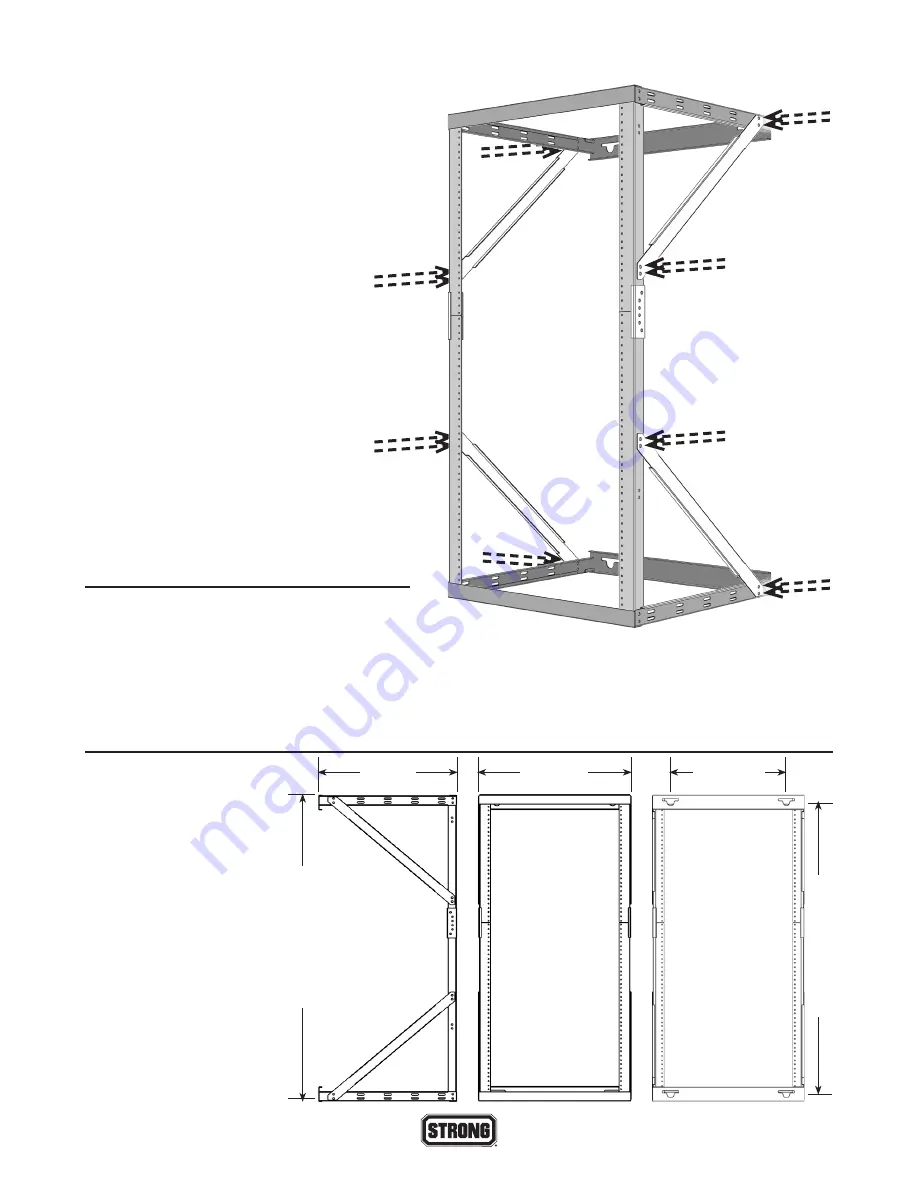
Step 6
Attach a side brace (D) to the
two holes in the top rack frame
(A) that are closest to the rear
of the rack, securing it with two
10-32 assembly screws (F). Next,
attach the side brace (D) to the
lower mounting holes of the 22U
rack rails (B+C+E) with two 10-32
assembly screws. See
.
Repeat this process for the second
side brace (D) on the other side of
the rack. See
.
Repeat this process again, placing
two side braces (D) to stabilize the
bottom rack frame. See
.
Mounting
Hang the rack on the lag bolts, ensuring that the washers are between the lag bolt head and the rack
(not between the rack and the wall). Adjust the rack to the left or right as needed. Tighten each lag
bolt (H) securely. Do not over tighten.
Dimensions
7
19.09"
485mm
21.118"
536.4mm
42.315"
/ 107
4.8mm
16"
406.4mm
40
.307"
/ 1023.8mm
SIDE
FRONT
REAR

