background image

7.6.2 Power On Control

Select how the unit should react after inserting the main power.

Power On

 will let the unit come up in Running mode.

Standby

 will let the unit come up in Standby mode.

Last state

 will let the unit come up in the mode in which power was removed, either Running mode or Standby mode.

7.7 USB

The USB menu contains the Media Centre, simple media player feature and the recorded programs in PVR Media. Also 

some settings for recording and timeshift can be changed here. The USB menu can be reached from viewing mode 

with the 

GREEN


Media

} button on the RCU as shortcut.

Media Centre


 This is a simple media player feature, which can show or play a 

Video, Music

 or 

Picture

 file. Only 

supported file types can be played. Select the partition on your USB device where the file is 

and select a file to be played. During play, you can press [

OK

] and bring up a progress banner, 

and  then use the 

pqtu

 buttons to select special functions in the screen. Also, the buttons 

on the RCU perform functions such as pause and play 

u


2

3

, previous file 

5

 and 

6

 file. For 

video files extra options come available: fast reverse 

8

 and fast forward 

8

. With the 

7

 and 

8

 buttons you can rewind or forward playback in x2, x4, x8, x16 and x32 speed when pressed 

repeatedly. While playing a video file, use 

OK

, then 

tu

 (short or long press) to jump quickly 

through the video file. Press 

OK

 to continue watching on the new point in the video.

File


 All supported file types can be played from here, whether they are 

Video, Music

 or{

Picture

Select 

File

 and press 

OK

Video


 Select 

Video

 if you are specifically looking for video files stored on the USB device. 

Press 

SUBTITLE

 during video play mode to see options about subtitles, if available. These can 

either be 

Inside

 which are embedded in the video or 

Outside

 with accompanied subtitles files in 

the .srt format. These must have exactly the same name as the video file and be located in the 

same folder as the video file.

Music

 Select 

Music

 if you are specifically looking for audio files stored on the USB device. 

Picture

 Select 

Picture

 if you are specifically looking for picture files stored on the USB device. 

PVR Media


 This item contains a list the recorded programs, with the last recording at the top off the list. 

Use 

OK

 to play a selected file, 

RED

 to delete a recording and 

BLUE

 to delete all in the list.

7.7.1 PVR Management

Timeshift


 To  use 

Timeshift

, set to 

On

. Space on your USB device will reserved for the Timeshift function. 

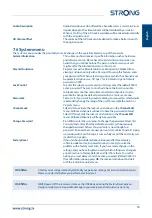
Record Duration


 Set the maximum time that a Timeshift should run for. Default is 2 hours 00 minutes. The longer 

the Timeshift duration is, the more space on your USB device is reserved.

Section Record


 It is later possible to change Timeshift into a Recording to be saved when 

4

 is pressed. Set to 

On


if you want the section from the moment you had started Timeshift included in the recording. 

If set to 

Off

, the recording will only have the part from when Recording was pressed.

Disk Information


 Select this option to view technical information about your connected USB device, like 

Used


space, 

Free

 space and 

Total

 space and formatted file 

System

.

Format

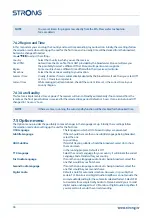
WARNING  

The 

Format

 function will delete all data and information stored on your USB device or 

selected partition. STRONG will not take any responsibility for damaged or lost data on the 

USB device. Confirm the format action in the popup screen or 

EXIT

 to deny.

If you have multiple partitions on your storage device, select the partition you would like to format. Press 

OK

 to start 

formatting (or 

EXIT

 to cancel it). The format procedure will take some time, depending on the size of the used storage 

device. At the end of the process, a “completed formatting” message will appear. Press 

EXIT

 to exit the menu.

21

English

Summary of Contents for SRT 3030

Page 1: ...Digital HD Cable Receiver SRT 3030 Picture similar User Manual Bedienungsanleitung ...

Page 2: ...Supplied by STRONG Austria Represented by STRONG Ges m b H Teinfaltstraße 8 4 Stock 1010 Vienna Austria Email support_at strong tv ...

Page 3: ... whole or in part or the production of derivative works therefrom without the express permission of Dolby Laboratories is prohibited Copyright 2003 2009 by Dolby Laboratories All rights reserved THIS PRODUCT IS SOLDWITH A LIMITED LICENSE AND IS AUTHORIZEDTO BE USED ONLY IN CONNECTIONWITH HEVC CONTENTTHAT MEETS EACH OFTHETHREE FOLLOWING QUALIFICATIONS 1 HEVC CONTENT ONLY FOR PERSONAL USE 2 HEVC CON...

Page 4: ...Changing channels 12 6 1 1 Direct access 12 6 1 2 Channel list 12 6 1 3 Using the pqbuttons 12 6 1 4 Using the BACK button 12 6 2 Info Banner 12 6 3Teletext 13 6 4 Subtitles 13 6 5 EPG Electronic Programme Guide 13 6 6 Favourite channels 13 6 7 Instant recording 13 7 MAIN MENU 13 7 1 Program menu 13 7 1 1 Channel Edit 13 7 1 2 Delete aTV or radio programme 14 7 1 3 Move aTV or radio programme 14 7...

Page 5: ...marks of Dolby Laboratories HDMI the HDMI logo and High Definition Multimedia Interface are trademarks or registered trademarks of HDMI Licensing LLC in the United States and other countries All product names are trademarks or registered trademarks of their respective owners STRONG 2022 All rights reserved 7 3 1 FTA Only 17 7 3 2 Auto Search 17 7 3 3 Manual Search 17 7 3 4 Full Search 17 7 4Time m...

Page 6: ... voltage Wait a few seconds after switching off the receiver before you move the receiver or disconnect any equipment It is a necessity that you only use an approved extension and compatible wiring that is suitable for the electrical power consumption of the installed equipment Please ensure that the electrical power supply corresponds with the voltage on the electrical identification plate at the...

Page 7: ...ia recording andTimeshift functions of the receiver might not work properly If you are going to use an external USB HDD Hard Disk Drive please consider that the power specifications may exceed the supported output of your receiver 5V 500 mA If so please connect your USB HDD to an according external power adapter STRONG cannot guarantee compatibility with all types of USB storage devices It is advi...

Page 8: ... the remote control 6 USB A port For Media playback record and timeshift 2 3 Rear Panel Fig 2 1 CABLE IN To connect a cable from the wall outlet of your cable signal provider 2 HDMI To connect to the HDMI input of yourTV using a good quality HDMI cable 3 TV SCART To connect toTV using a SCART cable 4 Power input Connect the supplied Power Supply unit to the input 4 5 3 2 1 500 mA max USB 5 V Digit...

Page 9: ... back to viewing mode 7 COLOURED BUTTONS Flexible functions in OSD menu andTeletext Some coloured buttons have a double function printed on them like TV Radio Red Toggles betweenTV and Radio mode Media Green Functions as a shortcut to the Media Centre menu Audio Yellow Displays the audio selection menu with selections for available languages and audio modes Delete Blue Delete function in Menu 8 EP...

Page 10: ...ile during playback in Media Centre 20 6 Jumps 10 places forwards in the program list and in Media Centre overview Jumps to the next file during playback in Media Centre 21 0 9 Channel number and numeric value input 22 TTX To openTeletext if available on the current channel 23 SUBTITLE To select subtitles language out of available ones on the current channel This user manual describes the full fun...

Page 11: ...etres from the receiver if properly aligned towards the IR eye on the front panel The remote control will not operate if its path is blocked NOTE Sunlight or other very bright light might decrease the sensitivity of the remote control 500 mA max USB 5 V INFO TV RADIO MEDIA AUDIO EPG MENU EXIT OK USB 4 5 6 1 2 3 0 7 8 9 TTX SUBT ITLE FAV BACK 9 English ...

Page 12: ...eTV SCART connector on your receiver and the other end to the SCART input of yourTV c Connect the supplied power adapter to the receiver at the power supply input Then plug the power adapter to a suitable wall outlet 3 3 Connecting to digital audio amplifier Fig 6 Connect one end of a good quality HDMI cable to the HDMI output of your receiver and the other end to an HDMI input of your home theatr...

Page 13: ...in power If you are using the receiver for the first time or restored to factory default the Installationguide will appear on yourTV screen Uset uto select theOSDLanguage of your preference Set the other options as are appropriate for your situation Country will follow OSDLanguage but can be changed in the main menu FTAOnlyFTA means only Free to Air channels will be stored after a search has been ...

Page 14: ...ch menu item 6 1 Changing channels There are different ways to change channels with your new receiver Via direct access Via the channel list Via the pq buttons Via the BACK button 6 1 1 Direct access To gain direct access to a certain channel simply enter its number with the 0 9 keys on the remote control Channel numbers can be up to four digits long Entering a number with less than four digits is...

Page 15: ... confirm with OK 6 6 EPG Electronic Programme Guide In the Program Menu select Program Guide or in normal viewing mode press the EPG button to enter to the EPG screen Please refer to chapter 7 for details NOTE To see all EPG information be sure you are in the All channels list 6 7 Favourite channels Use the FAV button to access your favourite channels and use pqto change between available favourit...

Page 16: ...ore than one before confirming 4 Press EXIT then OK at the confirmation popup screen or EXIT to cancel 7 1 5 Locking programmes You can lock selected programs to restrict view 1 Activate the Lock function by pressing 4 and enter your PIN code 2 Select the program you want to lock then press the OK button The program is now marked as locked 3 Repeat the previous step to select more programs or sele...

Page 17: ...our sections The actual time and date are shown in the top line of the screen time and date of the selected program is shown in the left hand top section of the screen The right hand top of the screen has a small size picture of the running program In the left hand lower section of the EPG screen you can select the channels the right hand lower section of the screen the program information for the...

Page 18: ... 3PanScan For 4 3TV screens on Scart output 16 9 content will have the extreme left and right portions cut off and presented full screen 4 3Full For 4 3TV screens on Scart output Will give no bars and no cut off parts from the content but will distort the linearity of the content 7 2 2 Resolution If the video does not appear correctly change the setting These settings match the most common setting...

Page 19: ...der called logical channels numbering LCN 7 3 4 Full Search In this advanced search method you may enter the Start and Endfrequency of the Cable Network in use The tuning step is always 8MHz Symbolrate and QAM modulation will automatically be detected Select Start and press OK to proceed When available channels will also be put in a predetermined order called logical channels numbering LCN 7 4 Tim...

Page 20: ... is 3hours It can also be turned Off changed to 1hour or 2hours NOTE If there are timers running the auto standby function will be disabled for the booked time 7 5 Option menu The Option menu provides the possibility to make changes in the language set up Initially these settings follow the selection made when setting up the unit for the first time OSD Language The language in which all On Screen ...

Page 21: ...items which could substantially change the setup of the unit for example the Search or Program menu Channel Lock Select On to activate the lock set on channels in the Channel Edit menu All locked channels will need to have the password entered Select Off to override the lock set on channels in the Channel Edit menu All locked channels will freely be accessible Change Password Press OK to enter the...

Page 22: ... during the USB Upgrade process Doing so might cause irreparable damage to your receiver and will void your warranty Dump Other options in the Software Upgrade menu at UpgradeType is the Dump function With this function you can back up the settings and channel list s you have created before to quickly re install those after for example a software upgrade At UpgradeType select Dump At FilePath pres...

Page 23: ... the video or Outside with accompanied subtitles files in the srt format These must have exactly the same name as the video file and be located in the same folder as the video file Music Select Music if you are specifically looking for audio files stored on the USB device Picture Select Picture if you are specifically looking for picture files stored on the USB device PVR Media This item contains ...

Page 24: ...e control Receiver off Remote not aimed correctly Front panel obstructed Remote batteries exhausted Plug in and turn on plug Aim remote at front panel Check for obstructions Replace remote batteries Forgotten PIN code Forgotten channel lock code Default PIN is 0000 Contact local Service Hotline or send email to our Support via www strong tv Signals are interrupted or blocking is visible on screen ...

Page 25: ...PEG encoded mpg VOB TS M2TS MPEG 4 Audio playback MP3 and MP3VBR Picture view BMP and JPEG jpg STRONG cannot guarantee the playback of all files although extensions are listed as it depends on codec used data bit rate and resolution all MPEG codec formats are supported System Demodulation DVB C Main Processor GX6701 System on Chip Demodulator in SoC Memory 64 MB SoC FLASH size 8 MB Connectors Cabl...

Reviews: