background image

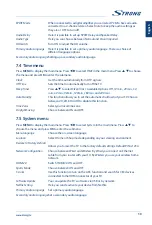
SPDIF Mode


 When connected to a digital amplifier you can select 

PCM

 to have all audio 

converted to a 2-channel stereo. Select 

Auto

 to keep the audio settings as 

they are or OFF to turn off.

Audio Delay


 Here it is possible to set up SPDIF Delay and Speaker Delay.

Audio Type


 Here you can choose between 

Normal

 and 

Visual Impaired

.

AD Switch


 Turn ON to adjust the AD volume.

Primary Audio Language

   Here it is possible to set a primary audio language. There is a choice of 

different language options.

Secondary Audio Language

  Setting up a secondary audio language.

7.4 Time menu

Press 

MENU

 to display the main menu. Press 

t


u

 to select 

TIME

 in the main menu. Press 

p


q

 to choose 

the menu and press 

OK

 to enter the submenu.

Clock


 Get the time automatically from DTV signals.

Off Time


 Sets the time to automatically turn off the TV.

Sleep Timer


 Press 

p


q

 to select 

Sleep Timer

. Available Options: 

Off

10 min.

20 min.

30 

min.

60 min.

90 min.

120 min.

,

180 min.

 and 

240 min.

.

Auto Standby


 This function allows you to set the automatic shutdown of your TV. Choose 

between 

4H

6H

8H

 or 

Off

 to disable this function.

Time Zone


 Select your local time zone.

Daylight Saving


 Choose between ON and OFF.

7.5 System menu

Press 

MENU

 to display the main menu. Press 

t


u

 to select 

System

 in the main menu. Press 

p


q

 to 

choose the menu and press 

OK

 to enter the submenu.

Menu language


 Choose the on-screen language

Location


 Select Home or Shop mode depending on your viewing environment

Restore to Factory Default


 Allows you to reset the TV to the factory default settings. Default PIN is 1234.

Network Configuration


 Choose  between 

Wired

 and 

Wireless

. By 

Wired

 you connect an Ethernet 

cable from your router with your TV. By 

Wireless

 you use your wireless home 

network.

HDMI 2.0


 Switch HDMI 2.0 

ON

 and 

OFF

.

Sports Mode


 Choose  between 

ON

 and 

OFF

.

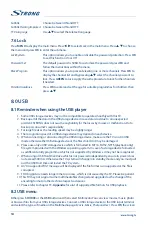
T-Links


 Use this function to turn on the ARC function and search for CEC devices 

connected to the HDMI connector of your TV.

Software Update


 You can update the TV's software via USB or by network.

Netflix Setting


 Here you can deactivate your device from Netflix.

Primary Audio Language

   Set a primary audio language.

Secondary Audio Language

  Set a secondary audio language.

13

English

Summary of Contents for SRT 43UA6203

Page 1: ...Korisnički priručnik Használati útmutató Manuale utente Gebruiksaanwijzing Instrukcja obsługi Manual do Utilizador Manual de Utilizare Uputsvo za upotrebu Používateľská príručka Navodila za uporabo Посібник користувача Руководство пользователя 4K UHD SMART TV with DVB T2 C S2 SRT 43UA6203 SRT 49UA6203 SRT 55UA6203 ...

Page 2: ...S PDIF coax HEADPHONE CI HDMI 1 USB 3 0 5 V 0 9 A Fig 1 Fig 2 Fig 3a Fig 3 Fig 3b 1 1 10 11 12 13 14 2 2 2 3 4 5 6 7 8 9 ...

Page 3: ...2 36 19 16 16 20 3 4 6 11 14 18 22 25 29 33 16 16 8 23 26 30 34 10 17 12 9 23 27 31 35 21 Fig 7 FB 5 FF 6 Prev Next Pause Sound Stop Mode Info Volume Picture Zoom Fig 8 FB 5 FF 6 Prev Next Sound Mode Stop Pause Info Fig 9 FB 5 FF Zoom Rotate Volume Picture Repeat Stop 6 Pause BGM Router Modem Internet Ethernet port on the back panel TV Set or Modem Wireless router TV Set ...

Page 4: ...www strong tv 31 Jan 2018 13 10 Supplied by STRONG Austria Represented by STRONG Ges m b H Franz Josefs Kai 1 1010 Vienna Austria Email support_at strong tv ...

Page 5: ...D SELLER OFTHE CONTENT YOUR USE OFTHIS PRODUCT IN CONNECTIONWITH HEVC ENCODED CONTENT IS DEEMED ACCEPTANCE OFTHE LIMITED AUTHORITYTO USE AS NOTED ABOVE STRONG declares that the equipment complies with the European Directive 2014 30 EU EMC and the LowVoltage Directive 2014 35 EU LVD and Radio Equipment Directive 2014 53 EU RED and the ErP Directive 2009 125 EC and the RoHS Directive 2011 65 EU in a...

Page 6: ... S2 installation 8 3 2 DVB T2 installation 8 3 3 DVB C installation 9 3 4 ATV installation 9 4 0 ELECTRONIC PROGRAMME GUIDE EPG 9 5 0 NETWORK CONNECTION 9 5 1 Connecting to a wired network 10 5 2 Connecting to a wireless network 10 6 0 USINGTHE HOME DESKTOP 10 7 0 MENU SETTINGS 11 7 1 Menu control 11 7 2 Picture menu 11 7 3 Sound menu 12 7 4Time menu 13 7 5 System menu 13 7 6 Lock 14 8 0 USB 14 8 ...

Page 7: ... risk of damage to hearing one should lower the volume to a safe comfortable level and reduce the amount of time listening at high levels The mains plug or appliance coupler is used as disconnect device it shall remain readily operable When not in use and during movement please take care of the power cord set e g tie up the power cord set with cable tie or something like that It shall be free from...

Page 8: ... the warranty period to keep your device perfectly protected in the event of repair or warranty 1 3 Accessories 1x installation instructions 1x assembly instruction 1x Safety Instructions Warranty Cards 1x remote control 2x AAA batteries 1x main power cable 1 4 Equipment set up Fig 1 Install the display on a solid horizontal surface such as a table or desk For ventilation leave a space of at least...

Page 9: ... acts like the OK button on the remote long press to exit Fig 3b NOTE The graphics are for representation only 1 ETHERNET Connect to your Internet router to access the internet apps 2 USB 2 0 USB 2 0 port 3 HDMI 3 Connect HDMI input signal from a signal source such as DVD Blu ray player or game console 4 HDMI 2 ARC Connect HDMI input signal from a signal source such as DVD Blu ray player or game c...

Page 10: ...or down 8 TV Switch back to theTV mode 9 SOURCE Select the input source mode 10 USB Enter the multimedia menu 11 OPTION Opens the smart menu 12 INFO Display information about the current source 13 FAV Press to view your assigned favourite channels Press pq t u to cycle through your favourite channels press OK to confirm 14 MENU Open the menu options 15 EPG Press to display the current EPG informat...

Page 11: ...y into fire and charge or decompose the battery 5 Please dispose batteries abide by relevant environmental protection regulation 2 6 Using the remote control Use the remote control by pointing it towards the remote sensor Items between the remote control and the remote sensor could block normal operation Do not cause the remote control to vibrate violently Also do not splash liquid on the remote c...

Page 12: ... used ChannelType Choose between Free Scramble and Free ServiceType Select DTV to search DTV channels only or All for a complete search NetworkSearch Network Scan on the selected satellite ClearDB Choose between All or OFF if you want to delete channels that were previously saved during the installation of new channels It is recommended to use the default settings Then select AutoScan and press OK...

Page 13: ...CK button Use the pq buttons to go to TunerType menu and by pressing pq again in the menu you can select Antenna Cable confirm with OK with BACK you return to the previous menu After you have selected the Antenna Cable option go to AutoTuning menu and choose ATV tuner confirm by pressing the OK button TheTV will search for analogue channels 4 0 ELECTRONIC PROGRAMME GUIDE EPG EPG stands for Digital...

Page 14: ...tion 2 Connect your Ethernet cable to the router and to the Ethernet port on the back of theTV 3 Use the NetworkConfiguration menu to configure theTV 5 2 Connecting to a wireless network Fig 6b NOTE The graphics are for representation only To connect to a wireless network 1 Ensure you have A router broadcasting a highspeed wireless signal A highspeed Internet connection 2 Use the NetworkConfigurat...

Page 15: ...input source Use SOURCE to select other source 7 1 Menu control Press MENU to enter the main menu Press pqt u to scroll through the items Press OK to enter the submenus Use OK to select an item Use t u to change an item press BACK to exit the item Some items are for information only and cannot be changed 7 2 Picture menu PictureMode Available choices are Dynamic Standard Movie and User In User mod...

Page 16: ...picture darker or lighter 7 2 2 ColourTemperature In this menu you can change the overall colour cast of the picture Press pq to select ColourTemperature then press OK to enter a sub menu Press pq to select the relevant picture effect DEFAULT ColdNormalWarm Cool lncrease the blue tone for the white Normal Increase the neutral colours for the white Warm lncrease the red colour for the white 7 2 3 N...

Page 17: ...to set the automatic shutdown of yourTV Choose between 4H 6H 8H or Off to disable this function TimeZone Select your local time zone DaylightSaving Choose between ON and OFF 7 5 System menu Press MENU to display the main menu Press t u to select System in the main menu Press p q to choose the menu and press OK to enter the submenu Menulanguage Choose the on screen language Location Select Home or ...

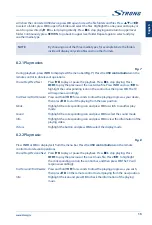
Page 18: ...The recognition speed of a USB storage device may depend on each device 5 When connecting or disconnecting the USB storage device make sure theTV is not in USB mode otherwise the USB storage device or the files stored in it may be damaged 6 Please use only a USB storage device which is formatted in FAT16 FAT32 NTFS playback only file system provided with theWindows operating system In case of a st...

Page 19: ...onse accordingly FastReverse FastForward Press and hold 5 6 for seconds to draw the playing progress as your desire then press u 2 to start the playing from the new position Mode Highlight the corresponding icon and press OK to switch to another play mode Sound Highlight the corresponding icon and press OK to select the sound mode Info Highlight the corresponding icon and press OK to view the info...

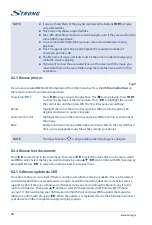
Page 20: ...ate the picture 90 degrees clockwise or counter clockwise ZoomIn ZoomOut Highlight the icon on the menu bar and press OK to zoom in or zoom out of the image BGM Background music If you additionally saved music files on the very USB flash drive you can playback music files while viewing your photos NOTE The move function is only available when the image is enlarged 8 2 4 Browse text documents Press...

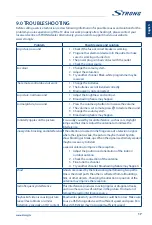
Page 21: ...ipples on the picture It is usually caused by local interference such as cars daylight lamps and hair driers Adjust the antenna to minimize the interference Snowy dots blocking and interferenceIf the antenna is located in the fringe area of a television signal where the signal is weak the picture may be marred by dots show blocking or break ups When the signal is extremely weak it may be necessary...

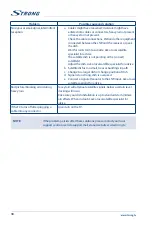
Page 22: ...ellite dish is too small trees or buildings in path c Change to a larger dish or change position of dish d Signal is too strong dish is oversized e Connect a signal attenuator to the LNB input Ask a local satellite specialist for advice Bad picture blocking error during heavy rain Heavy rain will attenuate satellite signals below a certain level blocking will occur Make sure your dish installation...

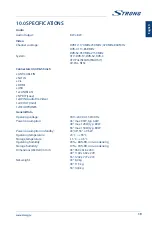
Page 23: ...x 1x AV IN Audio R L Video 1x AV OUT mini 1x HEADPHONES General Data Operating voltage 180 240V AC 50 60 Hz Power consumption 43 max 90W typ 60W 49 max 125W typ 80W 55 max 150W typ 80W Power consumption in standby 43 49 55 0 5W Operating temperature 5 C 35 C Storage temperature 15 C 45 C Operating humidity 20 80 RH non condensing Storage humidity 10 90 RH non condensing Dimensions WxHxD in mm 43 9...

Page 24: ...mkv xvid MPEG 4 SPIASP XviD MPEG AUDIO TSITP tsltrp LPCM MPEG AUDIO DAT MPG MPEG dat mpg mpeg LPCM MPEG AUDIO VOB vob FlashVideo FLV H 263 H 264 H 265 Music FileType Ext Name File Extension Version support Remark Mpeg 1 Layer 3 mp3 LPCM WAVE wav Audio Coding 2 AC3 Ogg Media ogg ogm oga ogv ogx Photo FileType File Extension Version support Remark JPEG BASELINE JPEG HD JPEG jpg jpeg BMP bmp support ...

Reviews: