background image

17


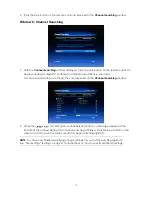
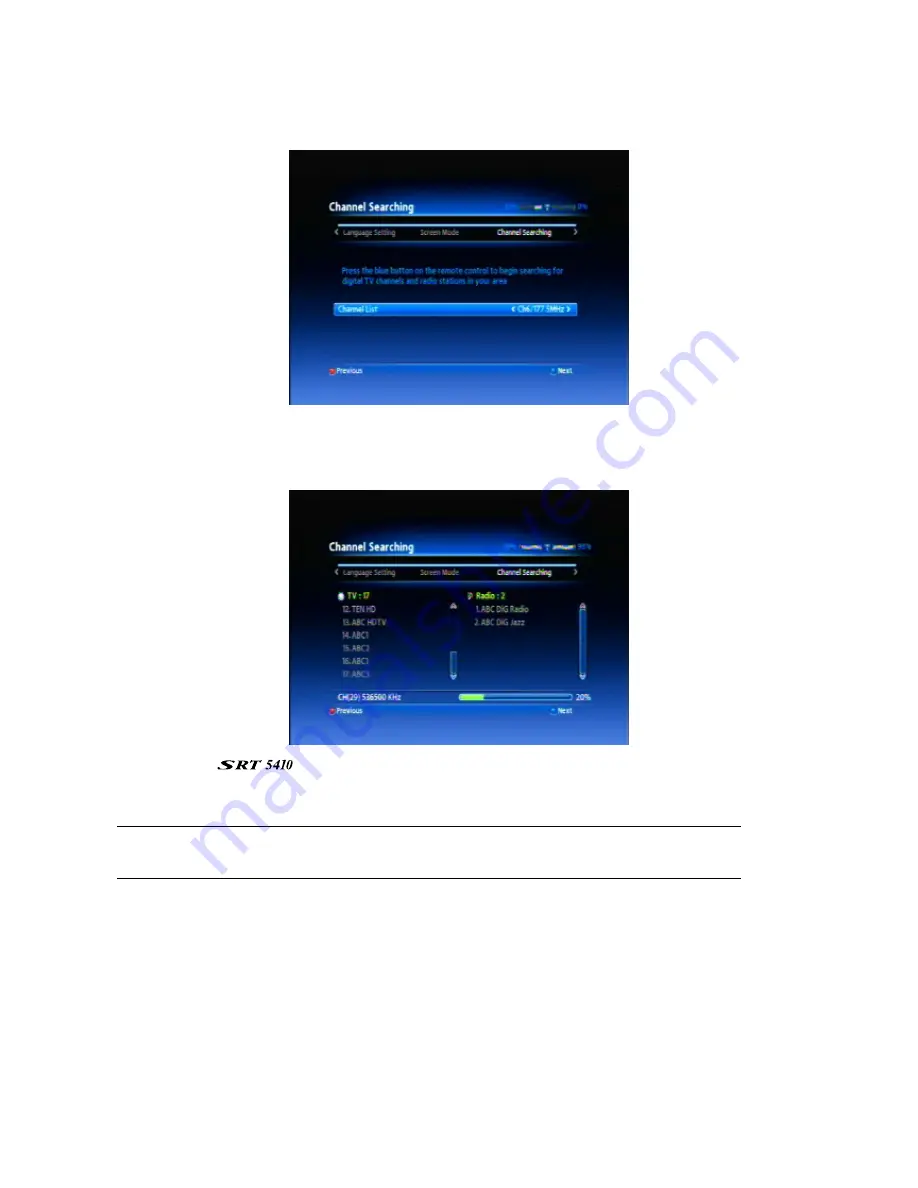
2.  Press the blue button on the remote control to proceed to the 

Channel Searching 

window. 

Window 8: Channel Searching 


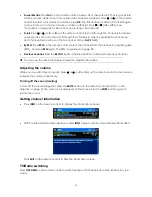
1. With 

the 

Channel Searching

 window displayed, press the blue button on the remote control to 

begin scanning for digital TV channels and digital radio stations in your area. 

As channels and stations are found, they are displayed on the 

Channel Searching

 window.   


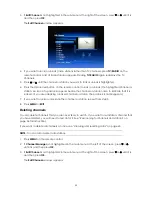
2. When 

the 

  can find no more channels and stations, a message appears at the 

bottom of the window stating that channel searching is finished. Press the blue button on the 
remote control to save the search results and begin watching digital TV. 

NOTE

: You have now finished specifying enough settings for you to start watching digital TV. 

See “User Settings” starting on page 37 for instructions on how to specify additional settings. 


Summary of Contents for SRT 5410

Page 1: ...High Definition Digital Terrestrial Receiver USER S MANUAL ...

Page 2: ...he product and in this user s manual should be adhered to The antenna cable must be earthed Do not use attachments not recommended by the product manufacturer as they may cause hazards or damage the equipment Do not overload adaptors wall sockets or extension cables as this can result in unit failure or electric shock For cleaning use only a dry or lightly dampened cloth Do not use liquid cleaners...

Page 3: ...ease email us at techau strong technologies com For technical assistance please call our Technical Support Help Line on 1 800 820 030 Main Features High Definition Multimedia Interface HDMI Dolby Digital S PDIF Optical Component Y Pb Pr MPEG 2 MPEG 4 AVC HD H 264 compliant RCA Cinch CVBS L R Audio CD quality audio mono and stereo Tuner loop through Auto Manual Search Modes Favourite Channels and S...

Page 4: ...t Antenna 14 Window 4 Connection Guide 15 Window 5 Set Up 15 Window 6 Broadcast Language Settings 16 Window 7 Screen Mode 16 Window 8 Channel Searching 17 Operation 18 Basic operations 18 Selecting a channel 18 Adjusting the volume 19 Getting channel Information 19 TV Radio switching 19 Closed captions 20 Teletext 21 Picture freeze 21 Organising channels 21 Locking channels 21 Deleting channels 22...

Page 5: ...tings 37 Choosing languages 37 Setting display options 38 Setting the time 38 Setting security options 39 To cancel a lock 41 Audio Video settings 41 System Maintenance 42 System information 42 HDMI information 42 Software upgrades 43 Clearing and resetting data 43 Troubleshooting 45 Specifications 46 ...

Page 6: ...d have been supplied with your If any were not supplied contact the retailer from whom you purchased the unit User s manual 1 Remote control 1 Batteries AAA type 2 CVBS Composite Video and Audio Cable yellow white red 1 Y Pb Pr Component Cable blue red green 1 ...

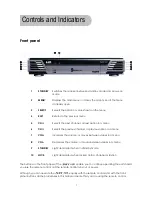
Page 7: ...s option in a menu 7 VOL Increases the volume or moves between values in a menu 8 VOL Decreases the volume or moves between values in a menu 9 STANDBY Light illuminated when in standby mode 10 LOCK Light illuminated when locked onto a channel or station The buttons on the front panel of the enable you to continue operating the unit should you lose the remote control or if the remote control runs o...

Page 8: ...tput optical 8 HDMI HDMI cable HDMI video and audio connection 9 USB USB 2 0 A type cable Software upgrades 10 Power Switch To turn unit on or off Note the presence of this symbol on the rear panel This indicates that important operating and maintenance instructions accompany the product These are set out in this manual It is highly recommended that you read this manual thoroughly before using the...

Page 9: ...ow information about the current program 6 To decrease volume or to change an option or setting in a menu 7 OK To show the channel list or to select an item or confirm a choice in a menu 8 V To increase volume or to change an option or setting in a menu 9 V To decrease volume or to change an option or setting in a menu 10 PAGE To move to the previous page if there is more than one page 11 STANDBY ...

Page 10: ...in a menu 24 P To choose the next channel or change an option or setting in a menu 25 P To choose the previous channel or change an option or setting in a menu 26 PAGE To move to the next page if there is more than one page 27 RECALL To return to the previous channel Also performs various functions in the menus 28 Yellow button Performs different functions in different menus 29 TV RADIO To switch ...

Page 11: ...r TV has a HDMI socket connect an HDMI cable between the HDMI socket on the socket 8 and the HDMI socket on your TV A HDMI connection incorporates video and audio You do not need to make separate connections for audio An HDMI cable is not provided with the B Y Pb Pr Component using the supplied RCA blue red green lead For Component video connect to your TV with the supplied Y Pb Pr Component cable...

Page 12: ...nect the red RCA lead between socket in socket 6 on the and the corresponding socket on your TV Step 3 Optional connections Dolby Digital Dolby digital bitstream audio S PDIF can be achieved using a fibre optic cable This cable is not supplied The cable should be connected between socket 7 on the and the S PDIF socket on your Dolby Digital decoder amplifier See Audio Video settings on page 41 for ...

Page 13: ...followed by the installation wizard explained in the next section Installation wizard The first time you turn on the and whenever you reset he unit the installation wizard appears The installation wizard is a set of windows that enables you to easily specify all the important settings The first window of the wizard is shown below How to use the wizard You move from window to window by pressing the...

Page 14: ...g On the Language Setting window you select the language for the menus you will see on your TV once you start using the 1 If you need to choose a language other than the one showing press or until the language you want is showing 2 Press the blue button on the remote control to proceed to the Connect Antenna window Window 3 Connect Antenna 1 The antenna lead coming from your antenna wall plate nee...

Page 15: ...pes are also described in How to Connect on page 11 above 2 Press the blue button on the remote control to proceed to the Set Up window Window 5 Set Up 1 If you want to choose the default languages for multi lingual broadcasts press or to select Advanced 2 Press the blue button on the remote control If you chose Advanced as the installation method the Language Settings window appears Proceed with ...

Page 16: ...age press or until the language you want is shown 4 Press to select Primary Subtitle 5 If you want to change the default language for your first preference subtitle language press or until the language you want is shown 6 Press to select Secondary Subtitle 7 If you want to change the default language for your second preference subtitle language press or until the language you want is shown 8 Press...

Page 17: ...els and stations are found they are displayed on the Channel Searching window 2 When the can find no more channels and stations a message appears at the bottom of the window stating that channel searching is finished Press the blue button on the remote control to save the search results and begin watching digital TV NOTE You have now finished specifying enough settings for you to start watching di...

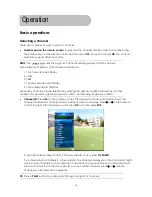
Page 18: ...ed by another number For example pressing 2 gives you ABC1 and pressing 22 gives you ABC2 Channel list Press OK on the remote control This displays the channel list which shows the channel number and channel name of all the scanned channels Press or on the remote control to select the channel you want press OK and then press EXIT To list radio stations rather than TV channels press or or press TV ...

Page 19: ... guide EPG and press EPG again The EPG is explained on page 30 Previous channel Press the RECALL button the blue button to display the previous channel TIP You can use the same techniques to select a digital radio station Adjusting the volume While you are watching a program press or or V or V on the remote control to decrease or increase the volume respectively Turning off the sound muting To tur...

Page 20: ...ticularly useful for the hard of hearing To turn on closed captions or turn them off 1 Press the SUBT button on the remote control 2 With the OPTIONS window displayed press or until the language you want is highlighted or until Off is highlighted if you want to turn closed captions off 3 Press OK ...

Page 21: ... again to resume normal viewing Organising channels The Edit Channel option on the Channel Manager menu enables you to lock delete and rename channels From the channel list displayed by pressing OK you to lock delete and rename channels and change the order in which channels appear on the channel list Locking channels Locking a channel requires a password to be entered before that channel can be v...

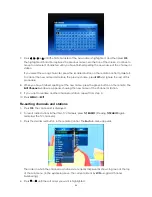
Page 22: ...are unlocking a locked channel or station the padlock icon disappears 7 If you want to lock or unlock another channel or station repeat from step 5 8 Press MENU or EXIT Deleting channels You can delete channels that you are never likely to watch If you want to re instate a channel that you have deleted you will need to rescan for it See Rescanning for channels and stations on page 34 for instructi...

Page 23: ...repeat from step 5 8 Press MENU or EXIT The channels and stations marked for deletion are now deleted Renaming channels and stations 1 Press MENU on the remote control 2 If Channel Manager is not highlighted in the main menu at the left of the screen press or until it is and then press OK 3 If Edit Channel is not highlighted in the sub menu at the right of the screen press or until it is and then ...

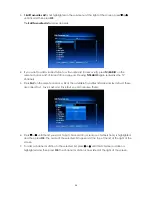
Page 24: ...name press the green button on the remote The Edit Channel window re appears showing the new name of the channel or station 9 If you want to rename another channel or station repeat from step 5 10 Press MENU or EXIT Re sorting channels and stations 1 Press OK The channel list is displayed 2 To resort radio stations rather than TV channels press TV RADIO Pressing TV RADIO again redisplays the TV ch...

Page 25: ...ss OK 6 If you want to return to the sort option that was current at the time you opened the SORT sub menu select UNDO as your sort option 7 Press MENU 8 A message appears asking you to confirm that you want to save your changes Press OK to confirm your changes or press or to select CANCEL and then press OK to cancel your changes 9 Press MENU to return to normal viewing Favourites lists You can cr...

Page 26: ...channels 5 Press FAV on the remote control A list of the available favourites lists appears By default these are called Fav1 Fav2 Fav3 and Fav4 but you can rename them 6 Press or until the list you want to put channels into or remove channels from is highlighted and then press OK The name of the selected list appears at the top of the list at the right of the screen 7 To add a channel or station t...

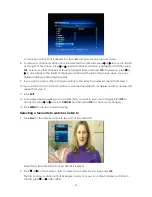
Page 27: ...ame favourites list repeat from step 7 10 If you want to add a channel or station to another favourites list or delete one from another list repeat from step 5 11 Press EXIT 12 A message appears asking you to confirm that you want to save your changes Press OK to accept or press or to select CANCEL and then press OK to cancel your changes 13 Press MENU to return to normal viewing Selecting a favou...

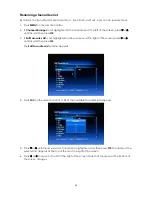
Page 28: ... is not highlighted in the sub menu at the right of the screen press or until it is and then press OK The Edit Favourites List window appears 4 Press FAV on the remote control A list of the available favourites lists appears 5 Press or until the list you want to rename is highlighted and then press OK The name of the selected list appears at the top of the list at the right of the screen 6 Press o...

Page 29: ...to confirm your changes or press or to select CANCEL and then press OK to cancel your changes 13 Press MENU to return to normal viewing Changing the order of channels or stations in a favourites list When you select a favourites list the first channel or station in it begins to play You press or to play the next or previous channel or station To change the order in which channels or stations play ...

Page 30: ... appears asking you to confirm that you want to save your changes Press OK to confirm your changes or press or to select CANCEL and then press OK to cancel your changes 13 Press MENU to return to normal viewing Electronic Program Guide EPG Some providers broadcast information about their programs This information is available on screen via an electronic program guide displayed by pressing EPG on t...

Page 31: ...then press OK Displaying multi channel information The default view of the EPG provides program information about one channel You can see program information about three channels at a time by pressing the smaller red button on the remote control Press the red button again to switch back to single channel mode Displaying the next day s programs Keep pressing until the program times pass midnight or...

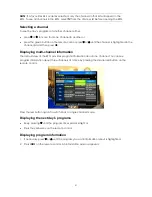
Page 32: ... program The default timer mode is to turn on the TV If you want the timer simply to change to the selected channel press the blue button one more time You can cycle through the available timer modes turn on change channels and cancel timer by repeatedly pressing the blue button Timers are discussed in detail in Using the timer on page 32 Watching a selected channel 1 If necessary press or until t...

Page 33: ...til it is highlighted and then press the green button on the remote control 6 To add a new timer press the red button on the remote key The Timer Event window appears 7 The default timer mode is Channel Change In this mode the will switch to whatever channel you specify at the date and time you specify The other modes available are Power Off and Power On To switch modes press or until the mode you...

Page 34: ... set another timer 17 Press EXIT 18 A message appears asking you to confirm that you want to save your changes Press OK to confirm your changes or press or to select CANCEL and then press OK to cancel your changes 19 Press MENU to return to normal viewing Rescanning for channels and stations The Channel Search option on the main menu enables you to scan for that is detect digital TV and radio stat...

Page 35: ...eted a channel and now want to access it again In this case you would just search for that particular channel To avoid a fruitless search you may want to check the strength and quality of the signal beforehand To do so select Signal Level from the Tools menu and press or until the channel and frequency of the broadcast you will be searching for appears on the screen The bars at the top of the scre...

Page 36: ... smaller red button on the remote control The begins scanning 7 If the channel or channels can be found the details are shown on the screen A message appears asking you to confirm that you want to save details of the channels and stations that have been detected Press OK to save the details or press or to select CANCEL and then press OK to reject the channels and stations If the channel or channel...

Page 37: ...casts Subtitle used to turn closed captions on or off Primary Subtitle your first preference for the language of closed captions Secondary Subtitle your second preference for the language of closed captions Note that the primary and secondary subtitle fields are only available if closed captions are on 4 Press or until a language option you want to change is highlighted and then press OK 5 For all...

Page 38: ...highlighted 5 Press OK to display a menu of values press or to highlight the value you want press OK and then EXIT 6 If you want o change another option repeat from step 4 NOTE If you changed a setting but want to restore it to its default value that is the value it had when the left the factory select the Load Default option and set its value to Yes 7 Press MENU and then click OK when asked if yo...

Page 39: ...if you want to save the change You have finished setting the time and can ignore the rest of this procedure 8 If you chose Not Used as the Time Mode you will need to manually enter the date and time Press to move to the Time field and then press OK 9 On the Time window enter the date and time using the number keys on the remote control 10 Press OK and then EXIT 11 Press MENU and then click OK when...

Page 40: ...ny program with a higher age rating can only be viewed if the password is entered You can choose an age between 7 and 18 When you have chosen an age press to move to the Change Password field 7 If you want to change the current password enter the current password in the Change Password field The current password is either 0000 if you have not set a password before 0000 is the default factory setti...

Page 41: ... is and then press OK The User Settings sub menu appears 3 If A V Output is not highlighted in the sub menu press or until it is and then press OK The A V Output sub menu appears 4 Press or until an option you want to change is highlighted 5 Press OK to display a menu of values press or to highlight the value you want press OK and then EXIT 6 If you want o change another option repeat from step 4 ...

Page 42: ...mation To display system information about your such as the model number software version hardware version and so on 1 Press MENU on the remote control 2 If Tools is not highlighted in the main menu at the left of the screen press or until it is and then press OK The Tools sub menu appears 3 If System Info is not highlighted in the sub menu press or until it is and then press OK The System Info wi...

Page 43: ...highlighted in the sub menu press or until it is and then press OK 5 The USB Upgrade sub menu appears Press OK to display the USB Upgrade screen 6 Press or until the upgrade file is highlighted and then press OK The upgrade process will take a few minutes and then you will be returned to normal viewing Clearing and resetting data You can reset the either by clearing all the channels and stations o...

Page 44: ...press OK on the remote control or press OK when Cancel is highlighted to cancel your changes 6 If asked enter the password A further message appears asking you if you are sure you want to proceed To continue with the reset make sure OK is highlighted and then press OK on the remote control If you selected Factory Reset the installation wizard appears For help with the wizard see Installation wizar...

Page 45: ... your TV Insufficient signal strength Check that the antenna cable is securely plugged in and that the signal is adequate Picture and or audio glitch Electrical interference Check that all antenna cabling is quad shielded The receiver or TV is in mute mode Press the MUTE button on the receiver or on the TV No sound Initial volume level has not been set on your TV Select the desired TV volume level...

Page 46: ...9 Pan Scan Video Decoding Video Resolution 1920 x 1080i 1280 x720p 720 x 576p 720 x 576i Standard MPEG Layer 1 2 Dolby AC 3 PCM and DTS Sampling Rate 32 44 1 48KHz Audio Decoding Channels Single Dual Mono Stereo Joint Stereo Dolby Digital bit streams Main Processor ST40 32 bit Superscaler RISC CPU_400 Dhrystone 2 1 MIPS 266MHz Main System Memory Flash Memory 8MB SDRAM 128MB Video Component Y Pb Pr...

Page 47: ...47 ...

Page 48: ...A 3803 PH 61 3 8795 7990 FAX 61 3 8795 7991 TECHNICAL SUPPORT 1 800 820 030 STRONG CO FAR EAST LTD P O BOX 85 YOKOHAMA KANAGAWA KEN JAPAN 231 91 FAX 81 45 651 1842 www strong technologies com Email techau strong technologies com Strong Technologies Pty Ltd 2008 ...

Reviews: