background image


22

z

 Press [RED] button a third time, to cancel the set recording   


SERIES RECORDING 

Series recording allows you to record every episode in 
the series of the program you have selected with a 
single button press: 

z


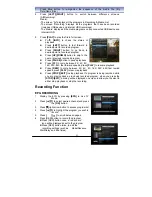
While viewing the program you wish to record the 
whole series, press [S. REC] button on the 
remote, the message “Series recording set 
successfully” will be displayed on the screen. 


z


You can also set a series recording via the EPG. 
Select the program you wish to record the whole series, press [S. REC] button of 
the remote, the message “Series recording set 
successfully” will be displayed on the screen. 


z


To cancel a set series recording press the Timer button on 
the remote control. Select the set series timer using the


[

][

buttons. Press the GREEN button to delete this 

timer   


Recording Function


COPY FILE TO EXTERNAL DEVICE 

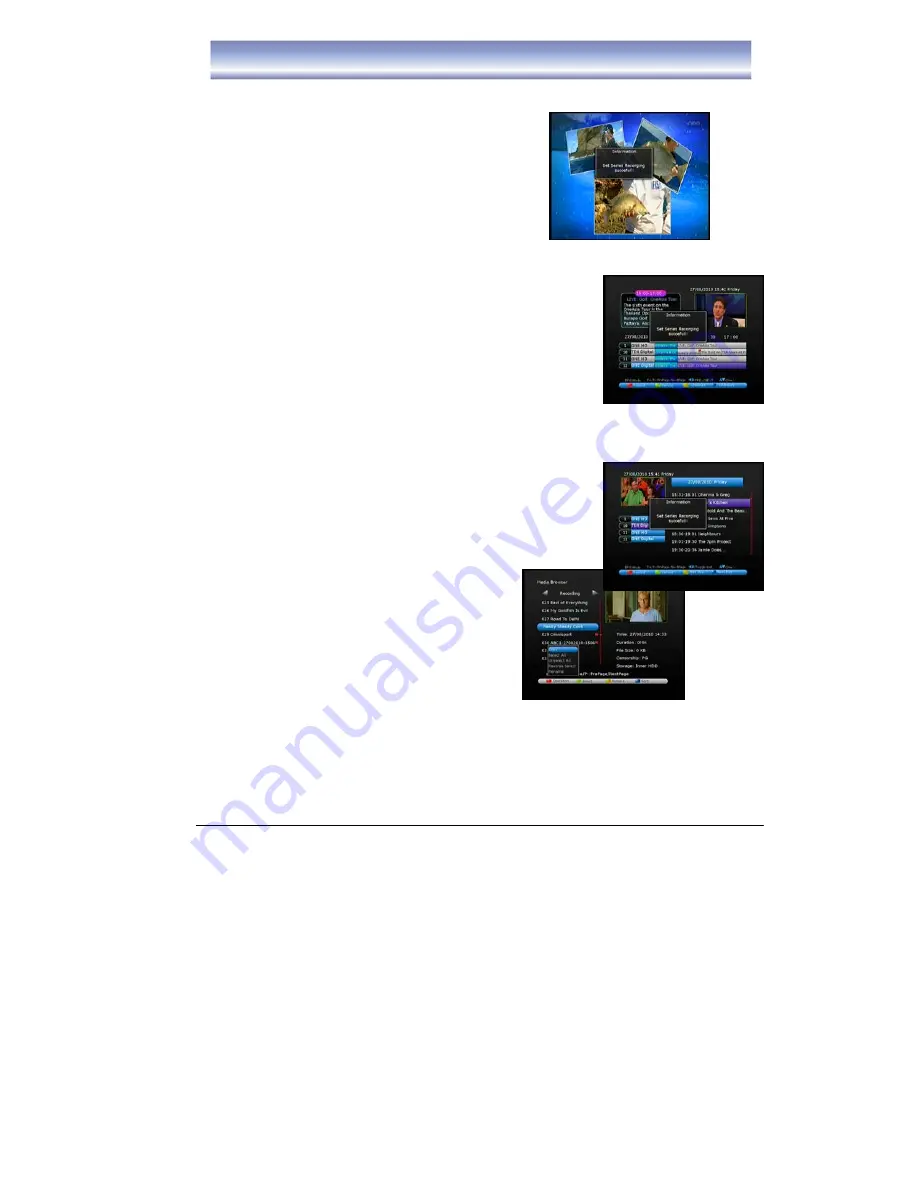
1. 

Open DVR Menu by pressing

 [DVR

] in Live 

TV Mode. 

2. Press 

[

][

to select the programs you 

wish to copy. 

3. 

Press the Red button to display the list of 
options. To copy a single file select Copy 
and press the OK button. Then select which 
storage device you wish to copy the file to. 
The options are HDD & USB. USB refers to 
the external USB device you have connected to the unit. You can also select all 
files to be transferred by selecting “Select All” and pressing the OK button. Once 
you have selected all files then press the Red button again and select Copy. 
Then select USB to transfer files to your external USB device. 


Summary of Contents for SRT 5495T

Page 1: ...Twin Tuner DVR with HDD User s Manual...

Page 2: ......

Page 3: ...win Tuner DVR 3 Front Panel and Rear Panel 4 Front Panel 4 Rear Panel 4 Remote Control 5 6 Using the remote control 7 Connecting to Equipment 8 10 Main Menu 11 14 Basic Operation 15 18 Recording 19 22...

Page 4: ...o not place the device in an unventilated cabinet or on top of a unit which emits heat To reduce the risk of fire or electric shock do not expose this apparatus to any liquids or extreme heat Copyrigh...

Page 5: ...s z DVR Recording Record two channels while watching a 3 rd from same network z Smart Series Record feature to record a whole series at a touch of a button z 3 5 Sata Hard disk 500GB z Timeshift Funct...

Page 6: ...econd tuner 2 ANT OUT RF signal output to other reception equipment such as TV 3 ETHERNET Connect to network 4 OPTICAL COAXIAL Digital audio output 5 USB Connect for software upgrades 6 HDMI HDMI to c...

Page 7: ...ay a recorded program or to resume time shift 13 PAUSE To pause the current program and activate timeshift or recorded program during playback Press again to resume program or playback 14 SKIP BACK To...

Page 8: ...resolution options 1080p 1080i 720P 576i supported 29 REC To start an instant recording on current channel 30 STOP To stop playback of recorded program or to stop time shift 31 SKIP FWD To skip forwar...

Page 9: ...ut two AAA size batteries inside the compartment The diagram inside the battery compartment shows the correct way to install the batteries Caution 1 Keep batteries out of children s reach 2 Don t atte...

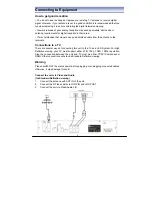
Page 10: ...the antenna to the receivers Connections to a TV There are several ways of connecting this unit to the TV and Hi Fi System For High Definition viewing your TV must support either 576i 720p 1080i 1080p...

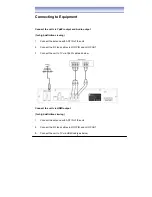
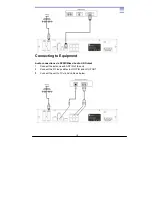
Page 11: ...ANT IN of the unit 2 Connect the RF loop cable via LOOP IN and LOOP OUT 3 Connect the unit to TV via YpbPr cable as below Connect the unit via HDMI output for high definition viewing 1 Connect the an...

Page 12: ...g to Equipment Audio connections via SPDIF Mixed Audio L R Output 1 Connect the antenna with ANT IN of the unit 2 Connect the RF loop cable via LOOP IN and LOOP OUT 3 Connect the unit to TV via AV cab...

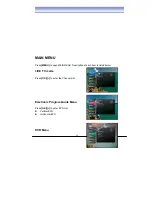
Page 13: ...ress MENU to open MAIN MENU Description of each item is listed below LIVE TV mode Press OK to enter the Channel List Electronic Program Guide Menu Press OK to enter EPG List z Vertical EPG z Horizonta...

Page 14: ...for incoming recordings will be stored on the selected drive There are 3 options Inner HDD Built in Hard disk external HDD connected to either USB1 rear USB slot orUSB2 front USB slot z Playback Start...

Page 15: ...Audio Video Output Setting z Video Resolution Select video output resolution Available options 1080p 1080i 720p 576p and 576i z TV Aspect Ratio Select the suitable aspect ratio for your TV Available...

Page 16: ...the Installation Menu Setting Menu and DVR Menu when you select these menu options in the future you will need to enter a password to gain access 2 The Factory default password is 0000 MAIN MENU OSD...

Page 17: ...ight Installation 2 Press OK to enter Installation menu 3 Press UP DOWN to select Auto Search and press OK the unit will start to scan all available channels 4 OR you can use the Manual Search option...

Page 18: ...ssociated with the 2 networks will be able to be viewed A red square indicates channels being recorded Basic Operation Channel Info Banner 1 Open Info Banner by pressing INFO in Live TV Mode 2 Info ba...

Page 19: ...urrent and the previously viewed channels Mute Press MUTE to mute the sound Press again to restore sound Basic Operation Time Shift Function 1 Activate Time Shift by pressing PAUSE in Live TV Mode Tim...

Page 20: ...n recording is complete the unit will enter full standby mode z Select Cancel To cancel this operation 3 When a timer is set to begin while unit is in full standby mode it will turn on automatically a...

Page 21: ...audience 15 year old R Restricted 18 year old AV Adult audience strong violence 15 year old NOTE Once censorship level has been selected you will need to enter a PIN number to view channels or access...

Page 22: ...end 3 Press OK to save this Timer 4 Press OK to edit the information of the Timer 5 Press Green button to delete the set timer 6 Press Yellow button to delete all the set timers 7 Press the Blue butto...

Page 23: ...pause playback z Press FF to cycle between 2X 4X 8X 16X 32X 64X fast forward speeds press PLAY to resume playback z Press REW to cycle between 2X 4X 8X 16X 32X 64X fast rewind speeds press PLAY to res...

Page 24: ...set series recording press the Timer button on the remote control Select the set series timer using the buttons Press the GREEN button to delete this timer Recording Function COPY FILE TO EXTERNAL DE...

Page 25: ...TV Mode EPG in Vertical Display Mode 1 Press CH CH to highlight channel then press OK to access this channel 2 Press button to enter electronic program data list 3 Press CH CH to highlight program th...

Page 26: ...er Horizontal EPG display mode 6 Press EXIT button to quit Electronic Program Guide EPG Access EPG by pressing EPG in Live TV Mode EPG in Horizontal Display Mode 5 Press CH CH to highlight channel the...

Page 27: ...Please ensure you have the receiver connected to your internet connection via the Ethernet port on the rear panel Once connected the receiver will detect your network settings automatically To ensure...

Page 28: ...ve stored on your PC on the SRT 5498 such as video files mp3 files and photos Regardless of the operating system on your PC the first step required is to create a folder on the local hard drive We rec...

Page 29: ...ation z IP Address Enter the IP address of the PC you wish to share with using the numeric keys z Shared Name Press the button to access the virtual keyboard to enter the shared folder name you create...

Page 30: ...ue button to save and exit 4 Press OK button to connect to your PC Once connected under the State heading it will display Connect OK If it displays Connect Fail please follow the above steps again and...

Page 31: ...29...

Page 32: ...30...

Page 33: ...Out of digital signal area Check with retailer No picture or sound Program not broadcasting now Retune to another channel Mosaic blocks in picture or picture freezes Aerial may not be compatible Check...

Page 34: ...4 AVC HP L4 1 MP L4 1 VC 1 AP L3 L2 Aspect Ratio 4 3 16 9 Video Format PAL NTSC Video Video Resolution 576i 720p 1080i 1080p Audio Decoding Standard MPEG 1 and 2 layer 1 and 2 MPEG 4 HE AAC Output Mod...

Page 35: ...put HDMI 1 3 ANT Input IEC type Female Loop Out IEC type Male VIDEO CVBS YPbPr AUDIO L R Digital Audio Output Coaxial Optical USB USB2 0 Front Panel RCU IR Receiver 38KHz Category IR Carrier 38KHz Bat...

Page 36: ...HALLAM VICTORIA 3803 PH 61 3 8795 7990 FAX 61 3 8795 7991 TECHNICAL SUPPORT 1800 820 030 STRONG CO FAR EAST LTD P O BOX 85 YOKOHAMA KANAGAWA KEN JAPAN 231 91 FAX 81 45 651 1842 www strong com au tech...

Reviews: