background image

English

6.8 DVR

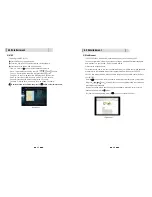
8) Bookmarking Recorded Programs

Ү

The 

SRT 7000

will set auto bookmarks to each recorded program. Once a recorded

program has been viewed, a bookmark will be set at the position playback was
stopped. If the recorded program is watched in full a bookmark position will not be
set. If selected to be viewed again playback will begin at the beginning of the
program.

Ү

When the program is re selected for playback it will resume form the last viewed
position.

Ү

You can also set manual bookmarks during playback of recordings-

Ү

During playback press the 

RED

button, a red triangle will appear on the playback

progress bar indicating the bookmarked position. You can set multiple bookmarks in
a program. (Maximum 20)

Ү

Press the 

GREEN

button and the current position will jump to the first bookmarked

position and commence playback from this point.

Ү

Press the 

YELLOW

button and the current position will jump to the next bookmarked

position and commence playback from this point.

Ү

To delete the bookmarks press the 

RED

button again and the red triangle will be

removed. This needs to be performed for each bookmark

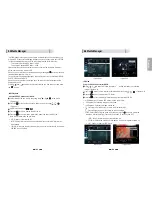
9) Editing Recorded Programs

- File Cut Feature

Ү

The SRT 7000 allows you to cut sections out of recorded programs. 

Ү

While playing back a recorded program press the 

button twice.  A menu will

appear at the bottom of the screen. 

Ү

Press the Blue key will place the unit into the File Edit mode. 

Ү

Pressing 

will input the start position of the file to be cut or copied. 

Ү

A small window will be displayed in the top left hand corner showing the time and
frame of when the cut was started. You can now fast forward or skip to the desired
position you wish cut or copy. 

Ү

Press the 

button to mark the end of the section to be cut or copied. You will then

be asked whether you wish to Cut or Copy. 

Ү

By selecting Cut the selected portion will be deleted. Selecting Copy, copies this
portion into a separate file in the File List. 

Ү

This file will be listed by the same name as the original file but will have E and digit in
front of the name (e.g. E2-ONE HD) 

6.8 DVR

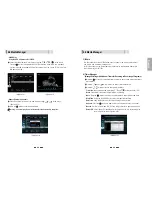
6) Lock Recorded TV programs:

Ү

To protect a recorded program from accidental deletion or to restrict the viewing of
recorded programs to specific audience, programs can be locked.

Ү

To Lock a program press the 

button to display the recorded programs

Ү

Press the 

GREEN

button, you will be prompted to enter your PIN (the default PIN is

“0000”), this will  put the receiver into File Lock Mode. (To set your own personal PIN
number for the receiver please refer to the Security Settings, Parental Lock Section in
this manual on page 23. 

Ү

Select the recorded program you wish to lock use the arrow buttons and press the

button. A padlock will appear next to the selected file. This file is now locked.

Ү

To return to normal mode either press the 

button or the RED button

Ү

Once a recorded file has been locked you will be required to enter the PIN number
to view or delete this program

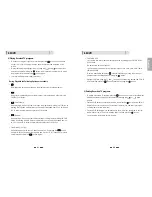
7) Rename Recorded TV programs:

Ү

Recorded programs can be renamed once recording is complete

Ү

To Rename programs press the 

button to display the recorded programs

Ү

Select the recorded program you wish to rename by using the arrow keys and press
the 

Yellow

button

Ү

The file name will be highlighted. Now press the 

button to bring up a virtual key

board.

Ү

Using the arrow keys select the desired letters to make up the new file name and
press the 

button

Ү

Once you have completed the new file name press the 

button. You wil be

prompted to save the  changes, select Yes and press 

to save

54

53

Summary of Contents for SRT 6100

Page 1: ...X 61 3 8795 7991 TECHNICAL SUPPORT 1 800 820 030 STRONG CO FAR EAST LTD P O BOX 85 YOKOHAMA KANAGAWA KEN JAPAN 231 91 FAX 81 45 651 1842 www strong com au tech strong com au Strong Australia Pty Ltd 2...

Page 2: ...Controls Functions 6 4 1 Front Panel 4 2 Rear Panel 4 3 Remote controller 4 4 Front Display 5 How to Connect 11 6 Operation 12 6 1 Getting Started 6 2 System Setting 6 3 Channels 6 4 Electronic Progra...

Page 3: ...r MP3 Playback JPEG Viewing Firmware Update Ethernet Port for Internet Connectivity File transfer and Ice TV functionality DVB T MPEG 2 MPEG 4 Compliant 1080p 1080i 720p 576p 576i Video Resolution HDM...

Page 4: ...e receiver immediately unplug power from the mains Contact a qualified service technician before using the receiver again or there may be a risk of electric shock Do not open the cover as there is a r...

Page 5: ...hes blue light in Passive Standby mode and shows no light in Power ON mode USB To connect a USB device ex Memory stick or external hard drive SD Card Reader To read and write data to SD media 10 9 8 7...

Page 6: ...7 6 5 4 3 2 1 AV IN 1 5 7 8 11 12 15 16 18 19 17 4 2 10 14 13 3 6 9 4 2 Rear Panel No Name Connector Function 1 S PDIF Fiber Optic Digital audio output Optical 2 USB USB A type USB 2 0 3 S VIDEO MINI...

Page 7: ...12 14 13 16 17 18 19 15 4 3 Remote controller AV IN CH Up Down To change channels Up Down To change channels or move the cursor up and down in menu mode Left Right To change the volume level Also modi...

Page 8: ...vision A Using the Composite cable provided red white and yellow leads For video connect the yellow lead to the yellow socket on back of the receiver and to the corresponding Video Input socket on the...

Page 9: ...s and Moves one channel up or down and Moves one page up or down RED Shows all channels in the current group Green Shows all channels alphabetically Yellow Shows all channels by transponder Blue Shows...

Page 10: ...o a Radio channel Pressing the button again will return the unit to the TV channel RECALL Pressing this button returns the unit to the previously viewed channel Audio Use this button to adjust the sub...

Page 11: ...summer time is applied Local Offset If GMT Usage is ON local time is GMT Local Offset Wake Up Mode Selects wake up frequency Off Once Daily Mon Fri Wake Up Time Set the wake up time using the NUMERIC...

Page 12: ...ngs This menu lets you specify the audio and video output settings of your receiver Figure 6 2 2 Use the scroll buttons to select your desired setting Audio Language set the audio language Subtitle La...

Page 13: ...s to change and enter new passwords 6 2 System Setting 6 2 System Setting Figure 6 2 5 21 4 Front Display Setting This function enables you to set the front display settings Moving text can be enabled...

Page 14: ...he factory default settings Please note that a factory reset is required to be performed after a software upgrade Figure 6 2 6 6 2 System Setting 7 IP Setting If the Network supports DHCP IP settings...

Page 15: ...rowse and select a sharing folder on your PC c Press then select STB Daemon and the window will be hidden You can still see the icon on bottom right of the windows screen 2 Connect an Ethernet cable o...

Page 16: ...ive the Ice TV EPG service IceTV is an independently compiled electronic program guide EPG for digital free to air television delivered via the internet The IceTV EPG service gives you acces to the on...

Page 17: ...the previous menu Figure 6 3 4 5 Skip Channels This feature skips a set channel when using the and buttons to navigate channels Press on the Skip Channels and follow the on screen prompts to activate...

Page 18: ...arrow buttons select the appropriate connection type If you have connected your external video source via Component Red Green and Blue RCA cables select YCbCr Video source must be set to 576i when con...

Page 19: ...rom the gaming console The 2 x Red Audio Output Right plugs should be connected to the 2 x RCA sockets of the splitter that has the Red Audio Output Right plug connected to it from the gaming console...

Page 20: ...e in your desired measurement Add City Press the YELLOW button to add a City to the list Rename Press the BLUE button to modify the City name Save Info Press the Record button to save the added CIty n...

Page 21: ...b Browser The SRT7000 has an inbuilt web browser similar to what you will find on your PC You can navigate the internet by either connecting an external USB wireless keyboard and mouse or via your iPh...

Page 22: ...ease refer to the separate instructions supplied titiled Remote Apps for SRT7000 You can also access your Twitter page using the virtual remote control built in to your SRT7000 Press the button on the...

Page 23: ...ystem which the SRT7000 runs on We do not recommend that you format storage devices in this format type if you wish to connect the storage device to a PC If connected a separate program will be requir...

Page 24: ...age Figure 6 6 8 Figure 6 6 9 90 Degrees Rotates the image anticlockwise 90 Degrees Rotates the image clockwise Press the Left arrow button to skip to the previous image HIDE infobar bar Press the RED...

Page 25: ...wnload Figure 6 6 12 Warning do not switch off your receiver before the download is complete Figure 6 6 12 Using the GROUP button select VIDEO has commenced all standard DVR buttons are active Play Pa...

Page 26: ...s Use the button to highlight the program name section of the EPG menu Use the or buttons to highlight the program you wish to record Press the button while this program is highlighted The selected pr...

Page 27: ...remove the external HDD Should you wish to have the external drive permanantly connected follow the abve instructions to select which HDD to record onto 2 Timer Lead In and Lead Out Times Lead In and...

Page 28: ...he PLAY button Slow Motion 1 2x 1 4x While playing back a file you can select slow motion By pressing the Button multiple times you can adjust the speed to slow motion 1 2 or 1 4 speeds To resume norm...

Page 29: ...ish cut or copy Press the button to mark the end of the section to be cut or copied You will then be asked whether you wish to Cut or Copy By selecting Cut the selected portion will be deleted Selecti...

Page 30: ...the default time you have set in the menu Please note that if you have Auto Timeshift on it will reset every time you change the channel 6 9 MEDIA Playing Media Files On Your SRT 7000 The SRT 7000 is...

Page 31: ...he terrestrial broadcasting mode Batteries are exhausted Fluorescent light is interfering with the remote controller Remote controller is incorrectly aimed No Power or Switched off Problem The LED lig...

Page 32: ...health which could otherwise be caused by inappropirate waste handling of this product The recycling of materials will help to conserve natural resources For more detailed information about recycling...

Page 33: ...VICTORIA 3803 PH 61 3 8795 7990 FAX 61 3 8795 7991 TECHNICAL SUPPORT 1 800 820 030 STRONG CO FAR EAST LTD P O BOX 85 YOKOHAMA KANAGAWA KEN JAPAN 231 91 FAX 81 45 651 1842 www strong com au tech strong...

Reviews: