background image

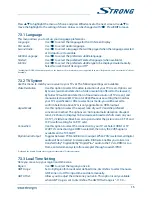
7.1.4 rename Favourite list

This menu allows you to personalize the names of the 8 available favourite lists.
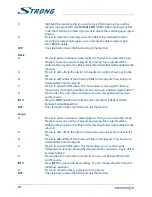
Use 

pq

 to select 

Rename Favourite List

 from the 

Edit Channel

 Menu and press 

ok

 to proceed. The 

names of all groups are now displayed. Select a favourite group with 

pq

 and press 

ok

 to edit its 

name. A text field will now pop up at the right of the screen. Use 

tu


pq

 to select characters and 

enter them with 

ok

. When you have finished editing, press 

bLUE

 to save the changes. When all 

changes have been made, press 

EXIT

 twice to leave this menu.

7.2 Installation

7.2.1 Auto Scan

Use 

pq

 to select 

Installation

 and press 

ok

 or 

u

 to advance.

Select 

Auto Scan

 with 

pq

 and press 

ok

 to enter.

Use 

tu

 to toggle between 

Yes

 or 

No

. When 

FTA Only

 is set to 

Yes

, scrambled channels won’t be 

stored in the channel list. Use 

pq

 to highlight 

Search

. Now press 

ok

 to start auto scan.

The receiver will store all found channels in the channel list.

7.2.2 Channel Scan

Use 

pq

 to select 

Installation

, press 

ok

 or 

u

 to advance.

Use 

pq

 to select 

Channel Scan

 and press 

ok

 to enter.

Use 

tu

 to toggle between available scan modes: 

By Channel

 and 

By Frequency

.

If 

By Channel

 is selected, use the cursor buttons to select 

Scan Band

 and 

Channel No

. If 

By Frequency

 is 

selected, use the cursor buttons to select 

Frequency

 and 

Bandwidth

. Highlight 

Search

 and press 

ok

 to 

start scanning. Newly found channels will be added to the channel list.

7.2.3 Antenna Power

Use 

pq

 to select 

Installation

, press 

ok

 or 

u

 to advance.

Use 

pq

 to select 

Antenna Power

 and press 

ok

 to enter.

Set to 

On

 if you use an active antenna.

Select 

Off

 for passive antennas.

When set to 

On

, 5 V will be present on the ANT IN connector of the receiver.

Press 

EXIT

 to leave the 

Antenna Power

 menu.

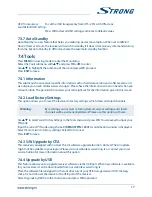
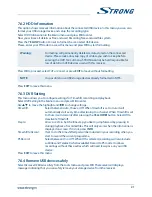
7.2.4 LCN (Logical Channel Numbering)

If 

LCN

 (Logical Channel Numbering) is activated and an LCN signal is provided by the operator, 

channels will be stored in an operator defined order. Set 

LCN

 to 

On

 to activate operator defined 

channel numbering or 

Off

 to store channels in found order. This function only applies when a new 

channel search is performed.

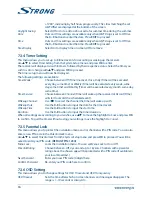
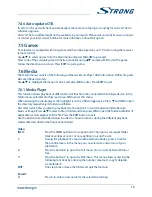
7.3 System Setup

This menu allows you to manage the system settings of your receiver. It consists of the following 
sub-menus: 

Language

TV System

Local Time Setting

Timer Setting

Parental Lock

OSD Setting

 and 

Auto 

Standby

.

14

Summary of Contents for SRT 8114

Page 1: ...tilisation Manuale Utente Manual del usuario Manual do Utilizador Návod k obsluze Návod na obsluhu Instrukcja obsługi Felhasználói kézikönyv Ръководство на потребителя Digital Terrestrial HD Receiver SRT 8114 Picture similar ...

Page 2: ......

Page 3: ...D AVC VIDEO AND OR ii DECODE AVC VIDEO THAT WAS ENCODED BY A CONSUMER ENGAGED IN A PERSONAL AND NON COMMERCIAL ACTIVITY AND OR WAS OBTAINED FROM A VIDEO PROVIDER LICENSED TO PROVIDE AVC VIDEO NO LICENSE IS GRANTED OR SHALL BE IMPLIED FOR ANY OTHER USE ADDITIONAL INFORMATION MAY BE OBTAINED FROM MPEG LA L L C SEE HTTP WWW MPEGLA COM This product contains one or more programs protected under interna...

Page 4: ...ng to a Digital Audio Amplifier with S PDIF 7 3 5 Connecting to a digital audio amplifier and TV using HDMI 7 3 6 Connecting to an analogue Audio Amplifier 8 3 7 Connecting a USB storage device 8 4 0 Starting up forthe firsttime 8 5 0 Quick guideto usingyour receiver 9 6 0 Operation 9 6 1 Changing channels 9 6 2 Info Banner 10 6 3 Selection of audio language 10 6 4 Teletext 10 6 5 Subtitles 10 6 6...

Page 5: ...r It is dangerous to touch the inside of the receiver due to high voltages and possible electrical hazards Opening the receiver will void the warranty of the product Refer all maintenance or servicing to suitably qualified personnel When you are connecting cables be sure that the receiver is disconnected from the mains supply voltage Wait a few seconds after switching off the receiver before you m...

Page 6: ... to be used e g NiMH we recommend using types with low self discharge to ensure long time operation of your remote control 1 5 Usage of external USB devices It is recommended to use USB 2 0 storage devices or higher If your device is not compatible to USB 2 0 specifications recording playback and other multimedia functions of the receiver might not work properly To ensure best performance of your ...

Page 7: ...TV SCART To connect your receiver with your TV set using a SCART cable 6 Audio L R To connect your receiver to an analogue audio amplifier 7 Power cord Your receiver requires a supply voltage of 220 240 V AC Auto selectable 50 60Hz 5 Please ensure the local power specification meets these requirements before connecting your receiver to the wall outlet 2 4 Remote control Fig 3 1 q Switches the rece...

Page 8: ...r Multimedia and Teletext functions 2 5 Installing the batteries Fig 4 Open the cover on the remote control and insert 2x AAA batteries into the compartment Correct position of the polar diagram shows the batteries inside the compartment 1 Open the cover 2 Insert the batteries 3 Close the lid WARNING The batteries should not be recharged disassembled electrically short circuited be mixed or used w...

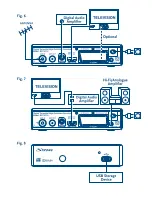
Page 9: ... possible quality 3 3 Connecting toTV with SCART cable Fig 6 Your receiver is also equipped with a SCART connector alternatively the TV set can be connected to the receiver using a good quality SCART cable 3 4 Connecting to a Digital Audio Amplifier with S PDIF Fig 6 By connecting your receiver to a digital amplifier or home theatre system you can enjoy the best possible sound quality and multi ch...

Page 10: ...ere you can choose your language Region Select your region where this receiver is used Subtitle Select Normal to display subtitles per default Select HardofHearing to show HoH subtitles per default Select Off to hide subtitles per default AspectMode Use this option to select the aspect ratio of your TV and the preferred conversion method Options are Auto automatic detection of aspect ratio 4 3Pans...

Page 11: ...ols DEFAULT PIN 1234 5 0 Quick guideto usingyour receiver We at STRONG understand that you can t wait to enjoy your new high definition digital terrestrial receiver The following quick guide will make you familiar with the basic operation of this device We do however advice you to read the full user manual to get the best performance from your receiver To turn your receiver ON or to Standby use th...

Page 12: ...vailability depends on broadcast 6 3 Selection of audio language Some channels support a choice of audio formats and or languages To select another audio stream press AUDIO in viewing mode A list with available audio streams will now be displayed Use pq to select the desired stream and confirm with OK The audio channel as stereo mono left and right can be selected with the tu buttons 6 4 Teletext ...

Page 13: ...d OK to execute it Press EXIT to quit the step function Press GREEN to set a timer for a selected event Refer to section 7 3 4 for details of the timer function Note Availability of EPG data depends on broadcast 6 8 Instant Recording Your new receiver allows you to make an instant recording of the programme you are watching Simply press RECORD to start the recording To enter the duration for the r...

Page 14: ...nels can only be watched after entering the PIN code DEFAULT PIN 1234 To lock or unlock a channel press RED while in TVChannelList Press pq to select a channel and press OK to lock or unlock it You are asked to input the PIN code DEFAULT PIN 1234 Locked channels will be marked with the symbol Locking unlocking multiple channels in one session is possible When all changes have been made press EXIT ...

Page 15: ...hed editing press BLUE to enter the changes When all changes have been made press EXIT twice Select Yes to save the changes or No to discard Delete Press BLUE in EditChannel to enable the Delete function The Delete sign will move up to indicate that Delete is selected Use pq to highlight a channel and press OK to mark it for deletion When you have marked all channels you wish to delete press EXIT ...

Page 16: ... OK to enter Use tu to toggle between available scan modes ByChannel and ByFrequency If ByChannel is selected use the cursor buttons to select ScanBand and ChannelNo If ByFrequency is selected use the cursor buttons to select Frequency and Bandwidth Highlight Search and press OK to start scanning Newly found channels will be added to the channel list 7 2 3 Antenna Power Use pq to select Installati...

Page 17: ...0p Please use a setting that matches your TV s specifications After a selection is made you will be asked to confirm Selection above 576i is only applicable on HDMI output AspectMode Use this option to select the aspect ratio of your TV and the preferred conversion method The options are Auto automatic detection of aspect ratio 4 3Panscan Displays 16 9 widescreen broadcasts full screen on your 4 3...

Page 18: ...se between Channel Timer will wake up the receiver or Record Timer will start to record the scheduled event WakeupChannel Use tu to select the channel the timer will wake up with WakeupDate Use the 0 9 buttons to input the date for the timed event WakeupTime Use the 0 9 buttons to input the start time Duration Use the 0 9 buttons to input the timer duration When all settings are according to your ...

Page 19: ...s you to reset the receiver to factory settings which clears all stored channels Warning By resetting your receiver to factory default all your settings and stored channels will be permanently deleted Please use this option with care Use pq to select LoadFactorySettings in the Tools menu and press OK You are asked to input your PIN code Input the correct PIN code using the 0 9 DEFAULT PIN 1234 A c...

Page 20: ...f channels It is also useful as a backup for your own unit Channel Dump function backup to USB Have a storage device connected to the USB port of the receiver Select UpgradebyUSB from the Tools menu and press OK to proceed The upgrade menu will now be displayed Use pq to select UpdateMode and choose the option Dumpchannellist Use pq to select UpgradeFile A DataBase file name containing date and ti...

Page 21: ...to enter this menu When entering the media player the highlight is on the USB storage device Press q and OK to open the directory respectively its folders subfolders First select which files you like to play back Use the button 1 to switch between Video Record Music or Image Press pq to select a file or folder and then press OK to open the folder subfolder if applicable or start playback of the fi...

Page 22: ...ber rename 4 copy 5 delete 6 create folder 7 2 Press button 2 to open the sort window You can sort by Name Time Size and Favourite INFO Press the INFO button to set repeat mode The option is Repeat Folder Random Folder Repeat One EXIT One step back or leave the folder and quit the function Image 4 Press 4 to open a previously created play list Then you can select the image file that you want to ad...

Page 23: ... recording and playback Select DVRSetting in the Media menu and press OK to enter Use pq to move the highlight and tu to change settings Timeshift Select between Auto Pause or Off When Timeshift is set to Auto it will automatically start every time after tuning to a channel When Timeshift is set to Pause it will start only after pressing the YELLOW 2 button Select Off to deactivate Timeshift Stept...

Page 24: ...al signal area Active antenna requires to switch ON antenna power external power Check aerial lead Check aerial Check with dealer Switch receiver s Antenna Power ON connect external power No picture or sound on TV or amplifier HDMI or SCART is not selected on your TV or amplifier or the unit is set to higher resolution as the TV supports TV amplifier is not switched on Switch to correct TV amplifi...

Page 25: ...d write speed of your USB device could be too low Make sure to use a USB storage device with sufficient speed and space Pen drives USB sticks may not support sufficient speed 9 0 Technical Specifications Demodulator Demodulator COFDM 16 QAM 64 QAM QPSK Transmission mode 2 K 8 K Video Decoder Profile level MPEG 2 MP ML AVC H264HP L4 1 MPEG4 ASP supported Video resolutions 480i 480p 576i 576p 720p 1...

Page 26: ...Operating temperature 0 C 40 C Storage temperature 10 C 50 C Operating humidity range 10 85 RH Non condensing Size WxDxH in mm 148 x 130 x 37 Net weight 0 26 kg STRONG declares that this item complies with the basic requirements and other relevant regulations of directives 2004 108 EC and 73 23 EC RoHS 2002 95 EC Subject to alterations In consequence of continuous research and development technica...

Page 27: ......

Page 28: ...etze 36 1 445 26 10 support_hu strong tv CEE PL 801 702 017 support_pl strong tv UA 380 44 228 24 73 support_ua strong tv FR 0826 029 928 support_fr strong tv 0 15 par mn poste fixe en France IT 199 404 032 support_it strong tv Da rete fissa 24 8 cent al min 12 5 cent scatto alla risposta Da rete mobile max 49 cent al min 15 6 cent scatto alla risposta Supplied by STRONG Co Japan Represented by ST...

Reviews: