20
English
7.4.3 Date Time
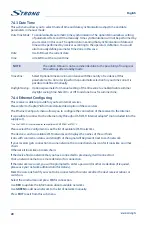
This sub-menu allows you to select mode of time and date synchronization, adjust time and date
parameters in manual mode.
Date Time Mode
: To enable/disable automatic time synchronization. The option
Manual
allows setting
of parameters Date and Time manually. Time synchronization will not be performed by
your receiver in this case. The option
Auto
meaning that synchronization of date and
time will be performed by receiver according to the operator’s definition. You could
also manually define parameter Time Zone in this case
Date
:
Use
0-9
to set the current date
Time
:
uUe
0-9
to set the current time
NOTE:
The option
Manual
is not recommended due to the possibility of losing real
time settings after standby mode.
Time Zone
:
Select Optional time zone in accordance with the country of residence. If this
parameter set to
Auto
, it will perform an automatic selection for your time zone. It is
possible to define it manually
Daylight Saving
: Optional parameter for manual setting of the time zone to enable/disable summer
daylight saving time. Select
On
or
Off
to add one hour for summer time.
7.4.4 Ethernet Configuring
This receiver is able to provide for you few internet services.
Please refer to chapter
7.6
for more detailed description of these services.
The
Ethernet Config
sub-menu allows you to configure the connection of the receiver to the Internet.
It is possible to connect to the internet only through a USB Wi-Fi Internet adapter* (not included into the
supply set).
* Use the USB Wi-Fi Internet adapter compatible with MTK7601 or RT5370
Please select the
Config
item to see the list of available Wi-Fi networks.
The device scans for available Wi-Fi networks and displays the names of those it finds.
Icons with connection status and strength of the signal will be present next to each network.
If your receiver gets connection to some network, the connection status icon for it looks like a normal
chain.
Otherwise it looks like a broken chain.
If the device finds a network that you have connected to previously, it will connect to it.
Click a network name to see more details or for connection.
If the network is secured, you will be prompted to enter a password or other credentials (if required,
please ask your network administrator for details).
Mark the
Auto Link
field if you want to be connected to this network after the next receiver reboot or
switch on.
Select the
Link
button and press
OK
for connection.
Use
RED
to update the information about available networks.
Use
GREEN
to add new network to the list of network manually.
Press
EXIT
to exit from this sub-menu.
Summary of Contents for SRT 8203
Page 2: ...TEXT SUB FAV TV R REC TEXT SUB FAV TV R REC ...
Page 3: ...TEXT SUB FAV TV R REC ...
Page 36: ......
Page 37: ......


