background image

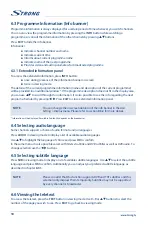
6.7 Electronic Programme Guide (EPG)*

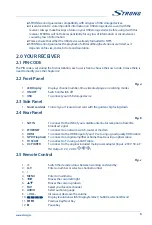
The Electronic Programme Guide is a very useful function that allows you to watch programme 
schedules and information on screen and not to miss any important event by setting Timer for it.
Press 

EPG

 button to activate this guide. The receiver will take a few seconds to collect all the 

informations of all channels. Use 

pq

 to select a channel. Use 

t


u

 to scroll through programmes on 

selected channel to display programme information on the screen or to book timer for it. Press 

BLUE


or 

YELLOW

 buttons to scroll through programmes to display programme information for the next/

previous day. Press 

INFO

 button to display detailed information for selected programme. Press 

EXIT

 to 

go back to viewing mode.

* Availability of EPG data depends on broadcaster.

6.7.1 Booking a programme from EPG

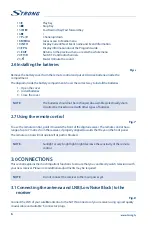
Select a programme as described above. Press 

GREEN

 button. A menu with three selections will appear: 

Play

 to book the program selected that it will be automatically tuned to the set time, 

Sleep

 to put the 

receiver in standby at the set time and 

NULL

 to cancel the program selection. Press 

OK

 to confirm one 

the the three options or 

EXIT

 to quit the nemu. Once you have chosen one of the two options 

Play

 or 

Sleep

, the chosen program will be highlighted in blue and the event will be added in the 

Timer

 list. To 

consult the complete list press 

MENU

User Setting

 and finally 

Timer

.

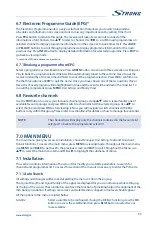
6.8 Favourite channels

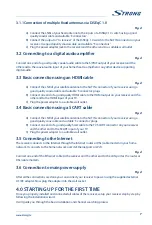
Use the 

FAV

 button to access your favourite channel groups. Using 

pq

 select created earlier one of 

available favourite groups and press 

OK

 to switch to channel list within selected group. Use 

pq

 to 

select channel and press 

OK

 to start viewing it. Now you will navigate (switch channels with 

CH+/-


buttons) only within this group. Please refer to section 

8.2.2

 for details on how to manage favourite lists.

NOTE:


 The channel list will display only the channels contained in the favourite list 
selected. To back to the complete list select 

All

7.0 MAIN MENU

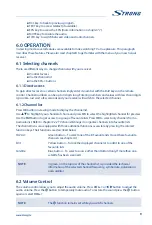
The main menu gives you access to 

Installation, Channel Manager, User Setting, Tools

 and 

Smartcard 

Tivùsat

 functions. To access the main menu, press 

MENU

 in viewing mode. Throughout the main menu, 

use 

MENU

 and 

BACK

 to get back to the previous screen and 

EXIT

 to quit. Throughout the Menu, use 

pq

 to select the main menu item and 

OK

 or 

u

 to highlight the submenu of choice.

7.1 Installation

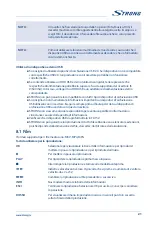
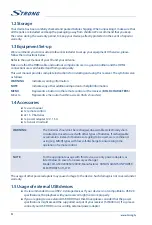
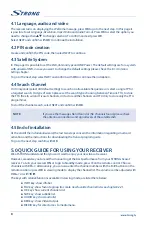
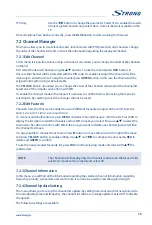
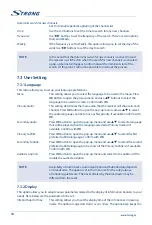
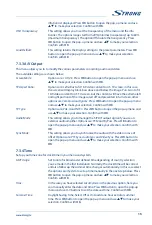
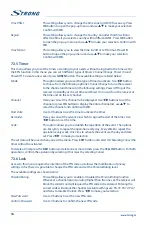
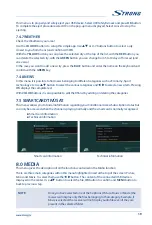
This section contains information of how to add or modify your satellite parameters, to search for 
channels and programmes list. To access this section of the menu it is necessary to enter the PIN code.

7.1.1 Auto Search

All settings and changes will be saved at exitting the menu. Confirm the pop-up.
The 

Signal Strength

 and 

Signal Quality

 of the signal are displayed for your convenience while setting up, 

at the top of the screen. These indicators also have the function of providing help in the alignment of the 
dish during installation. If settings are correct, and satellite dish is aligned, some level should appear.
All the options in the menu are listed below:

Satellite

 Select a satellite to be configured. If using the DiSEqC function, press the 

OK


button to access the satellite list, then press 

BLUE

 button to select two or 

more satellites.

11

Summary of Contents for SRT7807

Page 1: ...Manuale d utilizzo User Guide...

Page 2: ......

Page 3: ......

Page 4: ...12 Jan 2021 10 42 Supplied by STRONG AUSTRIA Represented by STRONG Ges m b H Teinfaltstra e 8 4 Stock A 1010 Vienna Austria Email support_at strong tv...

Page 5: ...e senza l espressa autorizzazione di Dolby Laboratories proibita Copyright 2003 2009 da parte di Dolby Laboratories Tutti i diritti riservati DICHIARAZIONE DI CONFORMIT UE SEMPLIFICATA Con la presente...

Page 6: ...IMA INSTALLAZIONE 8 4 1 Lingua audio e video 8 4 2 Creazione di codice PIN 8 4 3 Sistema satellitare 8 4 4 Ricerca dei canali 8 4 5 Fine dell installazione 8 5 0 GUIDA RAPIDA PER L UTILIZZO DEL RICEVI...

Page 7: ...ente a personale di servizio qualificato n Quando connettete i cavi siate sicuri che il dispositivo sia disconnesso dall alimentazione principale Attendete qualche secondo prima di spostare il ricevit...

Page 8: ...un tasto sul telecomando o sul ricevitore Caratteri in grassetto Spostarsisu Rappresenta una voce del menu all interno di una finestra Carattereincorsivo 1 4 Accessori n 1 manuale di istruzioni n 1x t...

Page 9: ...lli frontale e laterale Fig a 1 Display LED Visualizza il numero del canale l ora la pagina di televideo o le modalit di registrazione 2 ON OFF Accendi Spegni 3 USB Per collegare il proprio dispositiv...

Page 10: ...a l audio Aprire il coperchio delle batterie posizionato sul retro del telecomando e inserire le due batterie AAA Lo schema all interno del vano batterie mostra la corretta installazione delle batteri...

Page 11: ...F del vostro ricevitore e l altro capo all entrata audio coax del vostro sistema Home Theatre amplificatore o a qualsiasi dispositivo che supporti l audio digitale 3 3 Collegamento di base con cavo HD...

Page 12: ...NBalimentazione Le impostazioni predefinite sono per un sistema con lNB universale in caso si vogliano modificare per favore controllate il capitolo 8 1 1AntennaSetting Andate al passo successivo sele...

Page 13: ...TV un vero piacere Tali funzioni vengono descritte in questo paragrafo Leggere anche il capitolo 7 per familiarizzare con il menu del nuovo ricevitore tiv sat 6 1 Selezione dei canali Esistono diversi...

Page 14: ...nome del canale n Indica l ora n Fornisce informazioni sul nome del programma corrente n Indica il nome n Fornisce i parametri video e audio per il programma trasmesso n Utilizzare i pulsanti pq del t...

Page 15: ...ere tutte le informazioni su tutti i canali Utilizzare pq per selezionare un canale Usare t u per scorrere i programmi sul canale selezionato per visualizzare le informazioni sullo schermo relative al...

Page 16: ...lla parabola durante l installazione Se le impostazioni sono corrette e la parabola satellitare allineata dovrebbe apparire un certo livello Tutte le finzioni del men sono elencate di seguito Satellit...

Page 17: ...inale o al reparto manutenzione del condominio 7 1 2 Ricerca Manuale Satellite Selezionare un saltellite da configurare Frequenza Utilizzare i tasti numerici 0 9 per inserire una frequenza o premere i...

Page 18: ...elezionare con pq l elenco preferito NOTA L elenco dei canali visualizzer solo i canali contenuti nell elenco dei preferiti selezionato Per tornare all elenco completo seleziona All 7 2 3 Informazione...

Page 19: ...ezionare On per abilitare o Off per disabilitare la descrizione audio NOTA La disponibilit di tracce audio descrizione audio e dati dei sottotitoli dipende dall emittente Le opzioni impostate in quest...

Page 20: ...o per l orologio e l ora nel tuo men e nel sistema UtilizzoGMT Impostare su Auto per il tempo definito dall emittente a seconda della selezione del paese che hai effettuato nella prima installazione N...

Page 21: ...stati verranno salvati quando si esce dal menu Premere il pulsante ESCI e selezionare OK Selezionando Annulla il timer non verr attivato Per eliminare un timer premere il pulsante ROSSO per eliminare...

Page 22: ...re installato sul tuo decoder 7 4 2 Levello di segnale Questo men contiene indicazioni riguardo il livello del segnale Sotto le barre del segnale ci sono informazioni sul canale sintonizzato Utilizzan...

Page 23: ...egnale appaia e sia sufficientemente buono quindi selezionare Avviaricerca e premere il tasto OK Quindi attendi il processo di aggiornamento Impostazione OTA Questo men ermette di impostare il momento...

Page 24: ...categorie come Economia Sport Tecnologia etc Usa i tasti pq per selezionare le varie categorie e i tasti t u per selezionare l argomento delle notizie Premendo OK visualizzi il testo completo Coni ta...

Page 25: ...ti con il ricevitore Eseguire sempre prima il backup dei dati sul dispositivo di archiviazione USB usandolo con questo ricevitore n STRONG non si assume alcuna responsabilit per eventuali perdite di i...

Page 26: ...files 8 3 Foto Formati supportati JPG BMP OK Apri la foto selezionata a schermo intero Per visualizzare il menu Picture Option Selezionare Riproduzioneautomatica per attivare disattivare la visualizza...

Page 27: ...o Problema Possibile causa Soluzione Le spie del Decoder sono spente e il decoder non si accende dopo che hai schiacciato il pulsante di accensione Il decoder non alimentato Verifica che il cavo di al...

Page 28: ...ode 1 2 3 5 2 3 3 4 4 5 5 6 8 9 9 10 in DVB S2 8PSK mode Video Video Standard MPEG 2 MP ML MP HL MPEG 4 AVC H 264 MP L4 2 HP L4 2 Risoluzione Max video 1080p Aspect ratio 4 3 and 16 9 Risoluzione Vide...

Page 29: ...opyright 2003 2009 by Dolby Laboratories All rights reserved 12 Jan 2021 10 39 SIMPLIFIED EU DECLARATION OF CONFORMITY Hereby STRONG declares that the radio equipment type DVB S2 receiver is in compli...

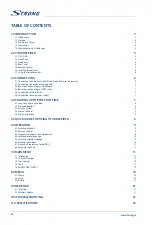
Page 30: ...Connection to main power supply 7 4 0 STARTING UP FORTHE FIRSTTIME 7 4 1 Language audio and video 8 4 2 PIN code creation 8 4 3 Satellite System 8 4 4 Search Channel 8 4 5 End of installation 8 5 0 QU...

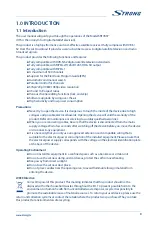
Page 31: ...personnel n When you are connecting cables be sure that the device is disconnected from the mains supply voltage Wait a few seconds after switching off the device before you move the device or disconn...

Page 32: ...en Italiccharacters 1 4 Accessories n 1x user manual n 1x remote control n 2x 1 5 V batteries n 1x power adapter 12 V 1 5 A n 1x tiv sat smartcard WARNING The batteries should not be recharged disasse...

Page 33: ...f 3 USB To connect your USB storage device 2 3 Side Panel 1 Smart card slot To insert your Tiv sat smart card with the golden chip facing down 2 4 Rear Panel Fig b 1 SAT IN To connect to the LNB of yo...

Page 34: ...short circuited be mixed or used with other types of batteries 2 7 Using the remote control Fig 7 To use the remote control point it towards the front of the digital receiver The remote control has a...

Page 35: ...ut of your TV C Plug the power adapter to a suitable wall outlet 3 4 Basic connection using a SCART cable Fig d A Connect the LNB of your satellite antenna to the SAT IN connector of your receiver usi...

Page 36: ...start the channel search select NEXT and confirm with OK NOTE If you see the messages Nolistfound or No channels found please check the antenna connections and signal levels of the satellite dish 4 5...

Page 37: ...o highlight your channel of choice and press OK to select the highlighted channel for preview Use the FAV button to get access to a group of favourite lists Press OK to select only channels from a par...

Page 38: ...lose extended information panel NOTE You can change the on screen duration of the info banner in the User Setting Display menu Please refer to section 8 3 2 for more details Information will be displa...

Page 39: ...eated earlier one of available favourite groups and press OK to switch to channel list within selected group Use pq to select channel and press OK to start viewing it Now you will navigate switch chan...

Page 40: ...scillator signal to ON 22K or OFF 0 Only for C Band LNB use Refer to manual of LNB LNBPower To turn the power on or off of the LNB Typeofsearch Set Tivu FTA to store the Tiv sat together to other unen...

Page 41: ...e saved 7 2 2 Edit Favorite Channels from the TVlist can be added to up to 8 different favourite groups which are HD Bambini Sport Serie Lista1 Lista2 Lista3 and Lista4 To create or edit the favorite...

Page 42: ...use pq to select the audio language you like to have as first priority if available Confirm with OK SecondaryAudio Press OK button to open the pop up menu and use pq to select a language that will be...

Page 43: ...our selection Confirm with OK TVType Options are PAL G and NTSC Press OK button to open the pop up menu and use pq to make your selection Confirm with OK AudioMode This setting allows you to manage th...

Page 44: ...list use pq to select the channel and confirm with OK StartDate Use 0 9 buttons to set the time to activate the timer Reminder Here you can set the advance in which to signal the start of the timer Us...

Page 45: ...r to turn off automatically The options available are 1Hour 2Hours 3 Hours default setting 4Hours or Close to disable the function NOTE When on StandbyMode RealStandby the receiver to allow checking f...

Page 46: ...home transponder 10992 V 27500 belonging to the frequencies present on satellite Hotbird 13E check that the signal level appears and is good enough then select SearchStart and press OK button Then wa...

Page 47: ...item Pressing OK displays the complete text With COLOR buttons it is also possible to edit the RSS list by adding or deleting the categories 7 5 SMARTCARDTIV SAT This menw allows you to find all info...

Page 48: ...t either the USB device is already formatted to FAT32 n STRONG cannot guarantee the playback of all files although extensions are listed as it depends on file size codec bit rate and resolution 8 1 Mo...

Page 49: ...t automatically all the parameters not editable and automatically connects to the network Selecting Manual the parameters have to be set manually otherwise no connection will be detected 9 1 IP Settin...

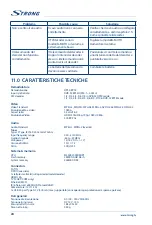
Page 50: ...Signal is weak Or Antenna Cable is unplugged Check whether the Antenna is connected well or reposition the Antenna Or restart the STB No video is displayed on the TV screen The video cable is not prop...

Page 51: ...ner Type1 F Type IEC169 24 Female 75ohm Input frequency range 950 2150 MHz Signal level 60 to 25 dBm LNB power 13 18 V DC 1 V DiSEqC version 1 0 1 1 1 2 Other SCR dCSS System memory CPU M3528 2000DMIP...

Reviews: