9
INSTALLATION, CONT’D: MAIN POWER SWITCH / TOE-KICK & AIR INTAKE GRILLE / PLUG-IN
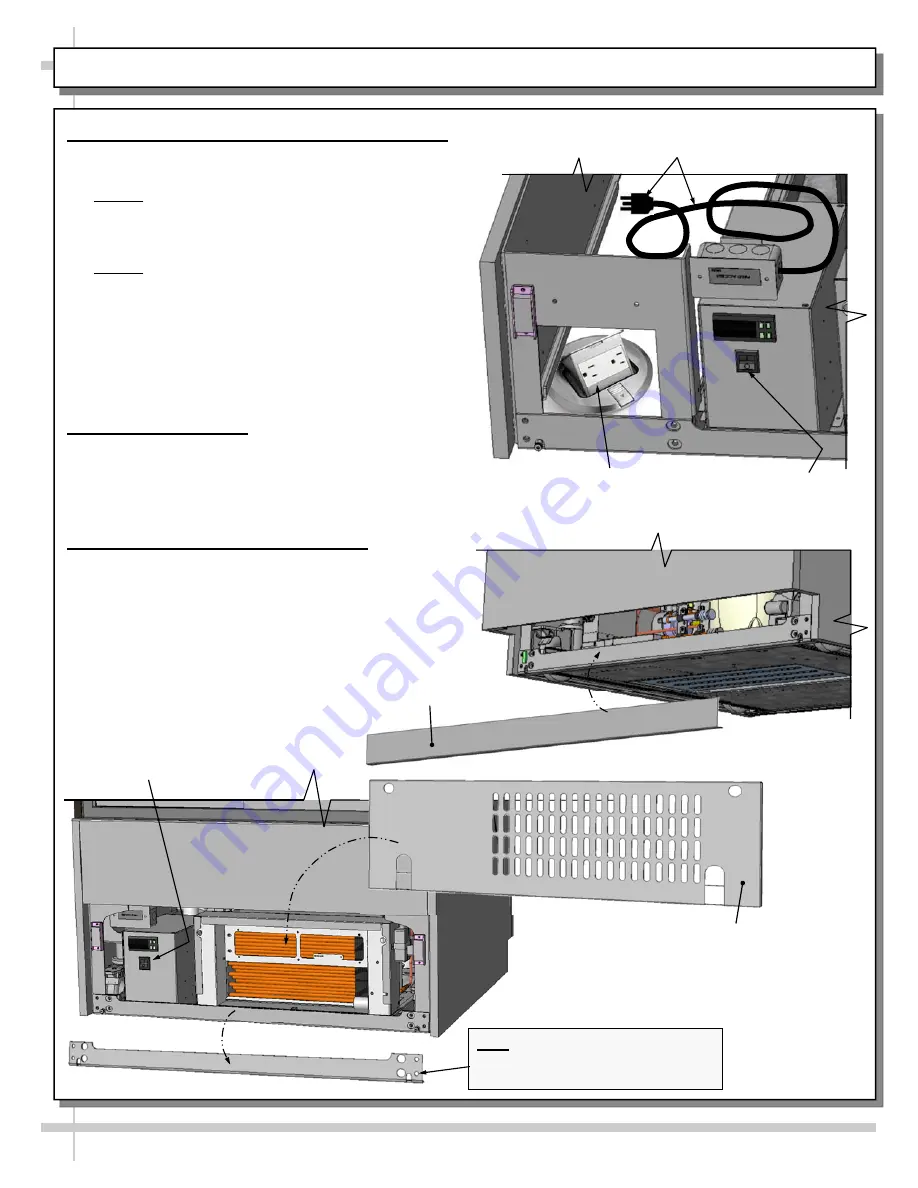
9. Plug Case In / Turn Main Power Switch On
•
Power cord with plug is factory-supplied.
•
Plug case into customer-supplied electrical outlet.
•
Note 1: Partially-disassembled view at right is
shown with casters removed for illustrative
purposes only. View/location of floor receptacle
is for illustrative purposes only.
•
Note 2: Due to space constraints, it may be
necessary to pull out condenser package to
maneuver power cord plug around components
and into receptacle.
•
Turn main power switch on.
•
Check that case is energized. Lift deck pans to
confirm that evaporator fans are rotating).
•
Turn on LED light switch at front-left header.
10. Toe-Kick To Case
•
After case has been fully assembled and is in
position, return toe-kick to case.
•
Toe-kick is held in place by magnets only. No
screw replacement is required.
11. Return Air Intake Grille To Case
•
After case has been energized and main power
switch has been turned on, return air intake grille
to case.
•
Air intake grille is held in place by magnets.
Screw replacement is not required.
•
See illustration below.
Main Power Switch
Front Toe-Kick
Air Intake Grille
Factory-Supplied Power
Cord With Plug
Customer Supplied Receptacle (Sample
Floor Unit Illustrated). Casters Removed
For Illustrative Purposes Only.
Main Power
Switch
Note: Shipping Brace That Is At Air
Intake Side of Condenser Package
(Shown) Must Be Removed!


