Mis
c
e
lla
neou
s
18
Precautions
EN
• Be sure to use only one cleaning sheet per cleaning
procedure. Using more than one sheet for a single roller
cleaning procedure may result in malfunction.
1
If thermal head cleaning has not been performed,
perform steps 1 to 5 of “Thermal head cleaning” on
page 17.
Note
When performing roller cleaning, do not pull out the
media tray after thermal head cleaning is performed.
2
Remove the paper that is ejected after thermal head
cleaning is performed.
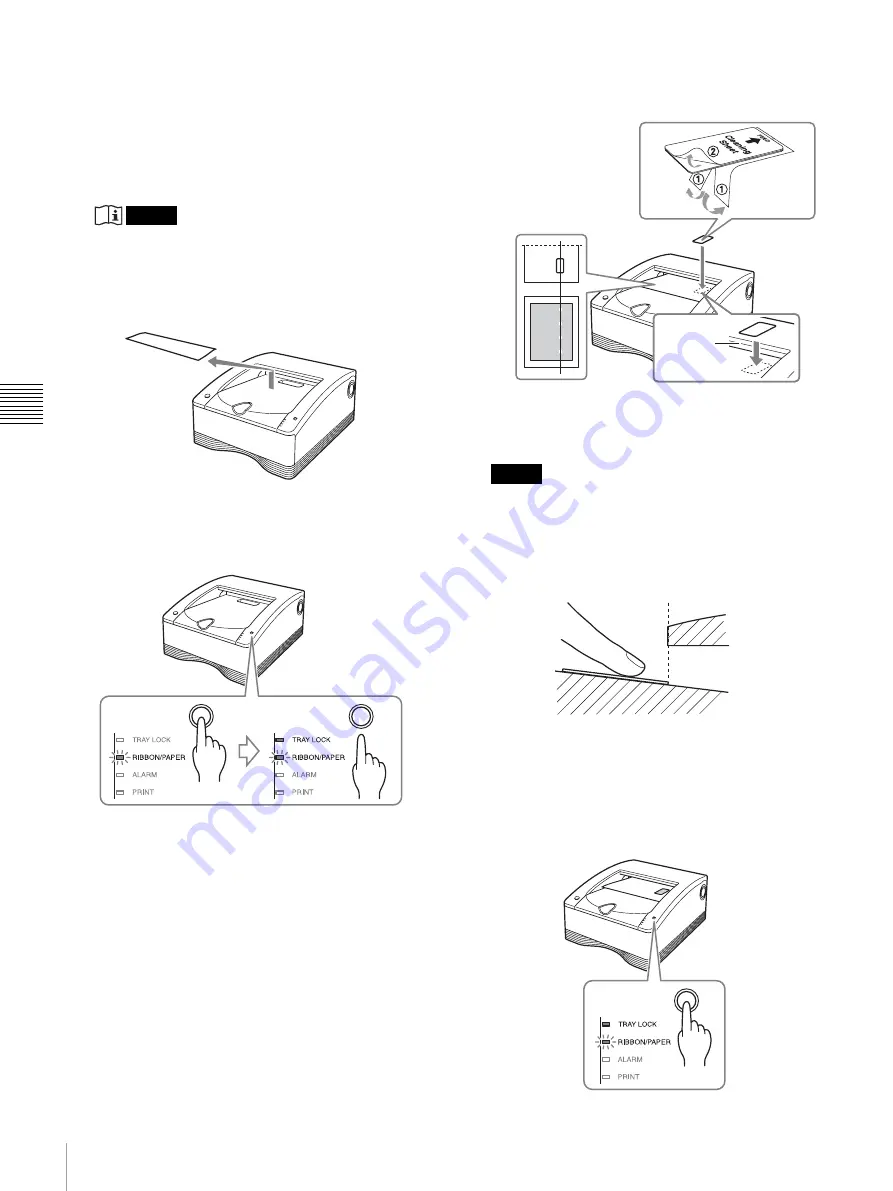
3
Keep the STOP button pressed and take your finger
off the button when the TRAY LOCK indicator is lit.
About 20 cm of paper is fed out of the printer from the
paper outlet.
4
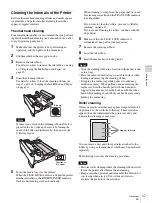
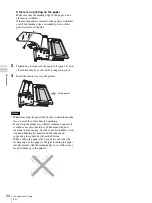
Remove the backing paper
1
from the cleaning sheet
and attach the cleaning sheet to the partially ejected
paper, then remove the backing paper
2
.
Notes
• Orient the scratched printout that you kept in the
direction it was facing when ejected, and use it to
align the position of the cleaning sheet with the
position of the scratches.
• Press the cleaning sheet with your finger to make
sure that it is firmly affixed.
• Make sure there is no air trapped under the cleaning
sheet and the corners of the sheet are not curling up.
Such cases will result in paper jams.
• If air is trapped under the cleaning sheet, be sure to
press it out.
5
Press the STOP button.
Roller cleaning with the cleaning sheet starts.
Attach the cleaning
sheet vertically in the
position where the
scratches appeared.
When attaching the cleaning
sheet, align its edge with the
edge of the paper outlet.
Paper
outlet
Paper outlet

