background image

ZUMA R300 

High Current DC Power Supply User Manual

®

pg 9


DRILL TEMPLATE

HOLE LOCATIONS

#4 SCREWS

Installation Instructions

Locate the Drill Template 

that is included in the box. It is also 

available for download here:


strymon.net/support/zuma-r300

.

Choose your mounting location.

 Tape the 

Drill Template

, logo side 

up, in the location you want to install your Zuma R300.
This illustration shows mounting to the top of your pedalboard. 
To mount Zuma R300 to the bottom of your pedalboard, turn the 
pedalboard over before placing the Drill Template logo side up in 
the location you want to install your Zuma R300.

Drill holes.

 Drill through the two marked 

hole locations 

with a 1/8” 

(3mm) bit. Remove the drilling template. 

Attach Zuma R300.

 Place Zuma R300 over the holes. Install from 

the reverse side of your pedalboard using the provided 

#4 screws


(3/8”).

1

3

4

2

Zuma R300 features built in threaded hardware for easy mounting to 
the top or bottom of most pedalboards.

Summary of Contents for ZUMA R300

Page 1: ...USER MANUAL ...

Page 2: ...e only attachments and or accessories specified by Strymon Unplug during lighting storms or when unused for long periods of time Do not attempt to service this unit yourself as opening or removing cover may expose you to dangerous voltage or other hazards Refer all servicing to qualified Strymon service personnel Servicing is required when the unit has been damaged in any way such as a power cord ...

Page 3: ...OISTURE The lightning flash with an arrowhead symbol within an equilateral triangle is intended to alert the user to the presence of uninsulated dangerous voltage within the product s enclosure that may be of sufficient magnitude to constitute a risk of electric shock The exclamation point within an equilateral triangle is intended to alert the user to the presence of important operating and maint...

Page 4: ...pansion kit The heart of the system is a Strymon Zuma or Ojai power supply like the Zuma R300 shown above which connects to an AC power outlet Additional outputs are added to the system by connecting one or more Ojai expansion kits sold separately to the 24V OUT jack of the power supply ZUMA R300 Zuma R300 is a flexible low profile high output power supply that provides ultra clean isolated power ...

Page 5: ...C CABLE Connect the included IEC cable to Zuma R300 and plug the other end into an AC power outlet Zuma R300 operates worldwide with the appropriate IEC cable 24V DC OUT Connect a Strymon Ojai sold separately to the 24V DC OUT jack and gain additional outputs for your pedals ...

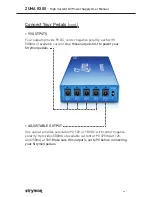
Page 6: ... the included 5 5mm x 2 1mm pedal cables Additional outputs can be added by connecting a Strymon Ojai sold separately to the 24V OUT jack Each output is dual isolated for noise free operation Zuma R300 will power most effects pedals on the market including all Strymon pedals Check with each pedal manufacturer for recommended voltage polarity and required current For pedals that have unique power r...

Page 7: ...tive polarity It provides 500mA of available current at 9V 375mA at 12V and 250mA at 18V Make sure this output is set to 9V before connecting your Strymon pedals 9V OUTPUTS Four outputs provide 9V DC center negative polarity each with 500mA of available current Use these outputs first to power your Strymon pedals Connect Your Pedals cont ...

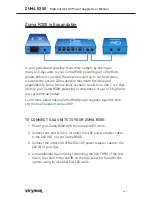
Page 8: ... R300 powering a combination of up to 15 high and low current draw pedals Learn more about linking Zuma R300 power supplies together here strymon net support zuma r300 TO CONNECT OJAI UNITS TO YOUR ZUMA R300 1 Power your Zuma R300 with the included IEC cable 2 Connect one end of Ojai s included EIAJ 05 power adapter cable to the 24V OUT on your Zuma R300 3 Connect the other end of the EIAJ 05 powe...

Page 9: ...tration shows mounting to the top of your pedalboard To mount Zuma R300 to the bottom of your pedalboard turn the pedalboard over before placing the Drill Template logo side up in the location you want to install your Zuma R300 Drill holes Drill through the two marked hole locations with a 1 8 3mm bit Remove the drilling template Attach Zuma R300 Place Zuma R300 over the holes Install from the rev...

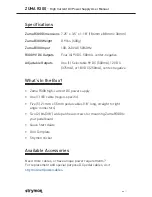
Page 10: ... 1mm barrel connectors straight to right angle 18 length Detachable IEC power cable included 24V Out jack allows connection to additional Strymon Ojai expansion units sold separately TECHNOLOGY Five 5 individual custom transformers one per channel deliver clean consistent power Worldwide power compatibility ensures no hassle international touring Energy efficient compact design CONSTRUCTION Lightw...

Page 11: ...5mA or 18V DC 250mA center negative Zuma R300 high current DC power supply One 1 IEC cable region specific Five 5 2 1mm x 5 5mm pedal cables 18 long straight to right angle connectors Two 2 4 3 8 wide pan head screws for mounting Zuma R300 to your pedalboard Quick Start Guide Drill Template Strymon sticker Need more cables or have unique power requirements For replacement and special purpose DC pe...

Page 12: ...n the case of malfunction the purchaser s sole recourse shall be repair or replacement as described in the preceding paragraphs Strymon will not be held liable to any party for damages that result from the failure of this product Damages excluded include but are not limited to the following lost profits lost savings damage to other equipment and incidental or consequential damages arising from the...

Page 13: ... our website at strymon net support for Return Authorization and information Proof of original ownership may be required in the form of a purchase receipt For International Customers Contact the Strymon dealer from which the product was purchased from in order to arrange warranty repair service Strymon is a division of Damage Control LLC REVA 11 10 17 ...

Reviews: