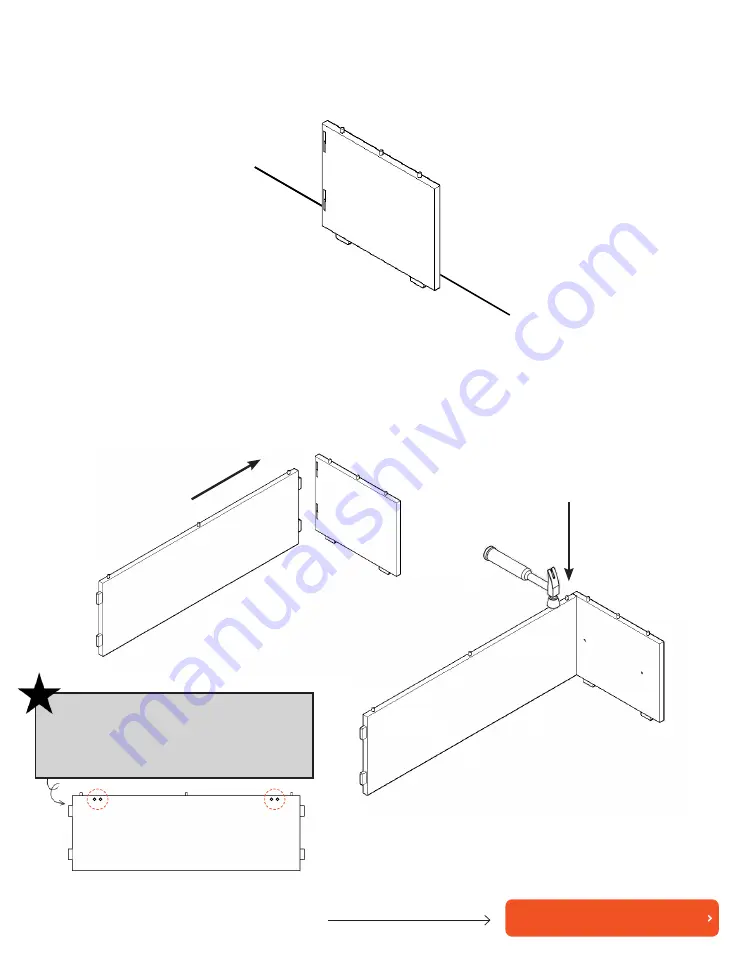
lean R side panel (A1) against a wall as shown.
3
4
insert connectors on back panel (B) into slots on R side panel (A1). push down at the
connection to lock into place. if needed, use hammer with hammer cap (J) to tap until
secure.
still confused? click to watch the assembly video
important!
be sure that the holes located on back
panel (B) are facing OUT, as seen in the
images above.
B
back panel


