8
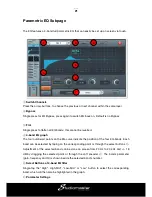
①
Switch Channels
Press the arrow-buttons, to choose the previous or next channel within the same layer
②
Bypass
Single press for EQ Bypass, press again to switch EQ back on. Default is no Bypass
③
Flat
Single press to flatten all EQ bands; this cannot be reverted.
④
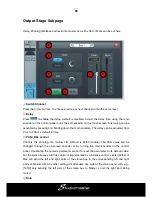
4-band EQ graph
The four numbered points on the EQ-curve indicate the position of the four EQ-bands. Each
band can be selected by taping on the corresponding point or through the select buttons
⑤
.
Adjustment of the selected band can be done on screen from 20 Hz to 20 kHz and +/- 18
dB by dragging the selected point or through the soft encoder
⑥
. The bands parameter
(gain, frequency and Q) is shown beside the selected band’s number.
⑤
Select Buttons of 4-band EQ filter
Single-tap the “High”, High-Mid”, “Low-Mid” or “Low” button to select the corresponding
band, which will then also be highlighted in the graph.
⑥
Parameter Settings
Gain, Frequency and Q can be adjusted using the on-screen soft-encoder by selecting it
through touch and subsequently “dragging” it to point towards the desired value. The
selected soft-encoder can also be adjusted using the blue-lit main encoder on the front
panel. Pressing and holding down the main encoder allows for fine adjustment of the
selected parameter.
Gain:
each band can be adjusted between -18 dB and +18 dB. Default setting is 0 dB.
Frequency
: each band can be set to a value between 20 Hz and 20 kHz. Default values are:
HF 4kHz, HMF 1kHz, LMF 200 Hz, LF 60Hz. The terms HF, HMF, LMF and LF only refer to
the initial setting of the bands; there is no restriction in setting the EQ bands so after setup
LF may actually be at the top of the frequency range.
Q
: allows bandwidth adjustment from 0.5(wide) to 10.0(narrow). Default is 0.5.
⑦
Library
The library allows to save and load user EQ settings. Tap the dropdown button and select a
library entry from the list to load its settings. Tap the “Save” button and select the desired
library slot (1 – 16) from the list to save the current EQ settings. A soft keyboard will pop-up
on screen to enter a name for the setting. Finally press “confirm” to save the setting or
“cancel” to abandon.


