29
Final assembly (continued)
Put the last parts back in place: (continued)
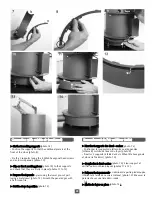
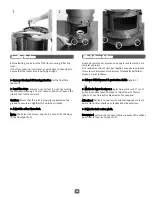
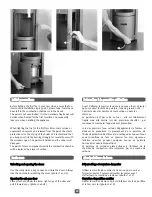
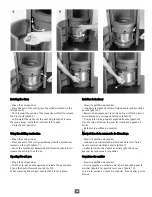
> the panels: position the lower part by placing the holes over
the positioning cones [photo 7]. Then fix the upper part of the
panels by screwing them into place (using 4 M5x8 hexagonal
head screws) [photo 8].
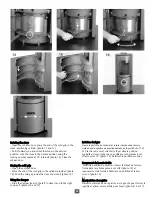
> the 2 upper plates: clip the front part of the plate into place
[photo 9]. Then place the rear part of the plate in position
[photo 10].
> the ash pan door [photo 11].
Caution: Check that the blocking screws in the combustion
chamber for transportation purposes have been removed
[photo 12].
Montage final (suite)
Remettez en place les dernières pièces : (suite)
> les parements: placer la partie basse en mettant les trous
dans les cônes de positionnement [photo 7]. Fixer ensuite la
partie haute des parements en les vissant (à l'aide de 4 vis M5
x 8 tête hexagonale) [photo 8].
> les 2 tablettes supérieures : clipper la partie avant de la
tablette [photo 9].Déposer ensuite la partie arrière de la
tablette [photo 10].
> le portillon du cendrier [photo 11].
Attention! Vérifier que les vis de blocage transport situées
dans la chambre de combustion soient bien enlevées [photo
12].
Summary of Contents for 30 Compact
Page 1: ...30 0 CO OMPAC CT ...
Page 2: ...2 ...
Page 8: ...8 ...
Page 9: ...9 30 COMPACT ...
Page 14: ...14 ...
Page 15: ...15 30 COMPACT ...
Page 31: ...31 30 COMPACT ...
Page 47: ...47 ...
Page 57: ...57 ...
Page 63: ...63 ...


