background image

1

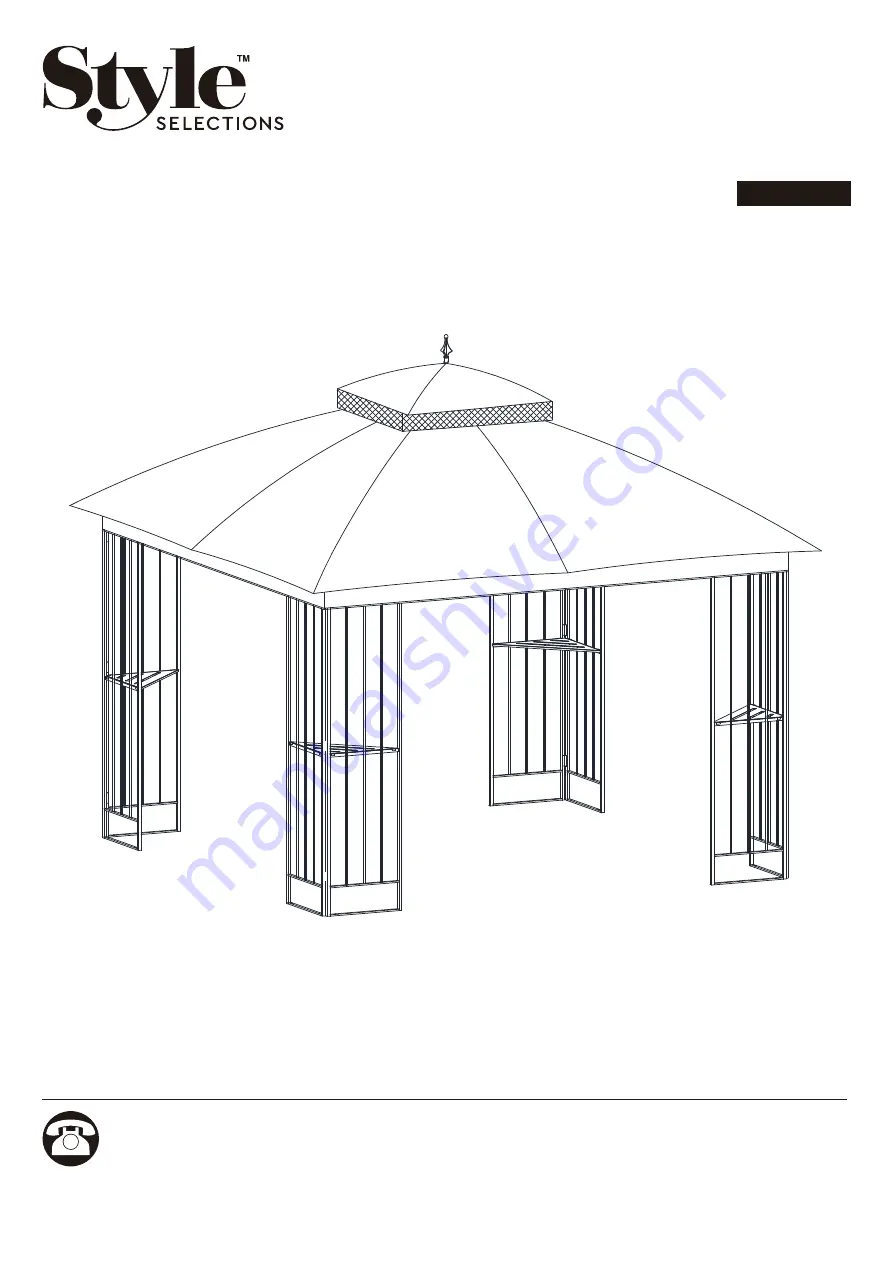
GAZEBO

ITEM #1839857/


#2808043/


#2808044  

MODEL #TPGAZ9116/


#TPGAZ9116B/


#TPGAZ9116A  


3

1

.

p

 l

o

ñ

a

p

s

E

Serial Number ____________________________   Purchase Date  _________________________

Questions, problems, missing parts? 

Before returning to your retailer, call our  

customer service department at 1-877-888-8225, 8 a.m. - 8 p.m., EST, Monday - Sunday.

AR19062

Style Selections is a trademark or registered 

trademark of LF, LLC. All Rights Reserved.

Summary of Contents for 1839857

Page 1: ..._________________________ Purchase Date _________________________ Questions problems missing parts Before returning to your retailer call our customer service department at 1 877 888 8225 8 a m 8 p m...

Page 2: ...2 TABLE OF CONTENTS Package Contents 3 Hardware Contents 4 Safety Information 5 Preparation 5 Assembly Instructions 6 Care and Maintenance 12 Warranty 12 Replacement Parts List 12...

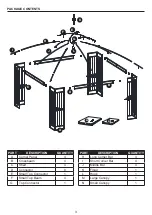
Page 3: ...B Crossbeam 4 C Shelf 4 D Connector 8 E Small Top Connector 1 F Small Top Beam 4 G 1 H Long Corner Bar Short Corner Bar 4 I 4 PART DESCRIPTION QUANTITY J Middle Bar 4 K L M N Finial Hook Large Canopy...

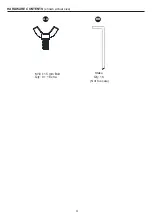
Page 4: ...4 HARDWARE CONTENTS shown actual size AA BB Stake Qty 16 Not to scale M10 x 15 mm Bolt Qty 8 1 Extra...

Page 5: ...me 30 minutes Tools Required for Assembly not included Safety goggles Gloves Hardhat Stepladder SET UP YOUR GAZEBO PROPERLY 2 people are recommended for safe assembly Keep all children pets and other...

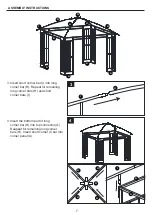
Page 6: ...TRUCTIONS 1 AA Hardware Used x 8 M10 x 15 mm Bolt A A A A A B B B B D 2 Attach the crossbeam B to the Corner panel A with connector D and Bolt AA Repeat the procedure for the remaining corner panels A...

Page 7: ...bar H Repeat for remaining long corner bars H and short corner bars I 4 Insert the bottom part of long corner bar H into top connector G Reapeat for remaining long corner bars H Insert short corner I...

Page 8: ...A ASSEMBLY INSTRUCTIONS J r a b e l d d i m f o t r a p p o t e h t t r e s n I 5 into top connector G Repeat for all middle bars J Insert middle bar J into crossbeam B Attach hook L to top connector...

Page 9: ...9 ASSEMBLY INSTRUCTIONS A M N A C A A ebo z a g f o p o t n o M y p o n a c e g r a l e c a l P 6 assembly Do not spread canopy yet 6 M...

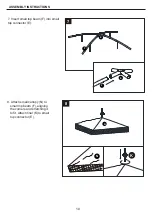
Page 10: ...l top beam F into small top connector E 8 Attach small canopy N to small top beam F aligning the corners and stretching it to fit Attach final K to small top connector E 10 ASSEMBLY INSTRUCTIONS E F 7...

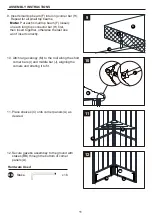
Page 11: ...he last one won t insert correctly 10 Attch large canopy M to the roof along the short corner bars I and middle bar J aligning the corners and streting it to fit 11 Place shelves C onto corner panels...

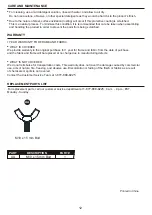
Page 12: ...spills is not covered Contact the Customer Service Team at 1 877 888 8225 For cleaning use a mild detergent solution rinse with water and allow to air dry Do not use acetone abrasive or other special...

Page 13: ..._ _ _ _ _ _ _ _ _ _ _ _ _ _ _ _ _ _ _ _ _ _ _ e i r e s e d o r e m N Preguntas problemas piezas faltantes Antes de volver a la tienda llame a nuestro Departamento de Servicio al Cliente al 1 877 888...

Page 14: ...14 NDICE Contenido del paquete 15 Aditamentos 16 Informaci n de seguridad 17 Preparaci n 17 Instrucciones de ensamblaje 18 Cuidado y mantenimiento 24 Garant a 24 Lista de piezas de repuesto 24...

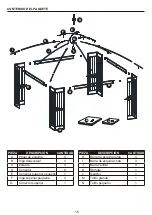
Page 15: ...l 4 C Estante 4 D Conector 8 E Conector superior peque o 1 F Viga superior peque a 4 G 1 H Barra de esquina larga Barra de esquina corta 4 I 4 PIEZA DESCRIPCI N CANTIDAD J Barra central 4 K L M N Rema...

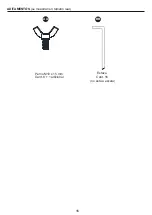
Page 16: ...16 ADITAMENTOS se muestran en tama o real AA BB Estaca Cant 16 no est a escala Perno M10 x 15 mm Cant 8 1 adicional...

Page 17: ...amblaje 30 minutos Herramientas necesarias para el ensamblaje no se incluyen gafas de seguridad guantes casco escalera de tijera ENSAMBLE EL GAZEBO ADECUADAMENTE Se recomienda que haya 2 personas para...

Page 18: ...A Aditamentos utilizados x 8 Perno M10 x 15 mm A A A A B B B B D 2 Fije la viga transversal B al panel de esquina A con el conector D y un perno AA Repita este procedimiento con los paneles de esquina...

Page 19: ...nto con las barras de esquina largas H y cortas I restantes 4 Inserte la parte inferior de la barra de esquina larga H en el conector superior G Repita el procedimiento con las barras de esquina larga...

Page 20: ...conector superior G Repita el procedimiento para todas las barras centrales J Inserte la barra central J en la viga transversal B Fije el gancho L al conector superior G INSTRUCCIONES DE ENSAMBLAJE 5...

Page 21: ...ASSEMBLY INSTRUCTIONS A M N A C A A 6 M rte a p a l n e M e d n a r g o d l o t l e e u q o l o C 6 superior del ensamble del gazebo No extienda el toldo a n 21...

Page 22: ...en el conector superior peque o E 8 Fije el toldo peque o N a la viga superior peque a F alinee las esquinas y est relas para que se ajuste Fije el remate K al conector superior peque o E 22 INSTRUCCI...

Page 23: ...la ltima no se insertar correctamente 10 Fije el toldo grande M al techo a lo largo de las barras de esquina cortas I y la barra central J alinee las esquinas y est relas hasta lograr el ajuste correc...

Page 24: ...ames no est n cubiertos P ngase en contacto con el equipo de Servicio al Cliente al 1 877 888 8225 Para limpiar use una soluci n de detergente suave enju guelo con agua y deje que se seque al aire No...

Reviews: