background image

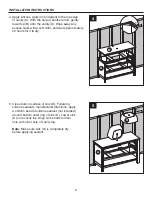
6. Following manufacturer’s enclosed assembly 

    instructions, install faucet and drain kit (E) to 

    vanity (A). 

7

INSTALLATION INSTRUCTIONS

CAUTION

7. To reinstall drawer into vanity (A), fully extend 

    metal glide tracks. Gently lower and slide 

    drawer box into rear glide catch. Next, lower 

    drawer box down to completely rest on 

    extended glides. Then, push plastic levers to 

    lock the drawer box in place.


    Note:

 To adjust the drawer box height, spin 

    the adjustment wheel to the left to raise the 

    drawer box or spin the adjustment wheel to 

    the right to lower the drawer box. You can 

    adjust the left and right side glide heights 

    independently in order to find the drawers best 

    alignment position.  

DO NOT 

force drawer or damage to glide may 

occur. If drawer does not slide in with ease, 

remove and try again from the start.

6

A

B

E

D

7

A

1

3

2

Summary of Contents for Cromlee 1211VA-48-242

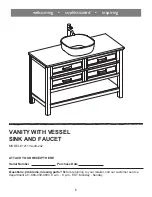
Page 1: ...48 242 Serial Number Purchase Date 1 ATTACH YOUR RECEIPT HERE Questions problems missing parts Before returning to your retailer call our customer service department at 1 866 439 9800 8 a m 8 p m EST...

Page 2: ...TABLE OF CONTENTS Package Contents 3 Hardware Contents 3 Safety Information 3 Preparation 4 Assembly or Installation Instructions 4 Care and Maintenance 8 Warranty 8 Replacement Parts List 9 2...

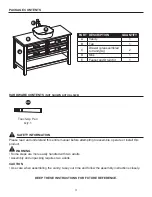
Page 3: ...two adults Assembly and unpacking requires two adults CAUTION KEEP THESE INSTRUCTIONS FOR FUTURE REFERENCE HARDWARE CONTENTS NOT SHOWN ACTUAL SIZE Touch Up Pen Qty 1 AA PART DESCRIPTION QUANTITY A Va...

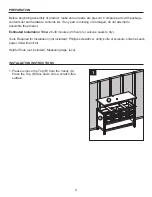
Page 4: ...sure all parts are present Compare parts with package contents list and hardware contents list If any part is missing or damaged do not attempt to assemble the product Tools Required for Installation...

Page 5: ...our installation site secure vanity A to wall stud If possible secure vanity A to two wall studs for increased stability Note Use preassembled levelers on legs of vanity A to level the item Twisting t...

Page 6: ...oth and wait approximately 24 hours for it to dry 5 Clean bottom surface of sink D Following silicone sealant s manufacturer directions apply a uniform bead of silicone sealant not included around bot...

Page 7: ...t on extended glides Then push plastic levers to lock the drawer box in place Note To adjust the drawer box height spin the adjustment wheel to the left to raise the drawer box or spin the adjustment...

Page 8: ...sequential or special damages arising at or in connection with product use or performance except as may otherwise be accorded by law The manufacturer disclaims any and all implied warranties IMPORTANT...

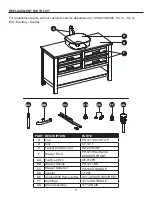
Page 9: ...Top PH 1211VA 48 TOP D Sink CF 1211 F Drawer Front PH 1211VA 48 242 DRAWER FRONT AA Touch up Pen OF 0120R E Faucet And Drain Kit FS6A0194NP BB Drawer Handle PH 1211 BN CC Drawer Glide Set PU 14X3 HAND...

Reviews: