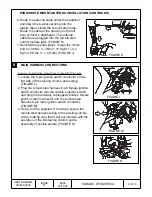
CONTROL MODULE CONNECTION & MOUNTING / IMMOBILIZER INTERFACE MOUNTING
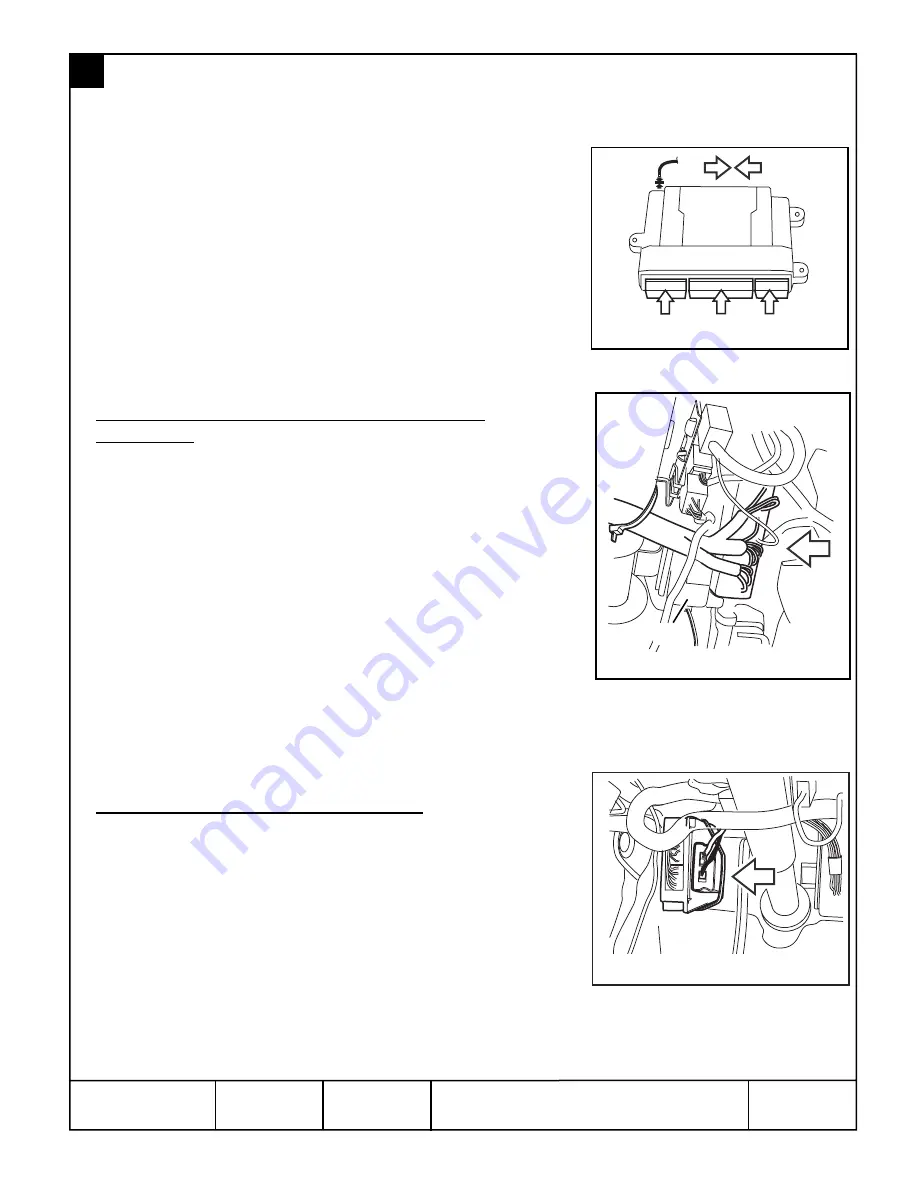
1. Route the previously installed antenna cable towards the
remote start harness 24-pin, 16-pin and 10-pin
connectors. At the top of the steering column secure the
antenna cable along the way with 2 of the supplied 8” tie
wraps.
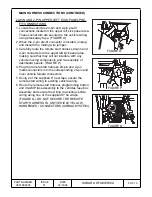
2. Plug the 24-pin, 16-pin and 10-pin connectors into the
front of the remote start control module making sure the
connectors are completely seated (they will only fit into
the control module one way). (FIGURE R) Plug the 2-pin
antenna cable connector into the 2-pin port on the back
of the remote start control module. NOTE: The small 4-
pin and 5-pin connectors on the control module are not
used.
PART NUMBER
H001SXA000
6 OF 10
ISSUE
01
DATE
03/1
4
/06
SUBARU OF AMERICA
7
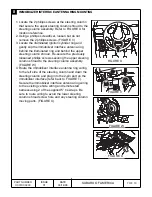
FIGURE S
24-Way
10-Way
Antenna
16-Way
FIGURE R
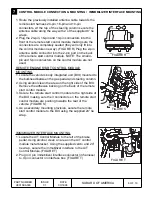
IMMOBILIZER INTERFACE MOUNTING
1. Locate the A/T Control Module to the left of the brake
pedal. Using alcohol, clean an area on the A/T control
module metal bracket. Using the supplied velcro and 24”
tie wrap, secure the immobilizer interface to the A/T
Control Module. (FIGURE T)
2. Plug in 4 pin immobilizer interface connector (in harness)
to 4 pin connector on interface box. (FIGURE T)
REMOTE ENGINE START CONTROL MODULE
MOUNTING
1. Locate the vehicle’s body integrated unit (BIU) mounted to
the bulkhead between the gas pedal and steering column.
2. Using alcohol clean the area on the right side of the BIU.
Remove the adhesive backing on the back of the remote
start control module.
3. Secure the remote start control module to the right side of
the BIU making sure the 3 connectors on the remote start
control module are pointing towards the rear of the
vehicle. (FIGURE S)
4. As a secondary mounting provision, secure the remote
start control module to the BIU using the supplied 24” tie
wrap.
FIGURE T
BIU

