


11
ENGLISH
www.sulion.es
ATC:
916749481 - info@sulion.es /
SAT :
916749483 - sat@sulion.es
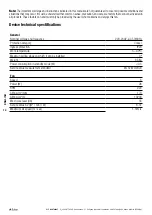
Congratulations on your purchase
Congratulations on your purchase of the latest in energy
efficient ceiling fans.
Energy efficiency:
SULION motors belong to the latest
design technology in fans, saving up to 70% in energy
consumption with DC motors.
Silent operation:
Thanks to R&D advances in our motors, we
have effectively reduced their operating noise in all models.
Comfort:
DC motor fans include up to 6-speed remote
control which provides superior comfort levels in their use.
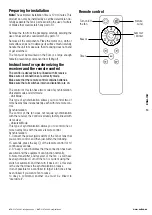
Safety precautions
Follow these instructions carefully to enjoy
maximum safety in the installation and
operation of this equipment.
The electrical installation of the ceiling fan must
be carried out by an authorized electrician
in order to be covered by our warranty.
Please remember to require your installer to
test all the fan functions before you leave.
In case of any doubt from the installer, do not
hesitate to contact us.
This device can be used by children aged 8
years and above and people with reduced
physical, sensory or mental abilities or lack
of experience or knowledge, if they have
been given appropriate supervision or training
regarding the use of the device and they
understand the dangers of its use. Children
should not play with the device. The cleaning
and maintenance of the device should not be
carried out by children without supervision.
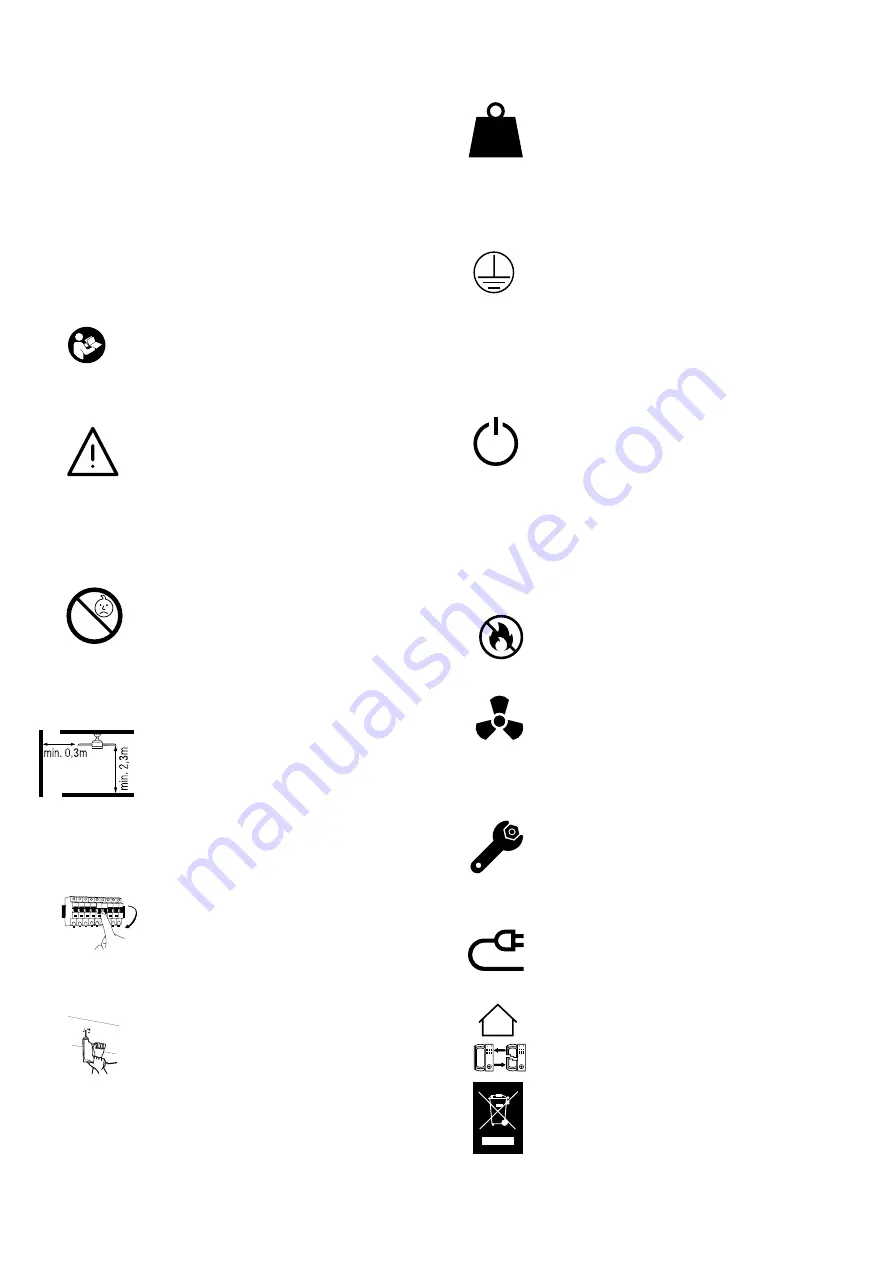
The fan must be installed in such a way that
the blades are more than 2,3m above the
ground. Make sure that there is a space of at
least 30cm between the fan’s blades and any
wall or other obstacle that they could hit. It is
important to note that the greater the distance,
the more efficient the air flow produced will
be.
Any action performed for the electrical
connection of the device, such as its cleaning,
must be carried out after ensurin that the
general power supply is disconnected, by
removing the corresponding fuse or disarming
the protective switch in order to ensure total
isolation of the power supply.
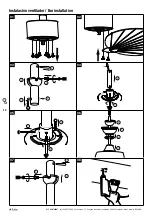
The system of attaching the fan bracket to the
ceiling will depend on the type of ceiling where
the installation is to be done. The decision
on which attachment system to use and the
quantity is the installer’s responsibility.
The fan must be installed at a location on
the ceiling sch that the blades are at least
2.3 m above the floor and 300 mm from any
object or wall. The mounting bracket must be
attached to a ceiling structure that is capable
of supporting a minimum of 30 kg using the two
screws provided. At least 30 mm of the length
of the screws must be screwed into the bracket.
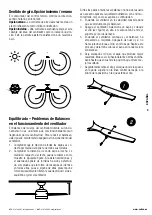
When deciding where to mount the fan, be sure
that there is at least 30 cm of space between the
fan and any wall or other obstruction that the fan
blades could collide with. The greater this distance,
the more effective the air flow produced.After the
fan is mounted, be sure that the blades are no less
than 2.3 m above the ground
The ground wire of the fan must be connected to
the earth network of the installation, to avoid any
derivation that may put people in danger.
Do not connect the fan’s power supply to any
dimmers, potentiometers, or light switches, as
it will cause the fan to malfunction and/or will
damage the motor. For the electrical connection it
is necessary to incorporate a switch disconnector
in accordance with the installation regulations,
which ensures an omnipolar cut, directly
connected to the power terminals and must
have a contact separation at all its poles, which
provides total disconnection under conditions of
Category III overvoltage. The fan must be directly
connected to a properly protected installation
circuit (magnetothermal differential switch with
the adequate size for the fan’s consumption and
technical specifications). Only use the fan’s control
to turn it on or stop it.
It is recommended not to use these types of fans
along with gas installations simultaneously in the
same room.
Do not insert anything that could hit the fan’s
blades into its pathway while it is moving, as this
could cause damage to people, can damage the
blades, and can offset the balance of the unit,
causing vibrations and wobbling.
After installing the fan, ensure that all fastenings
are secure and tightened in order to avoid any
noise caused by loose elements.Due to the fan’s
movement, certain fastenings may become loose.
Check all fastenings twice per year at a minimum
in order to ensure that they are sufficiently tight. If
necessary, they must be retightened.
If the power cord is damaged, it must be replaced
by the manufacturer, its after-sales service or
similar qualified personnel in order to avoid any
malfunction.
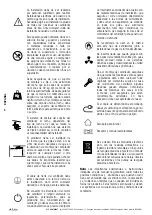
Only suitable for indoor.
Replaceable LED
Do not throw away electrical products together
with household waste. We ask you to recycle the
packaging at the collection points provided for this
purpose. Contact local authorities or your provider
for recycling advice. Thank you for recycling at the
collection points provided for this manual.
<8
Kg
OFF
OFF


