SECTION 5
300HH, 375, 375H, 375HH, 425 AND 425H USER MANUAL R00
65
E
LEMENT
I
NSPECTION
1. Insert a bright light source into the element
and look for any light leaks which indicate
the presence of damage (holes, cracks, etc.)
2. Inspect all gaskets and gasket contact sur-
faces of the housing and replace any dam-
aged ones.
3. Store clean elements for later use in a clean
container.
4. After installing the element, inspect and
tighten all air inlet connections before operat-
ing the compressor.
S
EPARATOR
E
LEMENT
R
EPLACEMENT
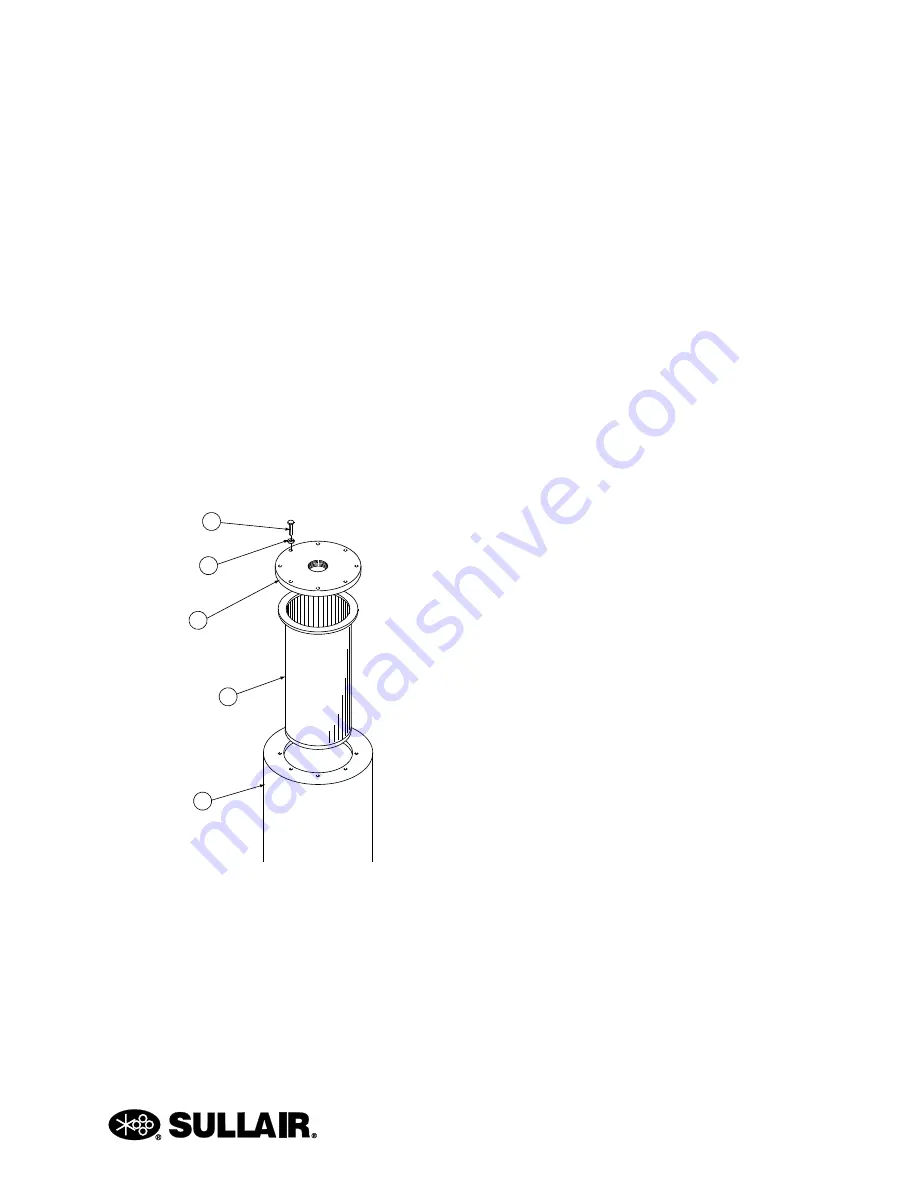
Refer to
. When compressor fluid
carryover is evident, after replacing or inspecting the
fluid return line strainer and orifice, the blowdown
valve and checking the oil; and all are in satisfactory
condition, the separator element must be replaced
with Kit number 250034-087 (element for air/fluid
separator).
1. Disconnect all sump cover piping connec-
tions to permit removal (return line, service
line, etc.).
2. Remove the fluid return line from the fitting
on the cover.
3. Remove the eight (8) cover bolts and wash-
ers and lift the cover off the sump.
4. Remove the separator element.
5. Scrape the old gasket material from the
cover and the flange on the sump. Do not
allow the scrapings to fall into the tank.
6. Install the new element.
7. Replace the sump cover and bolts. Lightly
tighten all the bolts and then gradually
tighten them alternating between bolts which
are diagonally opposite each other. Torque
the bolts to 160 ft-lbs (215 N•m).
8. Reconnect all piping. The fluid return line
tube should extend to the bottom of the sep-
arator element which will ensure proper
return line flow.
9. Clean the fluid return line strainer and clear
the orifice before starting the compressor.
10. After 24 hours of operation, tighten the sump
cover bolts to the value given in step 7.
P
ROCEDURE
F
OR
S
ETTING
S
PEED
A
ND
P
RESSURE
C
ONTROLS
O
N
P
ORTABLE
C
OMPRESSORS
E
QUIPPED
W
ITH
P
OPPET
V
ALVES
. Before adjusting
the compressor’s control system, the rated full-load
pressure and the high/low rpm settings must be
determined. This information is provided in
or can be obtained by contacting a Sullair
representative.
1
2
3
4
5
SU_0000670
1. Capscrew
2. Washer
3. Cover
4. Separator Element with Gaskets
5. Receiver Tank
Figure 5-3: Air/Fluid Separator
Summary of Contents for 300HH
Page 17: ...SECTION 1 15 Safety Symbols 2 ...
Page 18: ...SECTION 1 16 Safety Symbols 3 ...
Page 49: ...SECTION 2 300HH 375 375H 375HH 425 AND 425H USER MANUAL R00 47 2 9 WIRING DIAGRAM ...
Page 60: ...NOTES 58 ...
Page 79: ...NOTES ...


