29
MAINTENANCE
6.8
RADIATOR
6.8.1 INSPECTION
1.
Remove the radiator cap and check if engine coolant reaches the supply hole.
2.
Check the level of coolant in expansion tank. If the level is below the “
LOW
” mark, add as needed. Do not
overfill.
3.
Close the cap firmly. If the cap is loose or improperly tightened coolant can flow out and the engine may
overheat.
4.
Periodically check the radiator hoses and the hose clamps. If a radiator hose is damaged or if the coolant
leaks, it may cause overheating and serious burns.
6.8.2 FLUID DRAIN
1.
Wear protective equipment such as rubber gloves when handling engine coolant
–
it contains toxic
substances.
2.
Before draining engine coolant, place a container under the body of the engine. Do not directly drain on
floor, into a sewer or a source of water supply.
3.
Always simultaneously open both drain valves and the radiator cap. If the radiator cap remains closed, it
is not possible to drain the coolant completely.
4.
Remove the overflow hose of the radiator pressure cap to drain the expansion tank.
6.8.3 CLEANING
1.
Clean the core of the radiator and oil cooler (outside). Remove the dust between the fins and the water
pipe with running water.
CAUTION!
Do not clean the coolers with tools such as painting knives or screwdrivers. They may damage the fins
or the water manifold. it might also cause a fluid leakage and reduce cooler efficiency.
2.
Circulate a cleaning agent to clean the inside of the radiator system to remove scale sediments.
6.8.4 INSTALLATION
1.
Fill cooler with fresh coolant.
WARNING!
Do not mix different types of engine coolant. Such a mixture can initiate a chemical reaction generating
harmful products. The coolant is extremely flammable and explosive under certain conditions. Keep away
from flames and children.
—
In case of contact with skin or clothing, wash with water immediately.
—
In case of ingestion, induce vomiting and seek medical treatment.
2.
Do not overfill the expansion tank with coolant above the “
FULL
” level.
3.
Close the radiator cap securely. An incorrectly closed cap or an opening between the plug and the seat
may cause a leak.
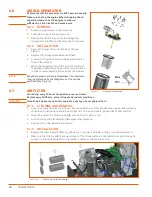
6.9
ENGINE LUBRICATION
Refer to Engine operator’s Manual for recommended engine lubricating oil, service intervals and
maintenance practices.
6.10
COMPRESSOR UNDERCARRIAGE
6.10.1 CLEANING
»
Regularly clean all components with water.
»
After the winter season, thoroughly clean galvanized parts with water.
6.10.2 MAINTENANCE
»
Use a multi-purpose type grease (MKG) or multi-purpose type grease with molybdenum disulfide
(MPGM) conforming to MIL-L-7866 for all parts except wheel bearings. Use wheel-bearing grease (WBG)
for lubricating the wheel bearings.
»
Torque the lug nuts after the first 65 miles.
»
During shutdown or storage, ensure sufficient ventilation.
Summary of Contents for D110PKU
Page 4: ......
Page 6: ...vi About This Manual ...
Page 13: ...5 2 SPECIFICATIONS TOPICS IN THIS SECTION Technical Data 6 Dimensions 7 ...
Page 16: ...8 Specifications ...
Page 44: ...36 Troubleshooting ...
Page 48: ...40 Parts Catalog 8 6 ENGINE ASSEMBLY ...
Page 50: ...42 Parts Catalog 8 7 ENGINE MOUNTING ASSEMBLY ...
Page 52: ...44 Parts Catalog 8 8 ENGINE TO FRAME ASSEMBLY ...
Page 54: ...46 Parts Catalog 8 9 BATTERY ASSEMBLY ...
Page 56: ...48 Parts Catalog 8 10 EXHAUST ASSEMBLY ...
Page 58: ...50 Parts Catalog 8 11 COMPRESSOR ASSEMBLY ...
Page 60: ...52 Parts Catalog 8 12 INLET VALVE ASSEMBLY ...
Page 62: ...54 Parts Catalog 8 13 AIR FILTER ASSEMBLY ...
Page 64: ...56 Parts Catalog 8 14 RECEIVER ASSEMBLY ...
Page 66: ...58 Parts Catalog 8 15 RECEIVER ASSEMBLY TO FRAME ...
Page 68: ...60 Parts Catalog 8 16 CONTROL TUBING ASSEMBLY ...
Page 70: ...62 Parts Catalog 8 17 COOLING ASSEMBLY ...
Page 72: ...64 Parts Catalog 8 18 COOLING ASSEMBLY ATTACHMENT TO FRAME ...
Page 74: ...66 Parts Catalog 8 19 COOLING SYSTEM HOSES AND RECOVERY TANK INSTALLATION ...
Page 76: ...68 Parts Catalog 8 20 OIL FILTER AND DISCHARGE HOSE ASSEMBLY ...
Page 78: ...70 Parts Catalog 8 21 FUEL TANK ASSEMBLY ...
Page 80: ...72 Parts Catalog 8 22 INSTRUMENT PANEL ASSEMBLY ...
Page 82: ...74 Parts Catalog 8 23 CANOPY ASSEMBLY ...
Page 84: ...76 Parts Catalog 8 24 CANOPY INSTALLATION ...
Page 86: ...78 Parts Catalog 8 25 LIFTING BAIL ASSEMBLY ...
Page 88: ...80 Parts Catalog 8 26 FRONT CROSSMEMBER ASSEMBLY ...
Page 90: ...82 Parts Catalog 8 27 LIGHT PACKAGE ...
Page 92: ...84 Parts Catalog 8 28 FENDER INSTALLATION ...
Page 94: ...86 Parts Catalog 8 29 AXLE AND WHEEL ASSEMBLY ...
Page 98: ...NOTES ...
Page 99: ...NOTES ...

