35
INSTAllATIoN AND oPERATIoN
4.12
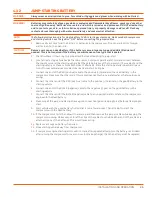
JUMP-STARTING BATTERY
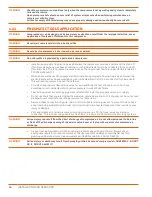
WARNING!
Always wear an acid-resistant apron, face shield with goggles and gloves when working with batteries!
WARNING!
Batteries may contain hydrogen gas which is explosive and flammable! Keep flames, sparks and any other
source of ignition away. Batteries also contain acid which is corrosive and poisonous. DO NOT allow battery
acid to contact eyes, skin, or fabrics. Serious personal injury or property damage could result! Flush any
contacted areas thoroughly with water immediately and seek medical attention.
NOTE!
The following instructions are for single battery 12 VDC starting systems only. Make sure both compressor
and starting vehicle have the ignition “OFF” before connecting the jumper cables.
1.
Remove all vent caps from the battery or batteries in the compressor. Do not permit dirt or foreign
matter to enter the open cells.
CAUTION!
Remove vent caps on dead battery if the battery is a maintenance type and add distilled water if
needed. This is not required if the battery is a maintenance-free type that is sealed.
2.
Check fluid level. If low bring to a proper level before attempting to jump-start.
3.
Locate the starting vehicle beside the compressor, but do not permit metal-to-metal contact between
the compressor and the starting vehicle. Set the parking brakes of the compressor (if provided) and the
starting vehicle, or chock or block both sides of all wheels. Place the starting vehicle in neutral or park,
turn off nonessential accessory electrical loads and start its engine.
4.
Connect one end of the RED (positive) cable to the positive (+) terminal on the dead battery in the
compressor. Make sure the other end of this cable does not touch any metal surface that would cause
arcing!
5.
Connect the other end of the RED (positive ) cable to the positive (+) terminal on the good battery in the
starting vehicle.
6.
Connect one end of the blACK (negative) cable to the negative (-) post on the good battery in the
starting vehicle.
7.
Connect the other end of the blACK (negative) cable to an unpainted metal surface on the compressor
engine with the dead battery.
8.
Make sure all the jumper cable clips have a good connection (good clamping force) before attempting to
start.
9.
Start vehicle with the good battery first and let it run a few minutes. Then attempt to start the
compressor with the dead battery.
10.
If the compressor starts then allow it to warm up and then remove the jumper cables while keeping the
compressor running. Make sure not to let the clips of the cables touch while either end of the cables are
attached to one of the batteries. This would cause arcing.
11.
Replace vent caps on battery if required.
12.
Move starting vehicle away from compressor.
13.
If compressor engine starting motor will not crank after repeated attempts or the battery is still dead
after running the compressor for over an hour (not taking charge), then the battery must be replaced.
Summary of Contents for D260UJD4PTOW
Page 4: ......
Page 6: ...vi About This Manual ...
Page 14: ...6 Safety ...
Page 21: ...13 Specifications 2 6 PTO SAE A DRIVE Figure 2 5 Power Take Off Auxiliary Drive Specs ...
Page 22: ...14 Specifications ...
Page 32: ...24 Component Description ...
Page 44: ...36 Installation and Operation ...
Page 58: ...50 Troubleshooting ...
Page 125: ...117 Parts Catalog ...
Page 134: ...NOTES ...
Page 135: ...NOTES ...

