English
- 4 -
mode automatically because there was no signal
for a long time.”
Press
OK
to continue.
The
Auto TV OFF
option(in the
System
>
Settings
>
More
menu) may be set to a value between 1 and 8 hours
by default. If this setting is not set as
Off
and the TV
has been left on and not been operated during the
set time, it will switch into standby mode after the set
time has expired. When you next switch-on the TV, the
following message will be displayed.
“TV switched to
stand-by mode automatically because no operation
was made for a long time.”
Press
OK
to continue.
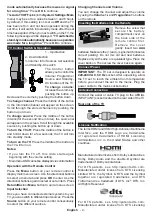
TV Control Switch & Operation
1 - Up direction
2- Down direction
3-Volume / Info / Sources List selection
and Standby-On switch
The Control button
allows you to control the
Volume / Programme /
Source and Standby-
On functions of the TV.
To change volume:
Increase the volume by
pushing the button up.
Decrease the volume by pushing the button down.
To change channel:
Press the middle of the button
in, the information banner will appear on the screen.
Scroll through the stored channels by pushing the
button up or down.
To change source:
Press the middle of the button
in twice(for the second time in total), the source list
will appear on the screen. Scroll through the available
sources by pushing the button up or down.
To turn the TV off:
Press the middle of the button in
and hold it down for a few seconds, the TV will turn
into standby mode.
To turn on the TV:
Press the middle of the button in,
the TV will turn on.
Notes:
•
If you turn the TV off, this circle starts again
beginning with the volume setting.
•
Main menu OSD cannot be displayed via control button.
Operation with the Remote Control
Press the
Menu
button on your remote control to
display main menu screen. Use the directional buttons
to select a menu tab and press
OK
to enter. Use the
directional buttons again to select or set an item. Press
Return/Back
or
Menu
button to quit a menu screen.
Input Selection
Once you have connected external systems to your
TV, you can switch to different input sources. Press
the
Source
button on your remote control consecutively
to select the different sources.
Changing Channels and Volume
You can change the channel and adjust the volume
by using the
/-
and
Programme
+/-
buttons
on the remote.
Inserting the Batteries into the Remote
Remove the screw that
secure the battery
compartment cover on
the back side of the
remote control first.
Remove the cover
gently. Insert two
AAA
batteries. Make sure the (+) and (-) signs match (observe
correct polarity). Do not mix old and new batteries.
Replace only with same or equivalent type. Place the
cover back on. Then screw the cover back on again.
Connect Power
IMPORTANT
: The TV set is designed to operate on
220-240V AC, 50 Hz
socket. After unpacking, allow
the TV set to reach the ambient room temperature
before you connect the set to the mains. Plug the
power cable to the mains socket outlet.
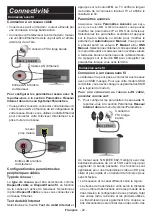
Antenna Connection
Connect the aerial or cable TV plug to the AERIAL
INPUT (ANT) socket located on the rear side of the TV.
Rear side of the TV
License Notification
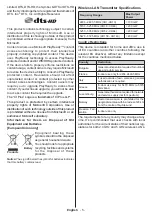
The terms HDMI and HDMI High-Definition Multimedia
Interface, and the HDMI Logo are trademarks
or registered trademarks of HDMI Licensing
Administrator, Inc. in the United States and other
countries.
Manufactured under license from Dolby Laboratories.
Dolby, Dolby Audio and the double-D symbol are
trademarks of Dolby Laboratories.
For DTS patents, see http://patents.dts.com.
Manufactured under license from DTS Licensing
Limited. DTS, the Symbol, & DTS and the Symbol
together are registered trademarks, and DTS
TruSurround is a trademark of DTS, Inc.
©
DTS, Inc.
All Rights Reserved.
For DTS patents, see http://patents.dts.com.
Manufactured under license from DTS Licensing

