6
1.8 Nameplate
See chapter 2.5 of the Installation and Operating Instructions 15972513-EU.
2 - 3
Safety; Transport and storage
See chapter 3 - 4 of the Installation and Operating Instructions 15972513-EU.
4
Product description
4.1
General description
See chapter 5 of the Installation and Operating Instructions 15972513-EU.
4.2
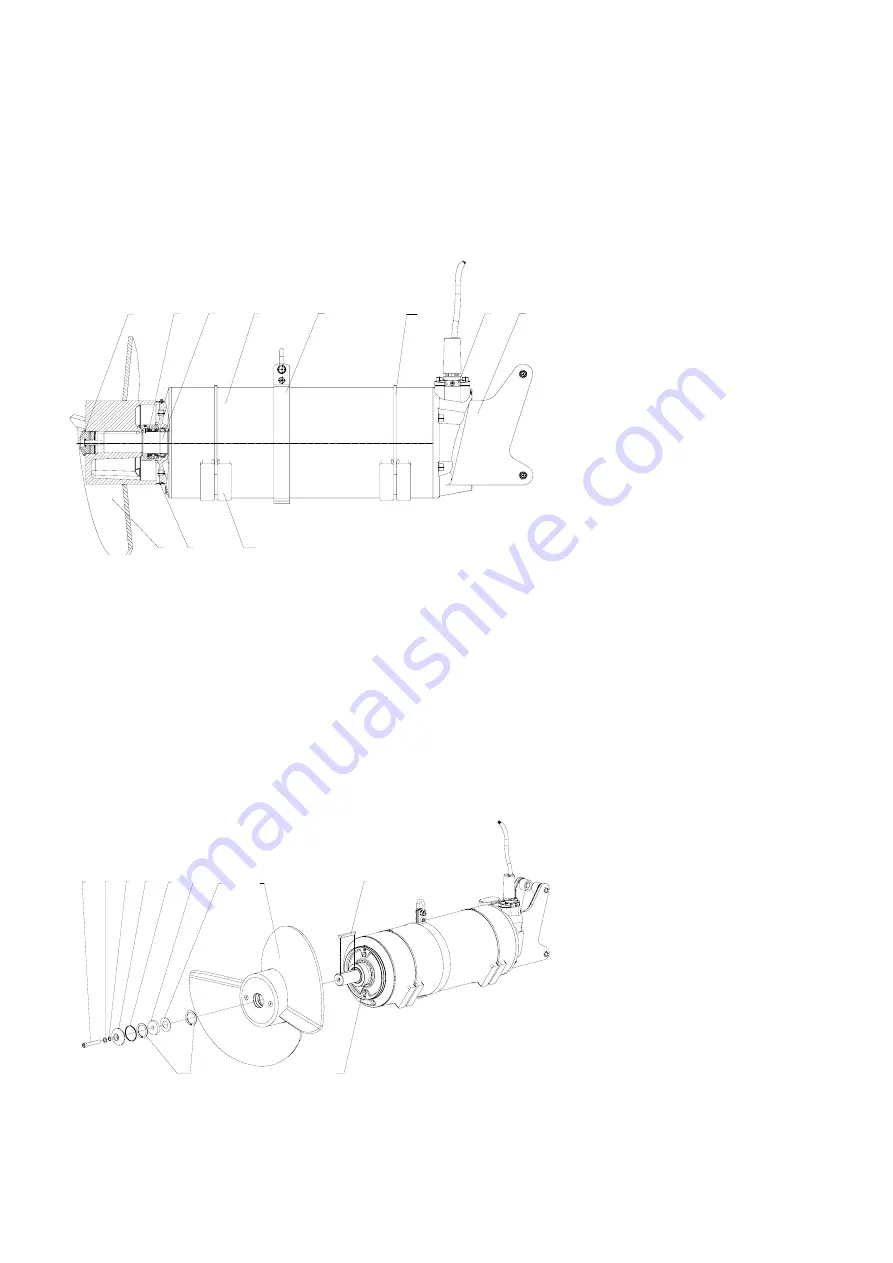
Structural design XRW 750
4
8
5
11
6
9
2
1
3
10
7
1581-0003
Legend
1 Bracket
2 Cable inlet
3 Bracket with shackle
4 Stainless steel covering (Option)
5 Mechanical seal
6 Propeller boss
7 Propeller
8 Shaft unit with rotor and bearings
9 SD - ring
Figure 2 XRW 7511
4.3
Operation with frequency inverters
See chapter 10 of the Installation and Operating Instructions 15972513-EU.
5 Installation
See chapter 8 of the Installation and Operating Instructions 15972513-EU.
5.1
Installation XRW 750
See chapter 8.1 of the Installation and Operating Instructions 15972513-EU.
5.2
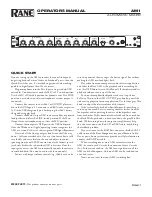
Propeller assembly XRW 750
The propellers of the XRW 7511 are supplied separately and must be fitted on site in accordance with the instructions below.
ATTENTION
Take care that the orientation of the lock washers is correct (Figure 17 Correct fitting position
of the securing washers in chapter 5.3 of the installation and Operating Instructions
15972513-EU) and that the prescribed tightening torque is used!
10
5
3
8
4
1
2
9
6
7
11
1581-0004
Legend
1 Socket head screw
2 Propeller washer
3 Lock washers
4 O-ring
5 O-ring
6 Propeller
7 Key (already fitted at factory)
8 Seal (already fitted at factory))
Figure 3 Propeller assembly
EN 1585-A


