S CLASS™ 2 cutter
User’s Manual
Contour Cutting
3-8
3.3
Calibrating OPOS
To ensure that OPOS is working accurately, two calibrations are necessary: the OPOS
calibration and the media calibration. The OPOS calibration is the calibration of the distance
between the knife tip and the sensor. The media calibration “teaches” the cutter the
reflection levels of the mark color and the media color.
NOTE:
Although the OPOS sensor has been calibrated in the factory, Summa
recommends doing a test in order to determine how well the factory-set
parameters work with the materials you are using. If the accuracy is not what is
expected, then perform the OPOS calibration.
3.3.1
OPOS calibration
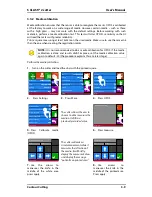
1.
Switch the cutter on and load black vinyl with white backing.
NOTE:
Black vinyl with white backing MUST be used when calibrating OPOS.
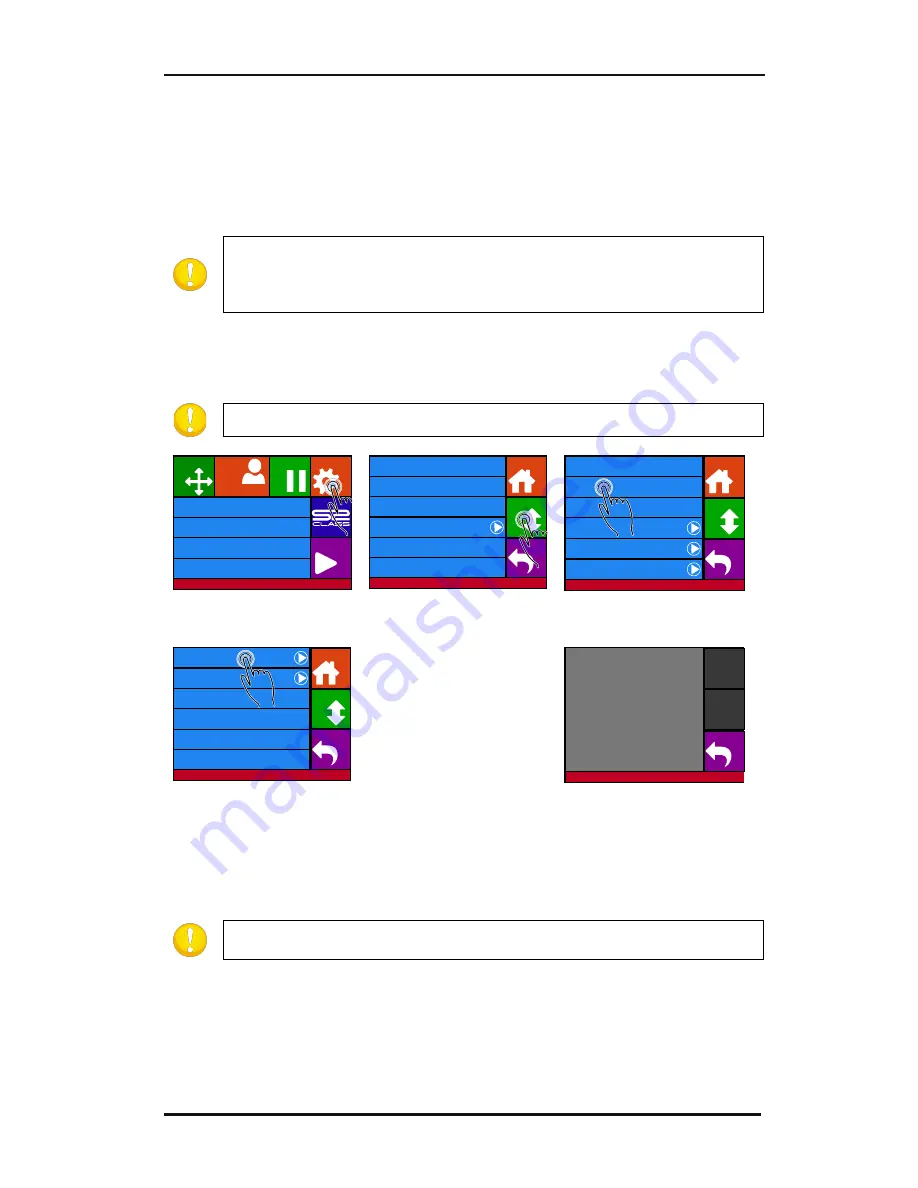
2.
Press Settings
3.
Press More
4.
Press OPOS.
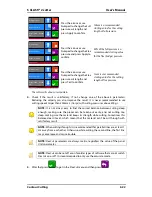
The cutter will cut out a
square, measuring
approximately 9.5x9.5mm
and move the square
forward. “Weed out
Rectangle” will appear on
the display.
5.
Press Calibrate OPOS
6.
Carefully weed the
square, making sure the
edges stay intact. Press
Back.
OPOS will read the edges of the square and calibrate itself accordingly.
NOTE:
In order to keep the accuracy of the OPOS sensor as high as possible, do
this calibration each time the knife is been replaced.
Knife pressure
95 gr
Velocity
800 mm/s
Tool
Tangential knife
Media size
50000 x 718 mm
Actions
Settings
Configuration 1
Pause
Origin
Summa USB port 1
Summa USB port 1
Knife pressure
95 gr
Velocity
800 mm/s
Tool
Tangential knife
Settings
Back
More
Home
...
General
Calibrate knife
Advanced cutting
...
FlexCut
...
Communication
...
OPOS
...
Settings
Back
More
Home
Length calibration
Coil setup
Confidence test
General
...
Settings | OPOS
Back
Home
OPOS origin
Mark
Alignment mode
OPOS X
OPOS sheet mode
Off
OPOS panelling
Off
Calibrate media (OPOS)
Calibrate OPOS
More
Settings | OPOS
Weed out rectangle
Back
Summary of Contents for S Class 2 OPOS-CAM
Page 1: ...User s Manual Rev 3b...


