S CLASS™ 2 cutter
User’s Manual
Detailed Operation
4-8
3.
Turn the top piece of the knife holder half a turn counterclockwise. In the ‘knife
pressure’ menu, press the test to activate the knife-pressure-test-pattern. If the pattern
is still cut out completely, repeat these actions. Once the pattern is not cut anymore,
increase the knife depth (turning clockwise) with 1/8’s of a turn and perform the test
until the minimum required knife depth is reached. Now increase (clockwise) the knife
depth slightly: ¼ of a turn for a tangential knife and ½ of a turn for drag knives.
4.
Decrease the knife pressure gradually and perform the knife depth test in between until
the knife pressure is set as described in section 2.2.2. Also write down this value.
5.
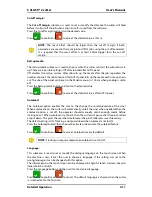
Go to the FlexCut submenu and set full pressure to the pressure that was needed to cut
through the media. Set the Flex pressure to the normal pressure. Set the full pressure
length to 10mm and the Flex pressure length to 1mm. Then cut a test pattern.
Depending on the strength (size) of the ‘bridges’, go to step 6 or 7.
6.
If the bridges are too strong, decrease the Flex pressure length and perform the test
again.
7.
If the bridges are too weak, raise the Flex pressure length and perform the test again.
4.3.1.8
Advanced cutting
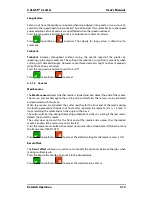
Overcut:
Use the
Overcut
submenu to generate an overcut in order to facilitate weeding the cut.
Each time the knife goes up or down, the cutter cuts a bit further then it should. Figure 4.3
below shows what overcut does with a tangential knife. A sample, cut out with a drag knife,
shows fewer overcuts because there are fewer up/downs (usually only one per curve/letter).
The overcut setting can be disabled (=0) or set to any value between 0(=off) and 10. One
unit is about 0.1 mm or 0.004 ".
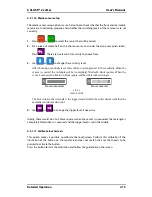
FIG 4-4
4-4
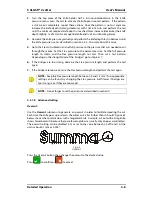
OVERCUT
Press the Overcut button, then change the overcut to the desired value.
Press
to confirm or
to cancel.
Apply
Cancel
NOTE:
Keep the Flex pressure length between 0.5 and 1.5mm. If no appropriate
setting can be found, try changing the Flex pressure itself (lower if bridges are
too strong, raise if they are too weak).
NOTE:
Do not forget to set the panel size as described in section 0
Summary of Contents for S Class 2 OPOS-CAM
Page 1: ...User s Manual Rev 3b...


