APPENDIX D
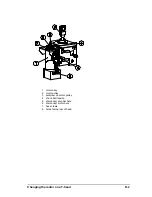
Procedure to set change the motor on a T-head
General:
Although a head is considered as a spare part on its whole (because fixtures are used in PR while
assembling it) there exist a method to change the motor on its own.
Procedure:
1. For removal of the head and putting it back on the machine, refer to the service manual
2. Once the head is off and before taking off the motor check the tension of the belt and remember
it. When you will replace the motor then the tension of the belt should be exactly the same
(more or less). The tension this belt needs is not as much as one should think.
3. disconnect the motor from the head.
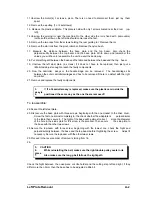
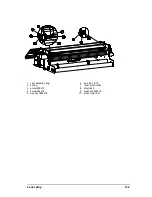
4. loosen the setscrew in the pulley on the motor in order to access more easily the hex screws
5. remove the motor from the head (two hex screw 4mm)
6. put the new motor on with the two hex screws you can set the belt tension, but do not secure
the pulley on the motor yet.
7. connect the motor to the head and connect the head to the flatcable of the machine
8. start the machine in FSM mode (standard)
9. press the "menu" key until you come to "internal test" 10 press the "up arrow " until you get to
knife calibration 11 press "enter"
10.press "2" this will set the motor on the head in its origin position.
11.turn the nose piece holder so that the two holes in it (there to hold the nose piece) face the back
of the head. Be sure it is aligned with the head because you are now busy setting the
mechanical zero point of the knife. If you are to far off then you will never be able to set the
origin correct if you do knife calibration. It is here that in production a fixture is used to put
the head in so that the mechanical origin is set almost perfect.
12.when you are sure that the nose piece holder is aligned and that you haven't turned the motor
shaft , then you may secure the pulley on the motor shaft. to be sure press the "2" key again
to check whether the origin point of the knife is correct (after pressing "2" the
nosepieceholder should be aligned with the head and the two holes should be facing the
back of the head.)
13.Power the machine down, the head is now ready to be remounted.
Changing the motor on a T-head
D-
1
Summary of Contents for SummaSign D1010
Page 1: ...Service Manual SummaSign Series Summa NV Rochesterlaan 6 8470 Gistel Belgium...
Page 80: ...SummaSign Service Manual 106 107 2 36 Replacements Guidelines Blank page...
Page 85: ...Service Manual SummaSignT se 3 2 OPERATING VOLTAGE CONVERSION Maintenance and Cleaning 3 5...
Page 87: ...Service Manual SummaSignT se Maintenance and Cleaning 3 7 blank page...
Page 92: ...Service Manual SummaSign Calibration 4 5...
Page 93: ...SummaSign Service Manual HEAD CALIBRATION 4 6 Calibration...
Page 131: ...Service Manual SummaSign Spare Parts List 7 13...
Page 134: ...Summasign Service Manual 7 16 Spare Parts List...

