Service Manual
SummaSign
REPLACING THE MAIN PCB
The SummaSign and SummaCut cutters manufactured since December 1995 have a different main
PCB from those manufactured before that date.
The boards on the new cutters have the logic for the head control on the same main PCB whereas
the parallel input is on an extra board. You can obtain this option by ordering part number 421-174.
The new type of boards are fully compatible with the old type of boards, the only difference being the
position of particular connectors, and certain parts, previously situated on the small PCB, that can
now be found on the main PCB.
The old type of boards can be exchanged for the new type of boards.
Summarizing, there are two types of main PCBs:
0
Type 1
: Main PCBs dating from before December
1
Type 2:
Main PCBs dating from after December 1995
To replace a PCB, proceed as follows:
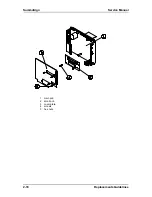
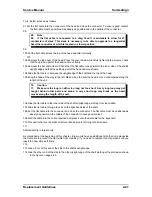
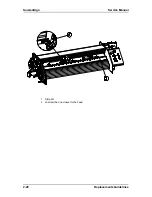
42.Remove the right-hand cover (see Chapter 2. 2, Removing the right-hand cover).
At the top of the PCB
43.
44.Disconnect the various connectors. Pay close attention to the positioning of the connectors. They
should be returned to their original location when re-installed.
36.
Note:
37.
In the Type 1 models the connector for the cam roller switch has to be
removed from the small PCB.
45.
46.Remove the flat cable for the head by pulling the flat cable connector up. On both sides of the
connector cover there is a small protuberance that you can pry up using a screwdriver. Gently
pull the flat cable out of the connector.
38.
Note:
39.
In the Type 1 models this connector is located on the top of the small PCB.
47.
48.Remove the flat cable for the keyboard.
49.Remove the flat cable for the LCD.
At the rear of the PCB
50.Remove the safeguard located a few inches above the grounding wires.
Loosen the two grounding clamps so that the earthing wires can be removed.
Replacement Guidelines
2-15
Summary of Contents for SummaSign D1010
Page 1: ...Service Manual SummaSign Series Summa NV Rochesterlaan 6 8470 Gistel Belgium...
Page 80: ...SummaSign Service Manual 106 107 2 36 Replacements Guidelines Blank page...
Page 85: ...Service Manual SummaSignT se 3 2 OPERATING VOLTAGE CONVERSION Maintenance and Cleaning 3 5...
Page 87: ...Service Manual SummaSignT se Maintenance and Cleaning 3 7 blank page...
Page 92: ...Service Manual SummaSign Calibration 4 5...
Page 93: ...SummaSign Service Manual HEAD CALIBRATION 4 6 Calibration...
Page 131: ...Service Manual SummaSign Spare Parts List 7 13...
Page 134: ...Summasign Service Manual 7 16 Spare Parts List...


