1. Always site your awning on a flat piece of ground this will enable you to
obtain the best possible fit of your awning.
2. Check that your awning rail is clean and free from any sharp edges which
could easily damage the fabric or awning beading.
3. You are now ready to start erecting your awning, to make the task easier
we would always suggest that two people will make erecting the awning a
much easier task.
4. Start by threading the white beading into the awning rail with one person
pulling the awning through the rail the other person should be feeding the
beading into the rail ensuring that it runs smoothly. Position the awning so
that it clears windows, doors, etc. Secure the awning in the correct position
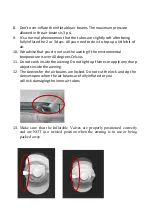
by pegging out the four corner tabs. Attach the inflator to the inflation valve;
inflate to a maximum pressure of 3psi.
During the latter part of inflation it may be necessary to lift the tubes into the
correct position. When you have inflated to the correct pressure disconnect
the inflator ensuring that you have securely tightened the valve cap, be
careful not to cross thread this cap.
Roof support tubes: NB-IA2-260 (855321) roof support poles 2 ; NB-
IA2-390(855322) roof support poles 3 ; NB-MA-L/M/H(855317/8/9) roof
support poles 1 ; NB-IA-400 (855320) roof support poles 8
Inflate the tubes supplied to a pressure of 3psi. You will notice that Velcro is
attached on the end of each tube. Insert the poles into the centre part of the
roof for straight tubes, or alternatively curved part of the awning for curved
tubes, these tubes will strengthen the roof and enable you to obtain a better
shape. During calm weather you can remove these tubes and attach them to
the front tubes to make a veranda bar.
To give the Awning the correct shape and stability we advise that all guy
lines are fitted and pegged correctly.
Suitability


