


10
11
4
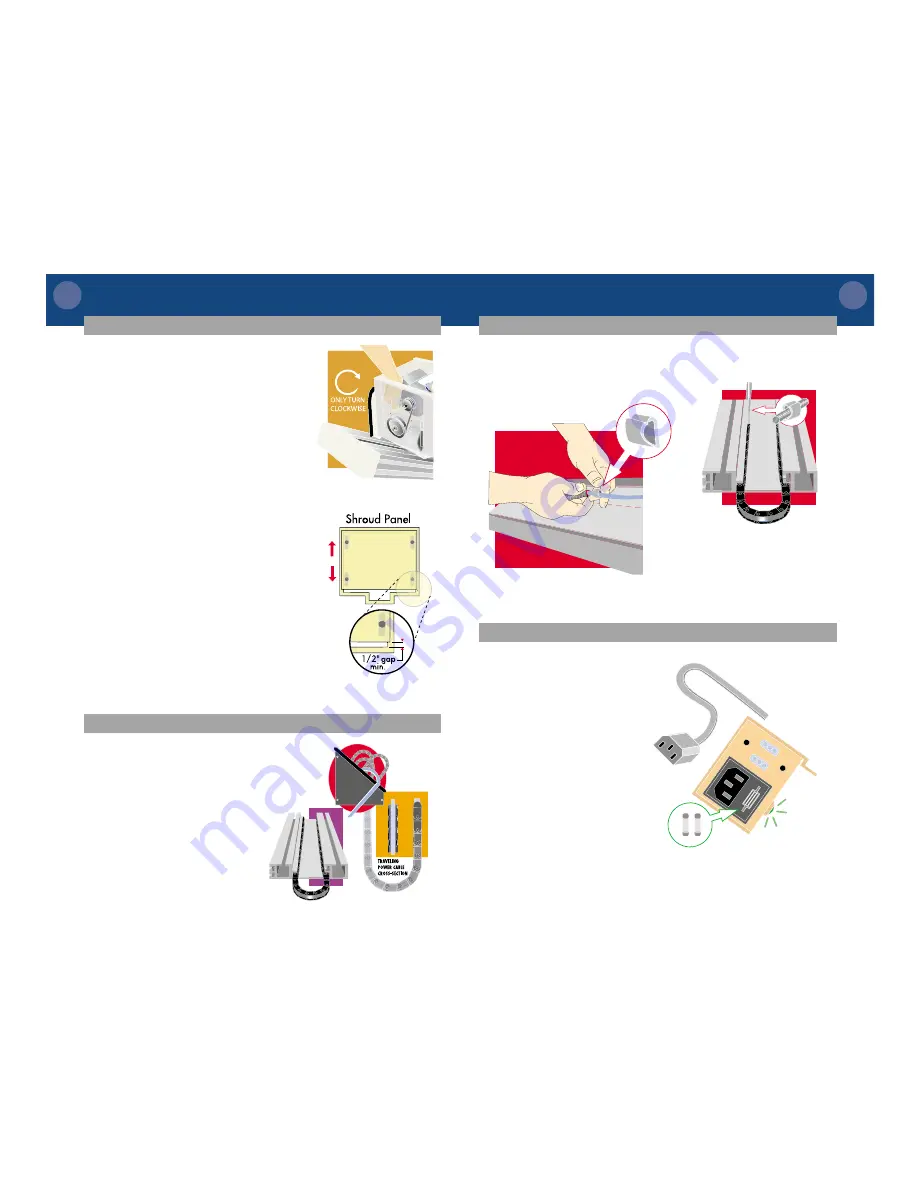
Snap the adhesive clip around the
power cable (a few inches above
the plastic chain). Pull down on
the power cable so there is no
slack in the cable.
5
Peel back the paper covering the
adhesive on the back of the clip.
Press the clip into the wall-side
channel.
This will anchor the power cable
to the track and allow free
movement of the power cable
when the unit is traveling up and
down.
spare fuses
1
Locate the power cable and plug
into the side of the upper track
cover. The
green light
should light
up - indicating the unit is
receiving power. If not, check
fuse in fuse drawer under the
power cord outlet.
CAUTION:
Do not ride. Track
brackets are not yet completely
anchored.
I N S T A L L I N G
T H E
P O W E R
C O R D
I N S TA L L I N G P L A S T I C
C H A I N A N D T R A V E L I N G P O W E R C A B L E
1
Unpack the traveling power cable from the maga-
zine holder on the side of the unit and pull the
cable down the length of the track.
2
Take one side of the traveling cable and tuck into
the bottom channel in the middle of
the track.
NOTE:
The power cable will
face in toward the metal channel.
3
Feed the other side of the cable into
the channel on the opposite side.
S L A C K
C A B L E
R E S E T
P R O C E D U R E
3
With your hand, grasp the motor belt and pull
upwards to turn the pulleys clockwise. This will
slowly inch the unit upwards.
Listen for a loud click that will tell you that the
slack cable device has reset.
NOTE: If you do not hear a loud click, then the
slack cable did not engage during shipping and
does not need resetting.
CAUTION! ADJUSTING THE UPHILL SHROUD PANEL
It is important that this panel not be moved
from its factory setting. This is the short panel
on the uphill side of the lift (opposite the side
with the magazine rack) with the 4 slots, held
in place by (4) phillips head screws.
2
If you remove the shroud panel during the slack
cable reset procedure or for any other reason,
you will need to set it back to the factory
setting. Loosen the 4 screws holding the panel
with a Phillips screwdriver and slide the panel
up until you have a gap underneath this panel
of at least 1/2”. Re-tighten the screws. Exact
position will vary depending on the angle of
your staircase.
I N S TA L L I N G P L A S T I C
C H A I N A N D T R AV E L I N G P O W E R C A B L E


