background image


Care and Maintenance


Cleaning Your Appliance: 

1.


Unplug the appliance, turn the thermostat to 

STOP

 (

0

) and remove all contents, 

including shelves, drip tray and crisper. 

2.


Wash the inside surfaces with a solution of lukewarm water and vinegar.  Wipe dry 
with a clean, soft cloth. 

3.


Wash the shelves, drip tray and crisper with a mild detergent solution, then rinse and 
dry thoroughly. 

4.


Wash the outside cabinet with warm water and mild liquid detergent. Rinse well and 
wipe dry with a clean soft cloth. 

5.


Wring excess water out of the sponge or cloth before cleaning the area of the 
temperature control or any electrical parts. 

6.


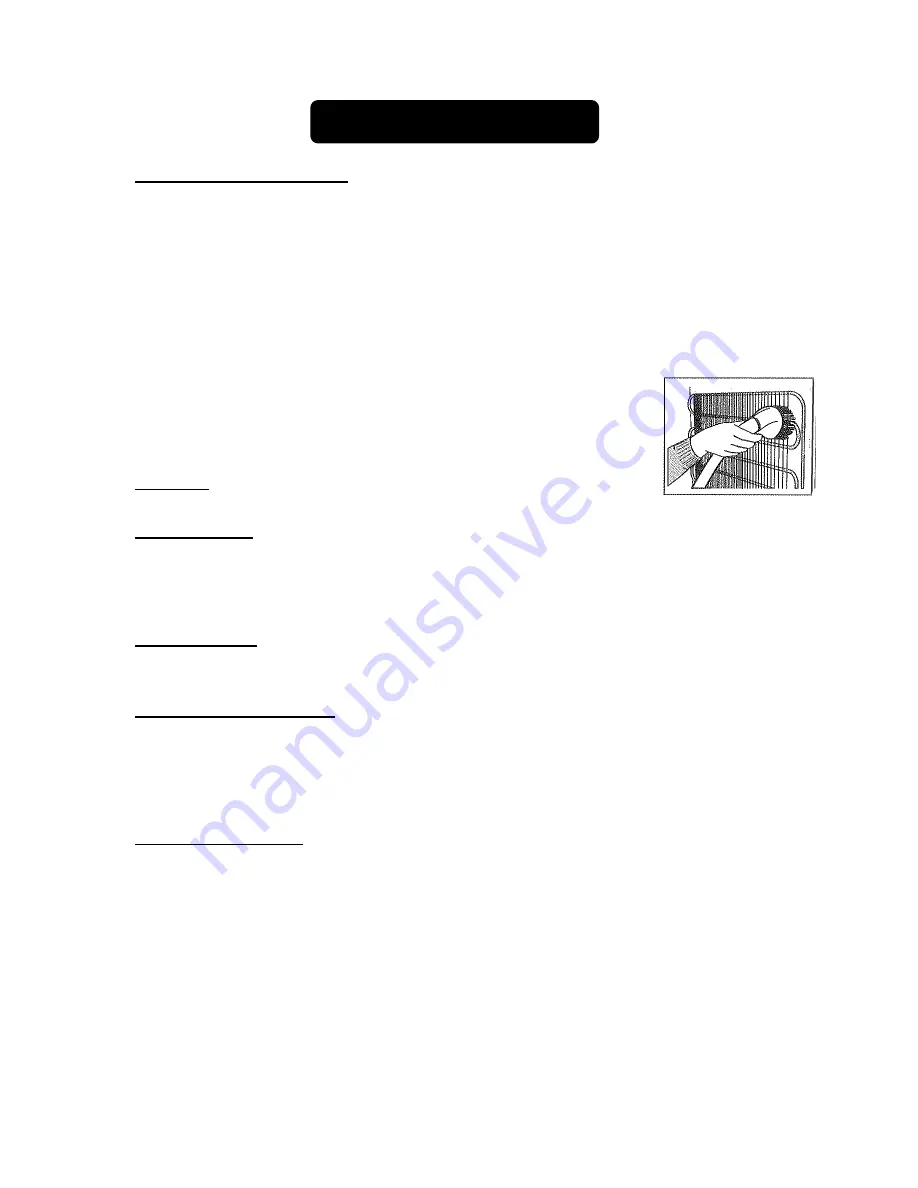
From time to time, wipe the condenser on the rear wall with a soft 
non-metallic brush or vacuum cleaner. 

7.


After you have cleaned the appliance, reconnect it to the power 
supply, reset the thermostat and return all contents to their place. 

CAUTION: Failure to unplug the unit could result in electrical shock or 

personal injury. 

Power Failure: 

Most power failures are corrected within a few hours and should not affect the 
temperature of your appliance if you minimize the number of times the door is opened. If 
the power is going to be off for a longer period of time, you need to take the proper steps 
to protect your frozen and chilled items. 

Vacation Time: 

During long absences, remove all contents. Unplug the appliance, clean it and leave the 
doors open slightly to avoid possible formation of condensation, mold or odors. 

Moving Your Appliance: 

1.  Remove the contents. 
2.  Securely tape down all loose items inside your unit. 
3.  Turn the leveling legs up to the base to avoid damage. 
4.  Tape the door shut. 
5.  Be sure the appliance stays secure in the upright position during transportation.  

Energy-Saving Tips: 


The unit should be located in the coolest area of the room, away from heat-producing 
appliances or heating ducts and out of direct sunlight. 


Try not to open the door too often, especially when the weather is damp and hot.  
Once you open the door, close it as soon as possible. 


Occasionally check if the appliance is sufficiently ventilated (adequate air circulation 
behind the appliance). 


Set the thermostat from higher to lower settings as soon as possible (depends on 
how loaded the appliance is, ambient temperature, etc.). 


Before loading items into the unit, be sure they have cooled to ambient temperature. 


A layer of frost and ice increases energy consumption, so defrost the freezer as soon 
as the layer is 1/2" thick. 


Summary of Contents for accucold CT66BBI Series

Page 1: ..._______ BUILT IN MEDICAL REFRIGERATOR FREEZERS CT66JBI CT66BBI Series CM411L Instruction Manual BEFORE USE PLEASE READ AND FOLLOW ALL SAFETY RULES AND OPERATING INSTRUCTIONS FELIX STORCH INC 770 Garrison Avenue Bronx NY10474 www summitappliance com ...

Page 2: ...epair or replace any part of your appliance unless it is specifically recommended in this material All other servicing should be referred to a qualified technician Use two or more people to move and install the appliance Failure to do so can result in back or other injury To ensure proper ventilation for your appliance the front of the unit must be completely unobstructed Choose a well ventilated ...

Page 3: ...ESS THEY HAVE BEEN ADEQUATELY SUPERVISED BY A RESPONSIBLE PERSON TO ENSURE THAT THEY CAN USE THE APPLIANCE SAFELY YOUNG CHILDREN SHOULD BE SUPERVISED TO ENSURE THAT THEY DO NOT PLAY WITH THE APPLIANCE SAVE THESE INSTRUCTIONS To save energy and maintain optimum performance Your appliance may be installed as a free standing unit or built into an enclosure or below a countertop When positioning this ...

Page 4: ...eezer 7 8 Temperature Control 7 8 Defrosting Your Appliance 8 Care and Maintenance 9 Cleaning Your Appliance Power Failure Vacation Time Moving your Appliance Energy Saving Tips Troubleshooting 10 Limited Warranty 11 Location of Parts NOTE Lock on model CT66L is located on the front of the door near the top Temperature control dial thermostat and interior light Door with storage compartments Front...

Page 5: ...tion Remove the crisper drip tray and shelves and clean them and the interior surfaces of the unit with lukewarm water using a soft cloth Installing the Refrigerator Freezer Place the unit on a floor that is strong enough to support the appliance when it is fully loaded To level the unit adjust the two leveling legs at the front Models CT66JBI and CT66BBI can be installed either free standing rece...

Page 6: ...the power cord supplied For personal safety this appliance must be properly grounded This unit requires a standard 115 volt AC 60Hz electrical outlet with three prong ground Have the wall outlet and circuit checked by a qualified electrician to make sure the outlet is properly grounded When a standard 2 prong wall outlet is encountered it is your responsibility and obligation to have it replaced w...

Page 7: ...e bottom hinge 5 Remove the decorative caps from the opposite side and plug the holes from the original side with the decorative caps 6 Move the bottom hinge to the opposite side and tighten the screws Use any lock washers or nuts if they were installed in the original installation 7 Replace door onto the hinge pin on the bottom hinge Place top hinge pin into door Insert screws into the top hinge ...

Page 8: ...older in the refrigerator On the coldest settings temperatures in some spots of the refrigerator compartment may drop below 32 F Use higher thermostat settings only when required or recommended When the ambient temperature is normal we recommend a medium setting Changes in the ambient temperature affect temperature in the refrigerator compartment so choose an appropriate setting of the thermostat ...

Page 9: ...e freezer compartment defrost carefully according to this procedure 1 Remove contents from the entire unit taking care that frozen items do not begin to thaw Set the thermostat to STOP 0 2 Unplug the appliance Defrosting is accelerated if the doors are left open 3 Melting ice will drain into the drip tray below the freezer compartment Empty this as needed 4 Use a sponge or toweling to remove water...

Page 10: ...r is opened If the power is going to be off for a longer period of time you need to take the proper steps to protect your frozen and chilled items Vacation Time During long absences remove all contents Unplug the appliance clean it and leave the doors open slightly to avoid possible formation of condensation mold or odors Moving Your Appliance 1 Remove the contents 2 Securely tape down all loose i...

Page 11: ...e air circulation behind the appliance and wipe the dust from the condenser Noise Cooling in refrigeration appliances is enabled by the refrigerating system with a compressor which produces noise How noisy the appliance is depends on where it is placed how it is used and how old the appliance is During the operation of the compressor the noise of liquid is heard and when the compressor is not oper...

Page 12: ... approved by warrantor 4 Replacement parts or repair labor costs for units operated outside the United States 5 Repairs to parts or systems resulting from unauthorized modifications made to the appliance 6 Expenses for travel and transportation for product service in remote locations 7 The removal and reinstallation of your appliance if it is installed in an inaccessible location or is not install...

Reviews: