background image


Page 9 

6. 

Remove the plastic film from the cooktop.  Clean the cooktop before you use it 
for the first time.  A thorough cleaning with a recommended cooktop cleaner will 
provide a clean, shiny coating on the cooktop surface. 

Final Preparations Prior to Use


The next sections of the manual cover cooktop use, maintenance and service 
information. 

Please keep these instructions with your cooktop for future reference. 


Operation 


READ 

S

AFETY 

I

NSTRUCTIONS BEFORE OPERATING YOUR APPLIANCE. 

 
The cooking surface areas of your glass ceramic cooktop are identified by 
permanent patterns in the cooktop. The appliance is easy to maintain and easy 
to clean. Keeping the cooktop at its top performance levels can be achieved by 
following the simple guidelines for use and cleaning below: 
 

Chances are that your existing cookware will work just fine with your glass 
ceramic cooktop.  Cooking on a glass ceramic cooktop does not require special 
pots or pans.  Since cookware plays an important role in cooking efficiency and 
convenience, keep in mind the following information when selecting your 
cookware. 

Cookware 

The cookware should have a flat bottom.  Although glass and other types of 
cookware can be used, metal cookware with thick, smooth, flat bottoms will 
generally conduct the heat well.  Aluminum and stainless steel cookware usually 
work best.  Avoid cookware with shaped and rounded bottoms as well as utensils 
that warp when heated. 

Use cookware of the correct diameter only.  The base of the pot or pan should be 
about as wide as the cooking zone on which it is used – not much wider or much 
narrower.  By using utensils with the correct diameter, you should achieve 
maximum heating efficiency in the shortest possible time. 

Be certain that both the cooktop surface and the bottom of your pots and pans 
are clean and dry before use.  By doing so, you will help prevent scratches and 
stains. 


This cooktop contains radiant heating elements. The radiant elements will “light 
up” about 4-5 seconds after being turned on. The special design of these 
elements directs the heat up through the ceramic glass, providing efficient 
cooking.  Temperature limiters are included in each element to ensure that the 
safe operating temperature of the ceramic glass top is not exceeded. The 

Heating Elements 

Summary of Contents for CR424

Page 1: ...ON MANUAL MODE D EMPLOI 4 Burner Electric Cooktop Table de cuisson électrique à 4 brûleurs Model Modèle CR424 Felix Storch Inc Summit Appliance Division 770 Garrison Avenue Bronx NY 10474 www summitappliance com ...

Page 2: ...on and Wiring Diagram 8 Final Preparations Prior to Use 9 Operation 9 10 Cookware 9 Heating Elements 9 10 Controls Indicators 10 Cleaning 10 Warranty 11 Technical Information Model Number CR424 Description 4 burner ceramic glass electric cooktop Electrical Requirements 230V AC 21A 60Hz Power Rating of Burners 4 1200W Total of 4800W Diameters of Burners 4 burners 6 5 Overall Dimensions 24 W x 20 D ...
Page 3: ...cooktop to reach such items could be seriously injured Wear proper clothing apparel Loose fitting or hanging garments should never be worn while using the appliance User Servicing Do not repair or replace any part of the appliance If service ever becomes necessary this appliance should be serviced by AUTHORIZED PERSONNEL ONLY or call SUMMIT Customer Service at 1 800 932 4267 Keep flammable materia...

Page 4: ...ce until they have had sufficient time to cool Other surfaces of the appliance may become hot enough to cause burns Use proper pan size This appliance is equipped with four surface units each with a diameter of 6 5 Select utensils having flat bottoms large enough to cover the surface unit heating element The use of undersized utensils will expose a portion of the heating element to direct contact ...

Page 5: ...mediately Important Do not remove the clear plastic covering film on the ceramic glass until the cooktop is ready to be installed 2 Checking the Electrical Supply Requirements This product must be installed in accordance with national state and local electric codes Here are the electrical requirements Model Number CR424 Maximum Connected Load 4800 watts Required Power Supply Input 230V AC 21A 60Hz...

Page 6: ...is protected by not less than inch thick flame retardant millboard covered with not less than No 28 MSG sheet steel 0 015 inch thick stainless steel 0 024 inch thick aluminum or 0 020 inch thick copper the minimum clearance should be 24 inches E The distance from the backsplash of the countertop to the edge of the ceramic glass of the cooktop should be a minimum of 2 inches The distance from a sid...

Page 7: ...entilated area Allow a 2 51mm minimum clearance between the bottom of the metal pan of the cooktop and any combustible surface located below e g the upper edge of a drawer installed below the cooktop Failure to provide proper clearances and ventilation may result in a fire hazard Countertop cutout dimensions are shown in the figure below Note When making the countertop put a radius at the corners ...

Page 8: ...emoval for service is necessary A very small bead of silicone sealant should be laid around the edges of the cutout Place the cooktop in the cutout opening and press firmly on all sides to seal the frame into the bedding compound The sealant will hold the cooktop firmly in place on the countertop Installation of the cooktop into the countertop ...

Page 9: ...ulated wires There are two hot lead conductors black and red insulated tinned copper and one insulated ground conductor green insulated tinned copper See Wiring Diagram for model CR424 below and on bottom of cooktop Electrical Connection Attach conductor wires to residence wiring in accordance with national state and local electric codes Warning Grounding The entire appliance must be grounded at a...

Page 10: ... following information when selecting your cookware Cookware The cookware should have a flat bottom Although glass and other types of cookware can be used metal cookware with thick smooth flat bottoms will generally conduct the heat well Aluminum and stainless steel cookware usually work best Avoid cookware with shaped and rounded bottoms as well as utensils that warp when heated Use cookware of t...

Page 11: ...r the first time A thorough cleaning with a recommended cooktop cleaner will provide a coating on the cooktop prior to its first use Always remove food spills grease spatters and metal rub off from cookware A razor blade scraper or the equivalent works well to remove spillovers Clean the cooktop with a paper towel or a clean soft cloth and a recommended cleaner After cleaning always wipe the cookt...

Page 12: ...ment parts or repair labor costs for units operated outside the United States Repairs to parts or systems resulting from unauthorized modifications made to the appliance Expenses for travel and transportation for product service in remote locations The removal and reinstallation of your appliance if it is installed in an inaccessible location or is not installed in accordance with published instal...

Page 13: ...t électrique 19 Derniers préparatifs avant utilisation 9 Opération 20 22 Batterie de cuisine 20 Éléments de chauffage 20 21 Commandes et indicateurs 21 Nettoyage 22 Garantie 23 Informations techniques Numéro du modèle CR424 Déscription Table de cuisson électrique en vitrocéramique à 4 brûleurs Exigences électriques 230V AC 21A 60Hz Puissance des brûleurs 4 1200W Total de 4800W Diamètres des brûleu...

Page 14: ...bonne habillement Vêtements amples ou détachés ne doivent jamais être portés pendant l utilisation de l appareil Entretien par l utilisateur Ne pas réparer ou remplacer toute pièce de l appareil Si le service devient jamais nécessaire cet appareil doit être réparé par du personnel autorisé ou appelez le Service à la clientèle à SUMMIT au 1 800 932 4267 Gardez les matériaux inflammables loin de la ...

Page 15: ...dir D autres surfaces de l appareil peuvent devenir assez chaudes pour causer des brûlures Utilisez le bon format de casserole Cet appareil est équipé de quatre unités de surface chacune avec un diamètre de 6 5 Choisissez les ustensiles ayant un dessous plat assez grand pour couvrir l élément chauffant de la surface L utilisation d ustensiles trop petits exposera une partie de l élément de chauffa...

Page 16: ...UMMIT immédiatement Important Ne pas retirer le film de protection en plastique transparent sur la vitre céramique jusqu à ce que la table de cuisson est prête à être installée 2 Vérification des spécifications de l alimentation électrique Ce produit doit être installé conformément aux codes électriques nationaux étatiques et locales Voici les exigences électriques Numéro du modèle CR424 Charge co...

Page 17: ... un quart de pouce d épaisseur de carton ignifuge recouvert d au moins n 28 MSG tôle d acier en acier inoxydable de 0 015 pouce d épaisseur en aluminium de 0 024 pouce d épaisseur ou en cuivre de 0 020 pouces d épaisseur la distance minimale doit être de 24 pouces E La distance entre le dosseret du comptoir et le bord de la vitre en vitrocéramique de la table de cuisson doit être d au moins 2 pouc...

Page 18: ...ez un espace de 2 51mm minimum entre le fond du plateau de métal de la table de cuisson et toute surface combustible située au dessous par exemple le bord supérieur d un tiroir installé en dessous de la table de cuisson Défaut de fournir des espaces appropriés et de ventilation peut entraîner une risque d incendie Dimensions de la découpe du comptoir sont présentées dans la figure ci dessous Remar...

Page 19: ...e Un très petit cordon de mastic silicone doit être placé sur les bords de la découpe Placez la table de cuisson dans l ouverture de découpe et appuyez fermement sur tous les côtés pour sceller le cadre dans le mastic Le mastic tiendra la table de cuisson bien en place sur le comptoir MASTIC SORTIE D AIR DÉCOUPE EN COMPTOIR ADMISSION D AIR DEVANT Installation de la table de cuisson dans le comptoi...

Page 20: ...ivre étamé avec isolation noire et rouge et un conducteur de terre isolé cuivre étamé avec isolation verte Voir le schéma de câblage pour le modèle CR424 ci dessous et sur le fond de la table de cuisson Raccordement électrique Raccordez les fils conducteurs au câblage de résidence conformément aux codes électriques nationaux étatiques et locaux Avertissement L ensemble de l appareil doit être reli...

Page 21: ...eroles ou poêles spéciales Depuis ustensiles de cuisine joue un rôle important dans l efficacité et la commodité de la cuisine garder à l esprit les informations suivantes lorsque vous choisissez votre batterie de cuisine Les ustensiles de cuisine doit avoir un fond plat Bien que le verre et d autres types de batteries de cuisine peuvent être utilisés ustensiles de cuisine en métal avec une épaiss...

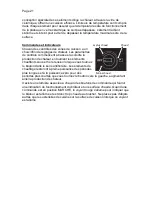
Page 22: ... les éléments chauffants sous et hors tension lorsque vous tournez le bouton dans le sens antihoraire Les éléments de chauffage resteront à pleine puissance des périodes plus longues et à la puissance zéro pour des périodes plus courtes que vous tournez le bouton vers la gauche augmentant ainsi la production de chaleur Commandes et indicateurs Il existe une lumière associée à chacun des boutons de...

Page 23: ... pour éviter résidus durcis de produit nettoyant Essuyez la table de cuisson à sec Ne pas utiliser un linge à vaisselle ou une éponge pour essuyer la table de cuisson Un film peut être laissé par le détergent et peut provoquer une décoloration de la surface de cuisson Évitez les produits à récurer d aucune sorte Évitez également d utiliser des tampons de nettoyage en plastique nylon ou métal Ils r...

Page 24: ... l utilisation de produits non approuvés par le garant 4 Les pièces de rechange ou les frais de réparation pour les appareils utilisés hors des États Unis 5 Les réparations aux pièces ou systèmes résultant de modifications non autorisées apportées à l appareil 6 Les frais de déplacement et de transport pour le produit dans des endroits éloignés 7 Le déplacement et la réinstallation de votre appare...

Reviews: