9-6
SPARCstation 4 Model 110 Service Manual • July 1996
9.2.2
Replacing the CD-ROM Drive
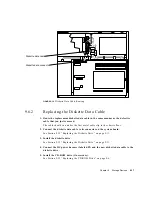
1. Remove the replacement CD-ROM drive from its antistatic bag.
All necessary brackets and grommets are installed on the CD-ROM drive when it is
shipped to you.
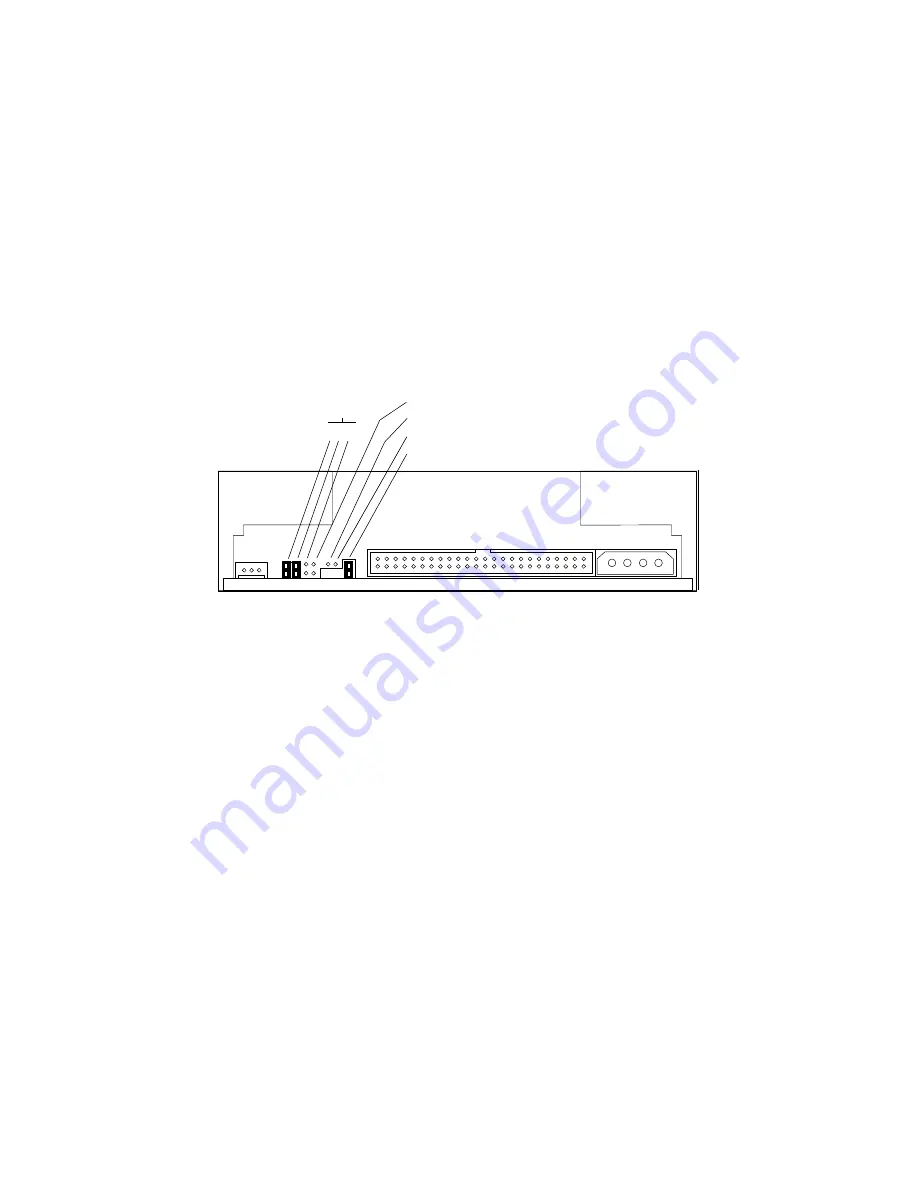
2. Make sure that the jumper settings on the replacement drive match those shown
in
FIGURE 9-5
.
Jumpers should be present for ID4, ID2, and Term power; all other jumpers should
be removed.
FIGURE 9-5
Jumper Settings for the CD-ROM Drive
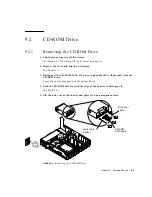
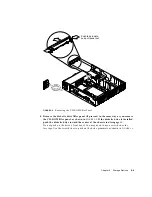
3. Install the drive as shown in
FIGURE 9-6
.
The CD-ROM drive sits on the shelf above the diskette drive. Push the drive toward
the center of the unit so that the grommets lock into place.
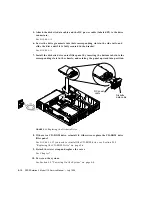
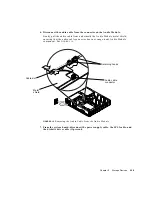
4. Attach the CD-ROM SCSI cable (labeled P2), the DC power (also labeled P2), and
the audio cable (if present) to the drive.
See
FIGURE 9-6
.
4 2 1
ID select
Parity
Prevent / Allow
Test
Term power
Summary of Contents for SPARCstation 4 110
Page 24: ...1 6 SPARCstation 4 Model 110 Service Manual July 1996...
Page 36: ...2 12 SPARCstation 4 Model 110 Service Manual July 1996...
Page 46: ...3 10 SPARCstation 4 Model 110 Service Manual July 1996...
Page 108: ...10 4 SPARCstation 4 Model 110 Service Manual July 1996...
Page 146: ...12 6 SPARCstation 4 Model 110 Service Manual July 1996...
Page 150: ...A 4 SPARCstation 4 Model 110 Service Manual July 1996...
Page 160: ...B 10 SPARCstation 4 Model 110 Service Manual July 1996...
Page 174: ...Glossary 4 SPARCstation 4 Model 110 Service Manual July 1996...

