9-8
SPARCstation 5 Service Manual—November 1996
9
9.2.2 Replacing the CD-ROM Drive
1. Remove the replacement CD-ROM drive from its antistatic bag.
All necessary brackets and grommets are installed on the CD-ROM drive
when it is shipped to you.
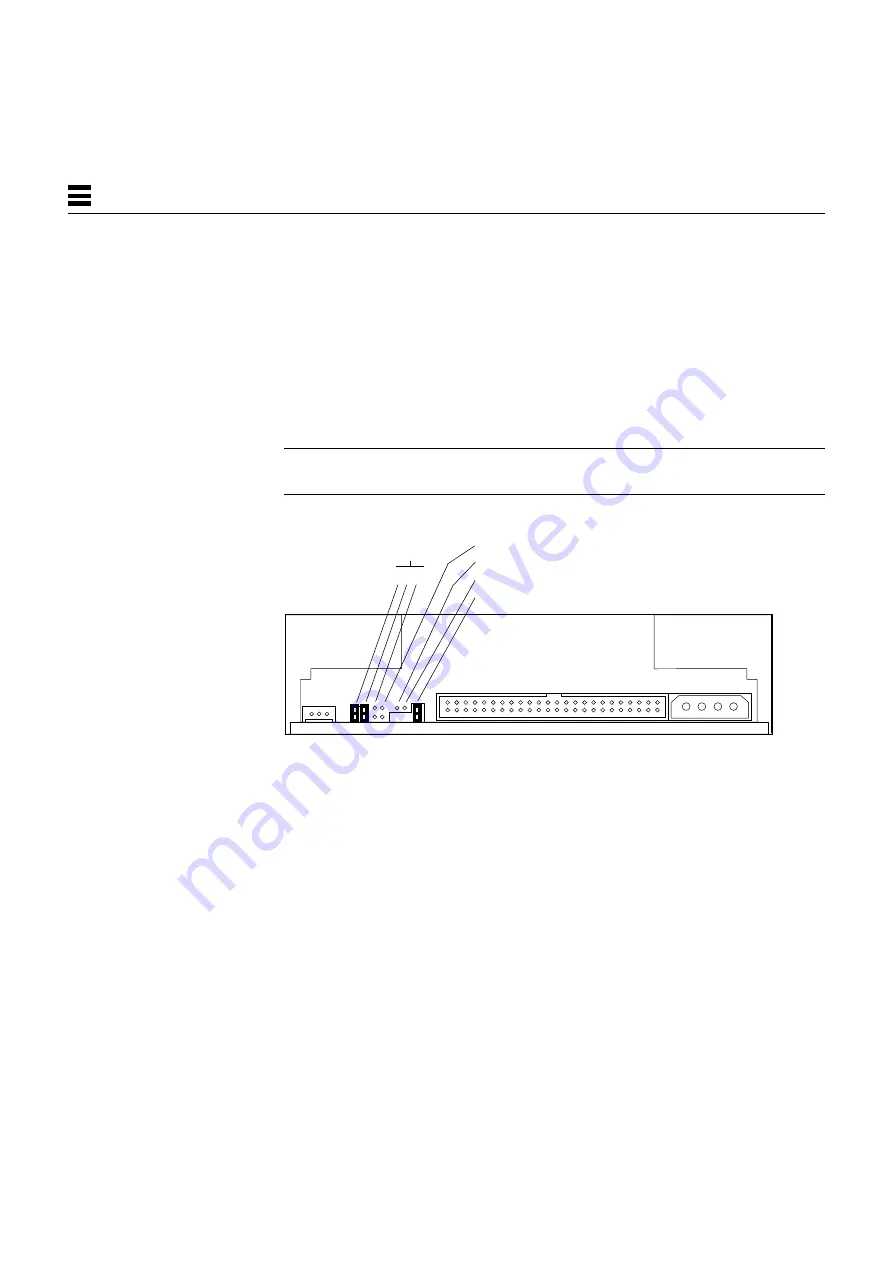
2. Ensure that the jumper settings on the replacement drive match those
shown in Figure 9-5.
Jumpers should be present for SCSI address 6 (jumpers ID4 and ID2 set) and
Term power should be set, all other jumpers should be removed.
Note –
If you are adding the CD-ROM drive, ensure that no external SCSI
devices are using the SCSI address 6.
Figure 9-5
Jumper Settings for the CD-ROM Drive
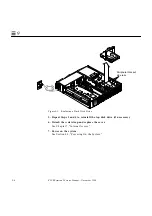
3. Install the drive as shown in Figure 9-6.
The CD-ROM drive sits on the shelf above the diskette drive. Push the drive
toward the center of the unit so that the grommets lock into place.
4 2 1
ID select
Parity
Prevent / Allow
Test
Term power
Summary of Contents for SPARCstation 5
Page 12: ...x SPARCstation 5 Service Manual November 1996...
Page 22: ...xx SPARCstation 5 Service Manual November 1996...
Page 23: ...Part 1 SystemInformation Chapter 1 Product Description...
Page 24: ......
Page 32: ......
Page 44: ...2 12 SPARCstation 5 Service Manual November 1996 2...
Page 64: ...4 10 SPARCstation 5 Service Manual November 1996 4...
Page 65: ...Part 3 PreparingforService Chapter 5 Safety and Tools Requirements Chapter 6 Power On and Off...
Page 66: ......
Page 72: ...5 6 SPARCstation 5 Service Manual November 1996 5...
Page 78: ......
Page 130: ...9 32 SPARCstation 5 Service Manual November 1996 9...
Page 132: ......
Page 136: ...10 4 SPARCstation 5 Service Manual November 1996 10...
Page 162: ...11 26 SPARCstation 5 Service Manual November 1996 11...
Page 163: ...Part 6 IllustratedPartsBreakdown Chapter 12 Illustrated Parts Breakdown...
Page 164: ......
Page 172: ......
Page 176: ...A 4 SPARCstation 5 Service Manual November 1996 A...
Page 198: ...D 10 SPARCstation 5 Service Manual November 1996 D...
Page 208: ...SPARCstation 5 Service Manual November 1996...
Page 210: ......


