2-6
Sun StorEdge 3000 Family FRU Installation Guide • May 2004
Caution –
Be sure to install a disk drive that is appropriate for your array. Sun
StorEdge 3510 FC array disk drives cannot be used in a Sun StorEdge 3511 FC array.
Similarly, a Sun StorEdge 3511 disk drive cannot be used in a Sun StorEdge 3510 FC
array.
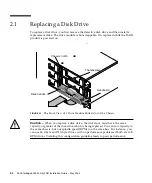
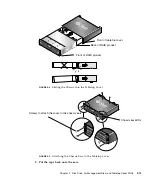
1. Gently slide the drive module into the drive slot until the handle pins slip into
the chassis notch.
2. Lower the disk drive handle until it is vertical.
3. Press and hold the drive handle in while you press the thumbscrew in until it
engages the threads.
4. Turn the thumbscrew clockwise until it is finger-tight.
5. Push the plastic front bezel onto the front of the unit until it is seated firmly, and
use the key to lock the locks.
6. If the replaced drive is in a JBOD directly attached to a server, perform any
operations your host software requires to recognize the new drive and bring it
under software control.
7. Go to
“Scanning the New Drive and Related Procedures” on page 2-6
.
2.1.4
Scanning the New Drive and Related Procedures
2.1.4.1
Scanning the New Drive
After you have replaced a disk drive, perform the following steps.
1. Check to see if the drive was automatically scanned onto the bus.
a. From the Main Menu, choose “view and edit scsi Drives.”
b. Check the status of the disk drive.
The status field will specify NEW_DRV or USED_DRV until it is assigned as a
GLOBAL or LOCAL spare with STAND-BY status.
2. If the disk drive was not automatically scanned, scan the replaced disk drive into
the configuration with the following steps:
a. From the Main Menu, choose “view and edit scsi Drives.” Select any disk drive
in the list and press Return.


