background image

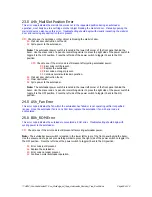
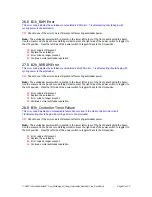
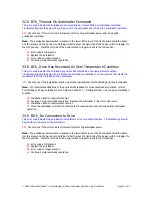
16.0  94h_Cartridge Unload Error 

This error code indicates a failure occurred while trying to unload a cartridge from the drive to its slot.  
Troubleshooting should begin with cycling power to the autoloader and retrying the autoloader command. 

 
DP1:

 Check to see if the error code is still present after cycling autoloader power and retrying the 

autoloader command. 
 

Note:

  The autoloader power switch is located in the lower left corner of the front panel behind the bezel.  

Use the eraser end of a pencil or something similar to press the right side of the power switch to toggle it to 
the OFF position.  Press the left side of the power switch to toggle it back to the ON position. 

 
Note:

  If a stuck tape in the tape drive is suspected, allow sufficient time for the tape drive to complete all 

operations prior to retrying the cartridge unload operation.  This may take as long as ten minutes if the 
autoloader power was cycled while the cartridge was positioned at the physical end of the media.  Also, 
make sure that the backup software is not reserving the slot or preventing the tape drive from ejecting the 
cartridge.  Temporarily disconnecting the autoloader from the host server will eliminate the host and its 
software as the possible cause of this error. 

 
R1:

 Error code is still present. 

A1:

 Toggle the front panel power switch to the OFF position. 

A1:

 Remove the AC power cord and SCSI cables from the back panel of the autoloader. 

DP2:

 Inspect the autoloader for stuck cartridges and/or misaligned cartridge carriers. 


Note:

 For instructions on removing stuck cartridges and inspecting for proper cartridge carrier 

installation, refer to Sun StorEdge L8 Tape Autoloader User’s Guide (6-00522-01) -> 
Troubleshooting and Diagnostics -> Removing Stuck Cartridges From Slots. 


R2:

 Cartridge stuck in tape drive. 


A2:

 Contact Technical Support for assistance. 

R2:

 Stuck cartridges and/or misaligned carriers not found. 


A2:

 Remove all media. 

A2:

 Reinstall cartridge carriers, autoloader cover and power cord.  Check to see that the 

LVD SCSI terminator is securely installed. 


A2:

 Toggle the front panel power switch to the ON position. 


DP3:

 Check to see if the error code is still present. 


R3:

 Error code is still present. 


A3:

 Replace the autoloader. 


R3:

 Error code no longer present. 

A3:

 Import media, reconnect SCSI cables, and continue normal 

autoloader operation. 


R2:

 Stuck cartridges and/or misaligned carriers found. 


A2:

 Remove stuck cartridges and reinstall cartridge carriers. 

A2:

 Reinstall autoloader cover and power cord.  Check to see that the LVD SCSI 

terminator is securely installed. 


A2:

 Continue normal autoloader operation. 

R1: 

Error code no longer present. 

A1:

 Continue normal autoloader operation. 

**ADIC / Sun Confidential**  Sun_StorEdge_L8_Tape_Autoloader_Decision_Tree_Rev02.doc 

Page 12 of 22 


Summary of Contents for StorEdge L8

Page 1: ...f the LCD The following decision tree assumes the following Field Replaceable Unit FRU items are available for servicing a StorEdge L8 Tape Autoloader Barcode Scanner StorEdge L8 Tape Autoloader does not include Barcode Scanner Failure to successfully clear the error code after performing the steps outlined in this decision tree will result in autoloader replacement ADIC Sun Confidential Sun_StorE...

Page 2: ...d of a pencil or something similar to press the right side of the power switch to toggle it to the OFF position DP4 Check the AC Power Cord for proper connection R4 AC Power Cord is properly connected DP5 Try a different AC power cord R5 Second AC power cord does not work A5 Replace the autoloader R5 Second AC power cord works A5 Replace the failing AC power cord R4 AC power cord is not properly c...

Page 3: ...the host server and cycling autoloader power R3 Autoloader command not successful A3 Replace the autoloader R3 Autoloader command successful A3 Troubleshoot the host server A3 Reconnect the autoloader to the host server A3 Continue normal autoloader operation R2 Error code no longer present A2 Continue normal autoloader operation R1 SCSI command is not supported or was sent with invalid parameters...

Page 4: ...er power R2 Error code is still present A2 Replace the autoloader R2 Error code no longer present A2 Continue normal autoloader operation R1 Error code no longer present A1 Continue normal autoloader operation 5 0 84h_Source Element Not Ready This error code indicates there is no cartridge in the location where a cartridge move was issued Troubleshooting should begin with cycling power to the auto...

Page 5: ...r this error DP1 Check the host application software to see if it is preventing media removal R1 Host application software is not preventing media removal A1 Cycle power to the autoloader and retry accessing the mail slot via the front panel Note The autoloader power switch is located in the lower left corner of the front panel behind the bezel Use the eraser end of a pencil or something similar t...

Page 6: ... command DP2 Check to see if the error code is still present after cycling autoloader power and retrying the autoloader command R2 Error code is still present A2 Replace the autoloader R2 Error code is no longer present R2 Continue normal autoloader operation R1 Error code no longer present A1 Continue normal autoloader operation 9 0 88h_Communications Error During Loop Back This error code indica...

Page 7: ...s securely installed A2 Cycle power to the autoloader DP3 Check to see if the error code is still present after cycling autoloader power R3 Error code is still present A3 Replace the autoloader R3 Error code no longer present A3 Troubleshoot the host server A3 Reconnect the autoloader to the host server A3 Continue normal autoloader operation R2 Invalid media is being used in the autoloader A2 Rep...

Page 8: ...oloader for stuck cartridges and or misaligned cartridge carriers Note For instructions on removing stuck cartridges and inspecting for proper cartridge carrier installation refer to Sun StorEdge L8 Tape Autoloader User s Guide 6 00522 01 Troubleshooting and Diagnostics Removing Stuck Cartridges From Slots R2 Stuck cartridges and or misaligned carriers not found A2 Remove all media A2 Reinstall ca...

Page 9: ...ges and inspecting for proper cartridge carrier installation refer to Sun StorEdge L8 Tape Autoloader User s Guide 6 00522 01 Troubleshooting and Diagnostics Removing Stuck Cartridges From Slots R2 Stuck cartridges and or misaligned carriers not found A2 Remove all media A2 Reinstall cartridge carriers autoloader cover and power cord Check to see that the LVD SCSI terminator is securely installed ...

Page 10: ...inspecting for proper cartridge carrier installation refer to Sun StorEdge L8 Tape Autoloader User s Guide 6 00522 01 Troubleshooting and Diagnostics Removing Stuck Cartridges From Slots R2 Stuck cartridges and or misaligned carriers not found A2 Remove all media A2 Reinstall cartridge carriers autoloader cover and power cord Check to see that the LVD SCSI terminator is securely installed A2 Toggl...

Page 11: ...tructions on removing stuck cartridges and inspecting for proper cartridge carrier installation refer to Sun StorEdge L8 Tape Autoloader User s Guide 6 00522 01 Troubleshooting and Diagnostics Removing Stuck Cartridges From Slots R2 Stuck cartridges and or misaligned carriers not found A2 Remove all media A2 Reinstall cartridge carriers autoloader cover and power cord Check to see that the LVD SCS...

Page 12: ...ll present A1 Toggle the front panel power switch to the OFF position A1 Remove the AC power cord and SCSI cables from the back panel of the autoloader DP2 Inspect the autoloader for stuck cartridges and or misaligned cartridge carriers Note For instructions on removing stuck cartridges and inspecting for proper cartridge carrier installation refer to Sun StorEdge L8 Tape Autoloader User s Guide 6...

Page 13: ...ions on removing stuck cartridges and inspecting for proper cartridge carrier installation refer to Sun StorEdge L8 Tape Autoloader User s Guide 6 00522 01 Troubleshooting and Diagnostics Removing Stuck Cartridges From Slots R2 Stuck cartridges and or misaligned carriers not found A2 Remove all media A2 Reinstall cartridge carriers autoloader cover and power cord Check to see that the LVD SCSI ter...

Page 14: ...d cartridge carriers Note For instructions on removing stuck cartridges and inspecting for proper cartridge carrier installation refer to Sun StorEdge L8 Tape Autoloader User s Guide 6 00522 01 Troubleshooting and Diagnostics Removing Stuck Cartridges From Slots R2 Stuck cartridges and or misaligned carriers not found A2 Remove all media A2 Reinstall cartridge carriers autoloader cover and power c...

Page 15: ...Note For instructions on removing stuck cartridges and inspecting for proper cartridge carrier installation refer to Sun StorEdge L8 Tape Autoloader User s Guide 6 00522 01 Troubleshooting and Diagnostics Removing Stuck Cartridges From Slots R2 Stuck cartridges and or misaligned carriers not found A2 Remove all media A2 Reinstall cartridge carriers autoloader cover and power cord Check to see that...

Page 16: ...loader cover and power cord Check to see that the LVD SCSI terminator is securely installed A2 Toggle the front panel power switch to the ON position DP3 Check to see if the error code is still present R3 Error code is still present A3 Replace the autoloader R3 Error code no longer present A3 Import media reconnect SCSI cables and continue normal autoloader operation R2 Stuck cartridges and or mis...

Page 17: ...s Note For instructions on removing stuck cartridges and inspecting for proper cartridge carrier installation refer to Sun StorEdge L8 Tape Autoloader User s Guide 6 00522 01 Troubleshooting and Diagnostics Removing Stuck Cartridges From Slots R2 Stuck cartridges and or misaligned carriers not found A2 Remove all media A2 Reinstall cartridge carriers autoloader cover and power cord Check to see th...

Page 18: ...le power to the autoloader Note The autoloader power switch is located in the lower left corner of the front panel behind the bezel Use the eraser end of a pencil or something similar to press the right side of the power switch to toggle it to the OFF position Press the left side of the power switch to toggle it back to the ON position 24 0 A5h_Fan Error This error code indicates the fan within th...

Page 19: ... the front panel behind the bezel Use the eraser end of a pencil or something similar to press the right side of the power switch to toggle it to the OFF position Press the left side of the power switch to toggle it back to the ON position R1 Error code is still present A1 Replace the autoloader R1 Error code no longer present A1 Continue normal autoloader operation 28 0 B3h_Controller Timer Failu...

Page 20: ...ader power Note The autoloader power switch is located in the lower left corner of the front panel behind the bezel Use the eraser end of a pencil or something similar to press the right side of the power switch to toggle it to the OFF position Press the left side of the power switch to toggle it back to the ON position R1 Error code is still present A1 Replace the autoloader R1 Error code no long...

Page 21: ...ion meets the requirements for the StorEdge L8 Tape Autoloader Note For technical specifications of the environment required for proper autoloader operation refer to Sun StorEdge L8 Tape Autoloader User s Guide 6 00522 01 Getting Started Choosing an Installation Location R1 Installation location requirements met A1 Continue normal autoloader operation Replace the autoloader if this error code recu...

Page 22: ...toggle it back to the ON position R1 Error code is still present A1 Replace the autoloader R1 Error code no longer present A1 Continue normal autoloader operation 36 0 BFh_Fatal Error This error code indicates the autoloader has encountered a fatal error Troubleshooting should begin with cycling power to the autoloader DP1 Check to see if the error code is still present after cycling autoloader po...

Reviews: