Chapter 11
Replacing the Motherboard and Associated Components
11-9
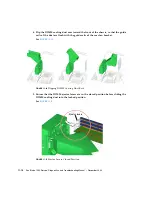
FIGURE
11-8
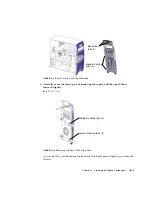
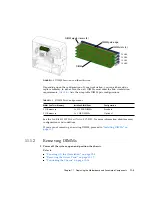
Aligning the DIMM
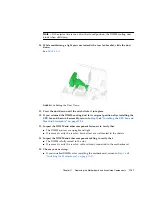
6. Insert the DIMM into the slot.
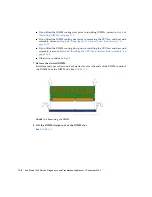
Using both thumbs, press the DIMM straight down into the DIMM slot until both
ejector levers click, locking the DIMM in the DIMM slot. See
FIGURE
11-9
Securing the DIMM
Note –
The DIMMs must be inserted evenly, straight down along the DIMM slot
until locked into place.
The DIMM is seated when you hear a click and the DIMM ejector levers are in the
vertical position.
7. Repeat
for all DIMMs.
DIMM key notch
DIMM slot key
Ejector levers (2)
Summary of Contents for Sun Blade 1500
Page 16: ...xvi Sun Blade 1500 Service Diagnostics and Troubleshooting Manual December 2004...
Page 30: ...xxx Sun Blade 1500 Service Diagnostics and Troubleshooting Manual December 2004...
Page 40: ...xl Sun Blade 1500 Service Diagnostics and Troubleshooting Manual December 2004...
Page 186: ...8 22 Sun Blade 1500 Service Diagnostics and Troubleshooting Manual December 2004...
Page 360: ...13 62 Sun Blade 1500 Service Diagnostics and Troubleshooting Manual December 2004...
Page 412: ...A 4 Sun Blade 1500 Service Diagnostics and Troubleshooting Manual December 2004...
Page 432: ...B 20 Sun Blade 1500 Service Diagnostics and Troubleshooting Manual December 2004...
Page 472: ...C 40 Sun Blade 1500 Service Diagnostics and Troubleshooting Manual December 2004...
Page 500: ...Index 14 Sun Blade 1500 Service Diagnostics and Troubleshooting Manual December 2004...

