Chapter 11
Replacing the Motherboard and Associated Components
11-21
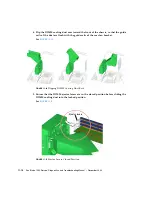
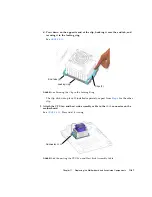
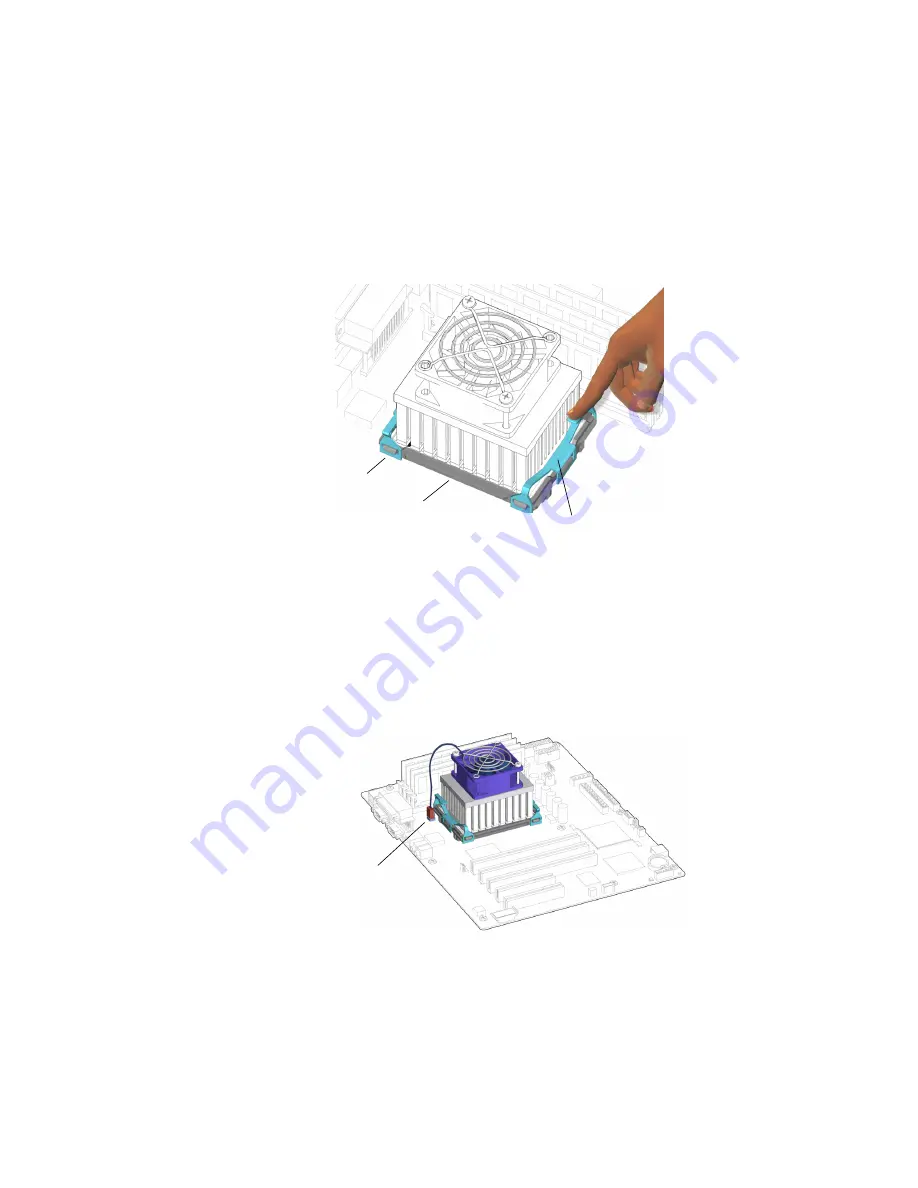
d. Press down on the opposite end of the clip, hooking it over the end tab, and
securing it to the locking ring.
See
.
FIGURE
11-23
Securing the Clip to the Locking Ring
The clip clicks into place. If installed separately, repeat from
for the other
clip.
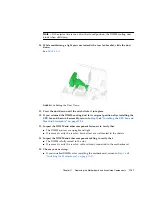
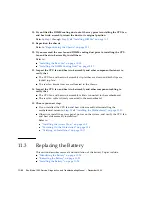
9. Attach the CPU fan and heat sink assembly cable to the
FAN2
connector on the
motherboard.
See
. Press until it is snug.
FIGURE
11-24
Connecting the CPU Fan and Heat Sink Assembly Cable
End tabs (4)
Clips (2)
Locking ring
Connector
FAN2
Summary of Contents for Sun Blade 1500
Page 16: ...xvi Sun Blade 1500 Service Diagnostics and Troubleshooting Manual December 2004...
Page 30: ...xxx Sun Blade 1500 Service Diagnostics and Troubleshooting Manual December 2004...
Page 40: ...xl Sun Blade 1500 Service Diagnostics and Troubleshooting Manual December 2004...
Page 186: ...8 22 Sun Blade 1500 Service Diagnostics and Troubleshooting Manual December 2004...
Page 360: ...13 62 Sun Blade 1500 Service Diagnostics and Troubleshooting Manual December 2004...
Page 412: ...A 4 Sun Blade 1500 Service Diagnostics and Troubleshooting Manual December 2004...
Page 432: ...B 20 Sun Blade 1500 Service Diagnostics and Troubleshooting Manual December 2004...
Page 472: ...C 40 Sun Blade 1500 Service Diagnostics and Troubleshooting Manual December 2004...
Page 500: ...Index 14 Sun Blade 1500 Service Diagnostics and Troubleshooting Manual December 2004...

