13-6
Sun Blade 1500 Service, Diagnostics, and Troubleshooting Manual
• December
2004
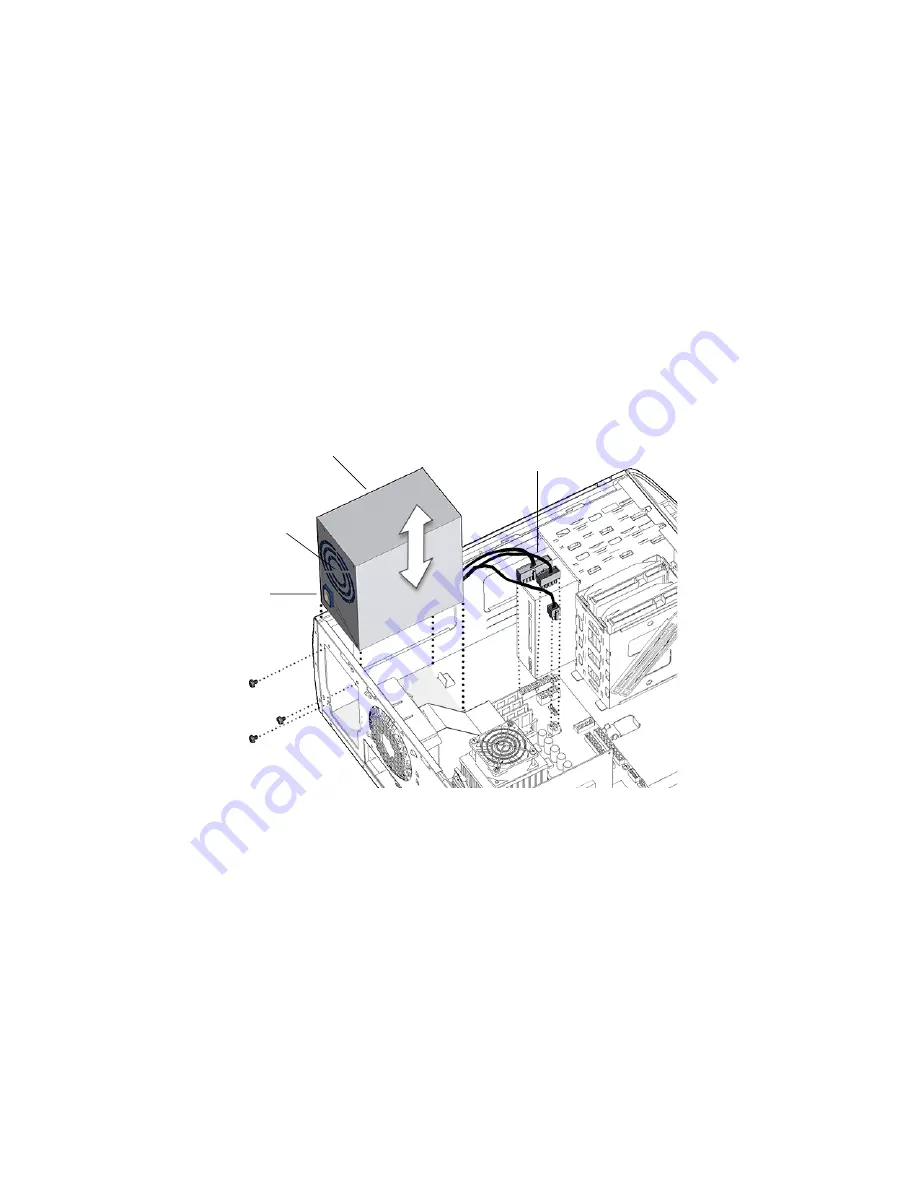
2. Remove the new power supply from its package.
3. Locate where the power supply is to be installed.
See
4. Align the power supply IEC-320 connector (power cord socket) and fan with the
chassis rear panel opening.
See
5. Position the power supply with the chassis power supply brackets.
6. Rotate the power supply down and into the chassis.
See
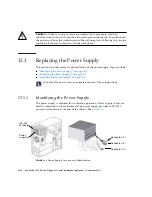
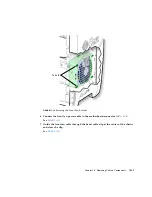
FIGURE
13-5
Installing the Power Supply
7. Using a No. 2 Phillips screwdriver, fasten the three screws that secure the power
supply to the chassis.
See
8. Feed the cables through the cable routing clips and close the cable routing clips.
See
Screws (3)
Power supply
Connectors
PS0
,
PS1
,
PS2
IEC-320
connector
Power supply
fan
Summary of Contents for Sun Blade 1500
Page 16: ...xvi Sun Blade 1500 Service Diagnostics and Troubleshooting Manual December 2004...
Page 30: ...xxx Sun Blade 1500 Service Diagnostics and Troubleshooting Manual December 2004...
Page 40: ...xl Sun Blade 1500 Service Diagnostics and Troubleshooting Manual December 2004...
Page 186: ...8 22 Sun Blade 1500 Service Diagnostics and Troubleshooting Manual December 2004...
Page 360: ...13 62 Sun Blade 1500 Service Diagnostics and Troubleshooting Manual December 2004...
Page 412: ...A 4 Sun Blade 1500 Service Diagnostics and Troubleshooting Manual December 2004...
Page 432: ...B 20 Sun Blade 1500 Service Diagnostics and Troubleshooting Manual December 2004...
Page 472: ...C 40 Sun Blade 1500 Service Diagnostics and Troubleshooting Manual December 2004...
Page 500: ...Index 14 Sun Blade 1500 Service Diagnostics and Troubleshooting Manual December 2004...


