Chapter 13
Replacing Chassis Components
13-61
13.9.3
Installing the Drive Rails
1. Power off the system and open the chassis.
Refer to:
■
“Powering Off the Workstation” on page
■
“Removing the Access Panel” on page
2. Remove the spare drive rails from their storage position, if needed.
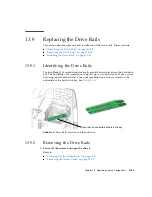
The drive rails are stored on the underside of the hard drive bay. Unsnap them from
their storage location. See
3. Locate the hard drive.
Whether you are replacing an existing hard drive or installing a new second hard
drive, refer to
“Replacing a Hard Drive” on page
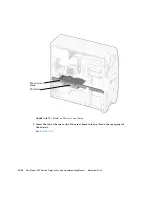
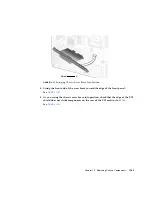
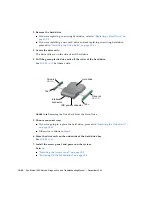
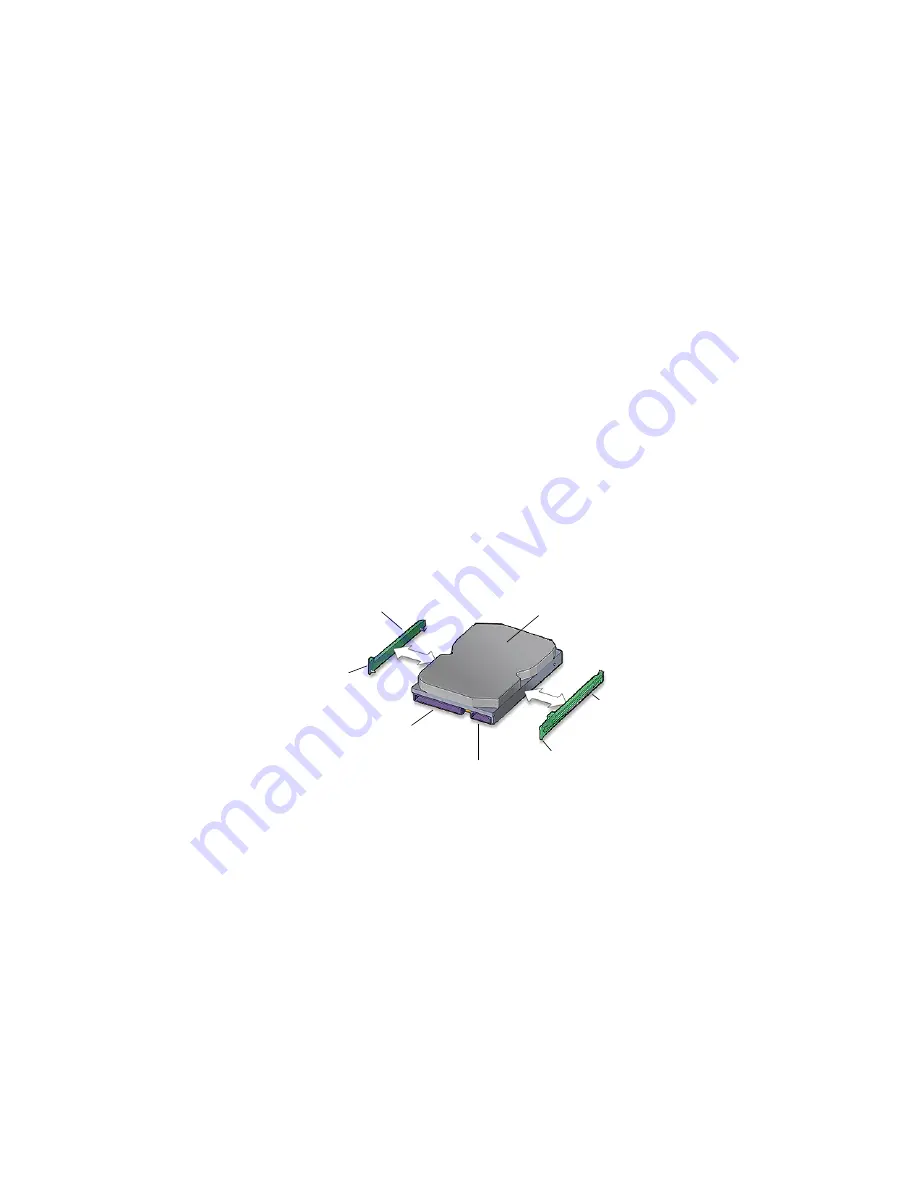
4. Snap both drive rails into the holes on both sides of the hard drive.
The lettering on the drive rails (
HDD-L
and
HDD-R
) is upright and the drive rail tabs
are toward the hard drive power and interface connectors. See
FIGURE
13-63
Installing the Drive Rails to the Hard Drive
“Replacing a Hard Drive” on page
Drive rail
HDD-L
Drive rail
HDD-R
Interface
connector
IDE power connector
Tab
R
Tab
L
Hard drive
Summary of Contents for Sun Blade 1500
Page 16: ...xvi Sun Blade 1500 Service Diagnostics and Troubleshooting Manual December 2004...
Page 30: ...xxx Sun Blade 1500 Service Diagnostics and Troubleshooting Manual December 2004...
Page 40: ...xl Sun Blade 1500 Service Diagnostics and Troubleshooting Manual December 2004...
Page 186: ...8 22 Sun Blade 1500 Service Diagnostics and Troubleshooting Manual December 2004...
Page 360: ...13 62 Sun Blade 1500 Service Diagnostics and Troubleshooting Manual December 2004...
Page 412: ...A 4 Sun Blade 1500 Service Diagnostics and Troubleshooting Manual December 2004...
Page 432: ...B 20 Sun Blade 1500 Service Diagnostics and Troubleshooting Manual December 2004...
Page 472: ...C 40 Sun Blade 1500 Service Diagnostics and Troubleshooting Manual December 2004...
Page 500: ...Index 14 Sun Blade 1500 Service Diagnostics and Troubleshooting Manual December 2004...

