
Chapter 3
Installing the System Chassis In a Rack or Cabinet
3-3
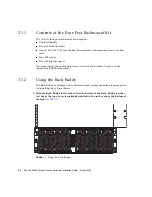
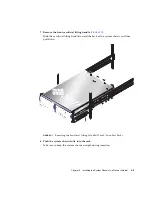
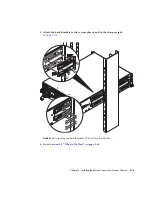
2. Note which holes are in alignment with the Rack Buddy recesses.
Use these holes when you attach the rack brackets to the rack. Continue with
Section 3.1.3, “Attaching the Brackets to the Four-Post Rack” on page 3-3
3.1.3
Attaching the Brackets to the Four-Post Rack
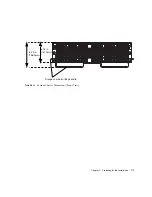
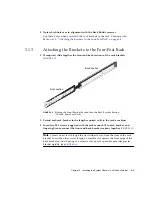
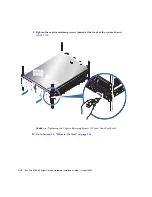
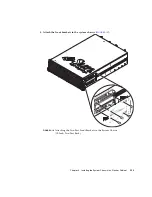
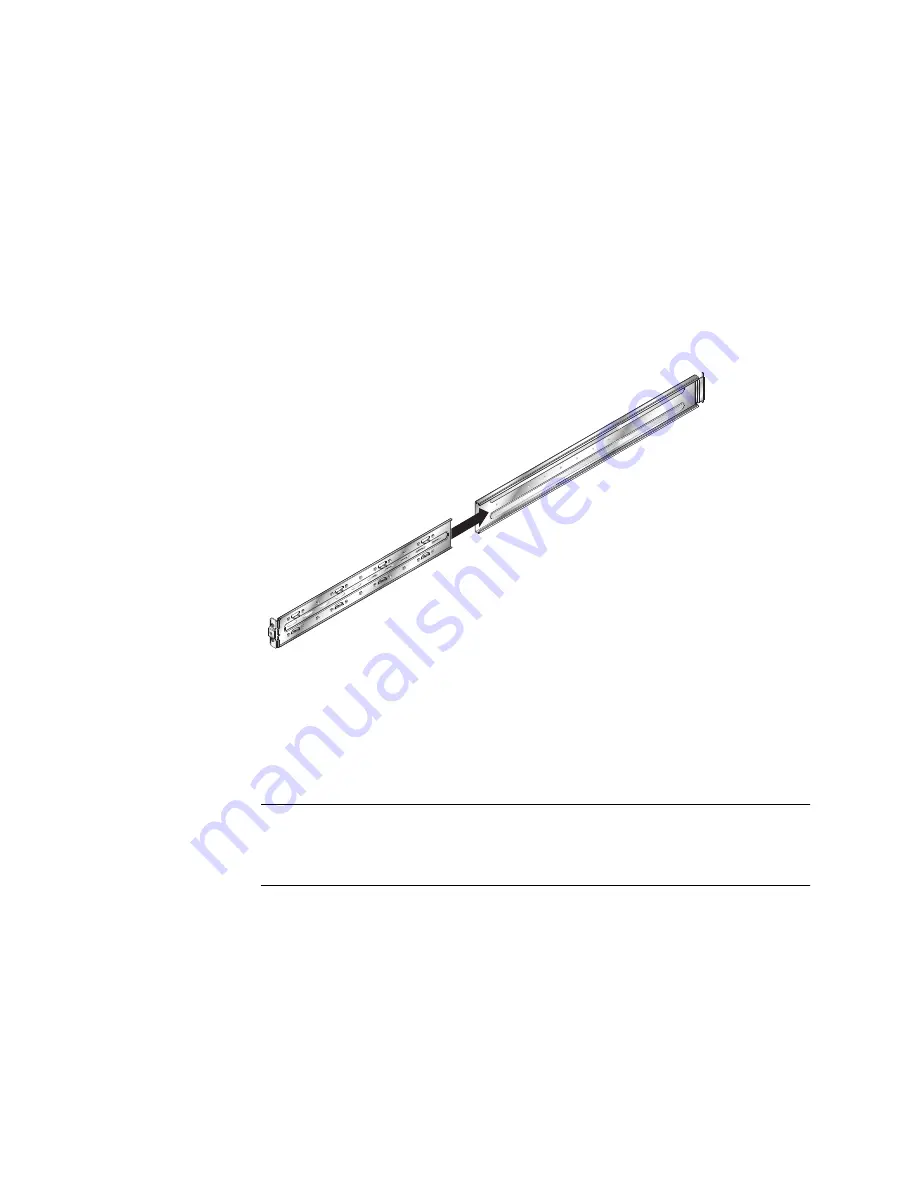
1. If required, slide together the front and back sections of the rack brackets
(
).
FIGURE 3-2
Sliding the Front Bracket Section Into the Back Bracket Section
(19-Inch, Four-Post Rack)
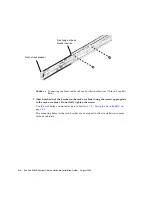
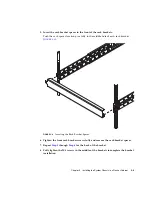
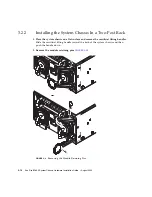
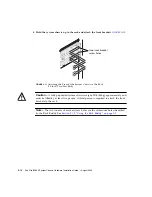
2. Extend each rack bracket to the length required to fit in the rack or cabinet.
3. Insert two M4 screws (supplied with the rack mount kit) to each bracket, and
finger tighten to connect the front and back bracket sections together (
).
Note –
Insert one screw through the slot furthest away from the front of the rack
bracket. Insert the other screw through a suitable slot nearest the front edge of the
back bracket section. Spacing the screws as far apart as possible provides greater
bracket rigidity (see
Front section
Back section
Summary of Contents for Sun Fire B1600 Administration
Page 6: ...vi Sun Fire B1600 System Chassis Hardware Installation Guide August 2003 ...
Page 10: ...x Sun Fire B1600 System Chassis Hardware Installation Guide August 2003 ...
Page 14: ...xiv Sun Fire B1600 System Chassis Hardware Installation Guide August 2003 ...
Page 30: ...2 4 Sun Fire B1600 System Chassis Hardware Installation Guide August 2003 ...
Page 82: ...5 14 Sun Fire B1600 System Chassis Hardware Installation Guide August 2003 ...
Page 94: ...6 12 Sun Fire B1600 System Chassis Hardware Installation Guide August 2003 ...
Page 98: ...Index 4 Sun Fire B1600 System Chassis Hardware Installation Guide August 2003 ...