10-22
Ultra 1 Creator Series Service Manual • August 1996
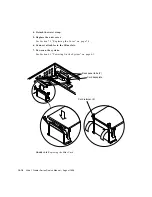
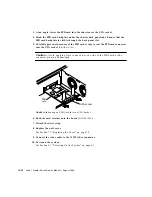
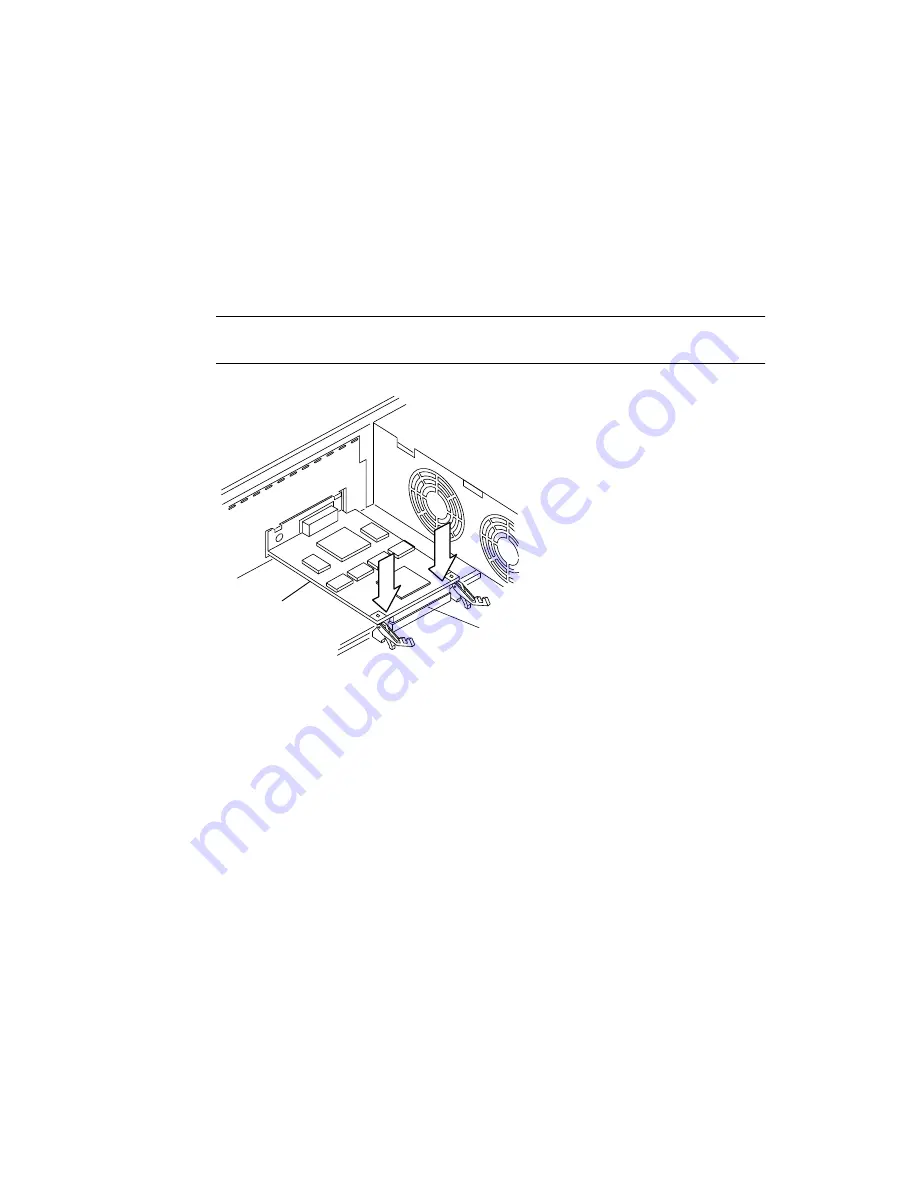
3. At an angle, lower the FFB card into the chassis over the UPA socket.
4. Hook the FFB card backplate under the chassis back panel tabs. Ensure that the
FFB card backplate is visible through the back panel slot.
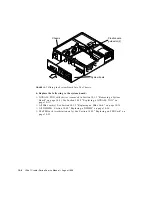
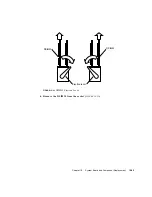
5. Carefully press both corners of the FFB card evenly to seat the FFB card connector
into the UPA socket (
FIGURE 10-19
).
Caution –
Avoid applying force to one end or one side of the FFB board or the
connector pin may be damaged.
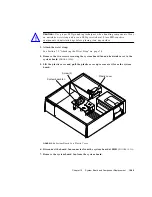
FIGURE 10-19
Seating an FFB Card Into the UPA Socket
6. Push the card retainer onto the board (
FIGURE 10-20
).
7. Detach the wrist strap.
8. Replace the unit cover.
See Section 7.3 “Replacing the Cover” on page 7-3.
9. Connect the video cable to the 13W3 video connector.
10. Power-on the system.
See Section 6.1 “Powering On the System” on page 6-1.
FFB
card
UPA socket
Summary of Contents for Ultra 1 Series
Page 8: ...viii Ultra 1 Creator Series Service Manual August 1996...
Page 21: ...Preface xxi Email smcc docs sun com Fax SMCC Document Feedback 1 415 786 6443...
Page 22: ...xxii Ultra 1 Creator Series Service Manual August 1996...
Page 34: ...2 4 Ultra 1 Creator Series Service Manual August 1996...
Page 70: ...6 4 Ultra 1 Creator Series Service Manual August 1996...
Page 110: ...8 36 Ultra 1 Creator Series Service Manual August 1996...
Page 126: ...9 16 Ultra 1 Creator Series Service Manual August 1996...
Page 158: ...10 32 Ultra 1 Creator Series Service Manual August 1996...
Page 164: ...A 4 Ultra 1 Creator Series Service Manual August 1996...
Page 186: ...B 22 Ultra 1 Creator Series Service Manual August 1996...
Page 208: ...C 22 Ultra 1 Creator Series Service Manual August 1996...
Page 212: ...Glossary 4 Ultra 1 Creator Series Service Manual August 1996...

