5-16
Sun Ultra 20 M2 Workstation Service Manual • January 2007
4. Remove any installed HDDs and place them on an antistatic surface.
See
Section 5.4.1, “Removing a Hard Disk Drive” on page 5-8
.
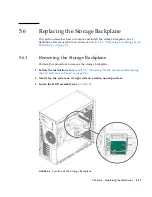
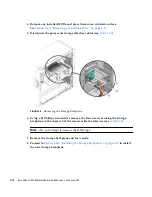
5. Disconnect the power and storage interface cables (see
FIGURE 5-9
).
FIGURE 5-9
Removing the Storage Backplane
6. Using a #2 Phillips screwdriver, remove the four screws securing the storage
backplane to the chassis. Set the screws aside for later use (see
FIGURE 5-9
).
Note –
Do not attempt to remove the HDD cage.
7. Remove the storage backplane and set it aside.
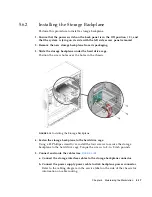
8. Proceed to
Section 5.6.2, “Installing the Storage Backplane” on page 5-17
to install
the new storage backplane.
Summary of Contents for Ultra 20 M2
Page 16: ...xvi Sun Ultra 20 M2 Workstation Service Manual January 2007...
Page 22: ...1 6 Sun Ultra 20 M2 Workstation Service Manual January 2007...
Page 30: ...2 8 Sun Ultra 20 M2 Workstation Service Manual January 2007...
Page 116: ...5 60 Sun Ultra 20 M2 Workstation Service Manual January 2007...
Page 132: ...B 10 Sun Ultra 20 M2 Workstation Service Manual January 2007...
Page 136: ...Index 4 Sun Ultra 20 M2 Workstation Service Manual January 2007...


