40
8
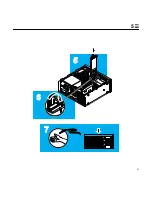
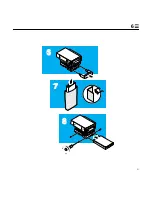
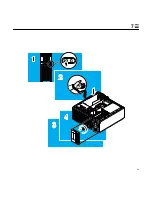
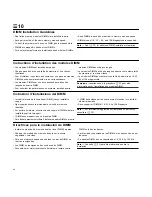
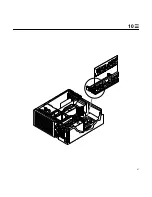
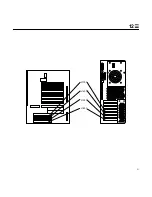
Installing UPA Graphics Cards or PCI Cards
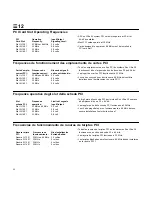
Note — If you are installing a PCI card, first see (
12).
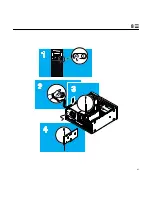
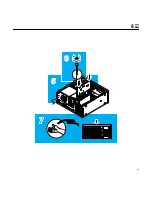
1. Power off the system and open the system unit (
2).
2. Locate the wrist strap, and attach its adhesive copper strip to
the chassis back panel. Wrap the other end twice around your
wrist, with the adhesive side against your skin.
3. Remove the filler panel from the back panel of the system
chassis.
4. Fit the card back panel into one of the system chassis card
slots, and lower the card connector so that it touches its
associated card slot on the main logic board.
Installation de cartes graphiques UPA ou de cartes PCI
Remarque : si vous installez une carte PCI, consultez au préalable
la procédure
12.
1. Mettez votre système hors tension et ouvrez l’unité système (
2).
2. Attachez le bracelet de mise à la terre à votre poignet et reliez
son extrémité adhésive en cuivre au panneau arrière du
châssis. Enroulez deux fois l’autre extrémité autour de votre
poignet, la partie adhésive de la bande côté peau.
3. Otez le cache SBus du panneau arrière du châssis du système.
4. Engagez le panneau arrière de la carte dans l’un des
emplacements de carte du châssis du système et insérez le
connecteur de carte dans l’emplacement qui lui est associé sur
la carte système.
Installazione delle schede grafiche UPA o delle schede PCI
Nota — Se si installa una scheda PCI, consultare prima (
12).
1. Spegnere il sistema e aprire l’unità centrale (
2).
2. Indossare il cinturino antistatico e collegare l’estremità adesiva
in rame al pannello posteriore. Arrotolare due volte intorno al
polso l’altra estremità con la parte adesiva a contatto con la
pelle.
3. Rimuovere il pannello di riempimento dal pannello posteriore
del telaio.
4. Inserire il pannello posteriore della scheda in uno degli slot del
telaio e abbassare il connettore in modo che tocchi il relativo
slot per la scheda sulla scheda madre.
Instalación de tarjetas de gráficos UPA o tarjetas PCI
Nota — SI está instalando una tarjeta PCI, consulte antes (
12).
1. Apague el equipo y abra la unidad del sistema (
2).
2. Localice la muñequera antiestática y coloque la banda adhesiva
de cobre en el panel posterior del bastidor. Envuelva el otro
extremo dos veces alrededor de la muñeca, con la parte
adhesiva contra la piel.
3. Extraiga el panel de relleno situado en el panel posterior del
bastidor del sistema.
4. Encaje el panel posterior de la tarjeta en una de las ranuras
para tarjetas del bastidor del sistema y baje el conector de la
tarjeta para que contacte con su ranura de tarjeta asociada de
la placa lógica principal.
Summary of Contents for Ultra 30
Page 11: ...9...
Page 13: ...11 1...
Page 15: ...13 2...
Page 17: ...15 3...
Page 19: ...17 3...
Page 21: ...19 4...
Page 25: ...23 5...
Page 27: ...25 5...
Page 29: ...27 5...
Page 31: ...29 6...
Page 33: ...31 6...
Page 35: ...33 6...
Page 37: ...35 7...
Page 39: ...37 7...
Page 41: ...39 7...
Page 43: ...41 8...
Page 45: ...43 8...
Page 47: ...45 9...
Page 49: ...47 10...
Page 53: ...51 12 J1301 J1401 J1501 J1601...
Page 55: ...53 13...
Page 61: ...59...


