background image

Cable Guide Installation 
 

1. 

Installing Cable Ties 

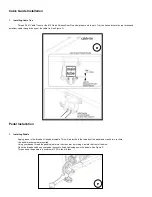
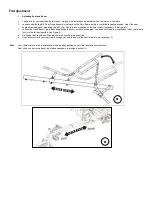
Thread 2 #21 Cable Ties over the #15 Quick Release Seat Pin and zip them onto the pin. Trim the ties and route the rear brake and 

derailleur cable through the eye of the cable tie. See Figure O. 


Pedal Installation 
 

1. 

Installing Pedals 


Apply grease to the threads of the pedal spindle. This will protect both the threads of the pedal and crank arm over time. 


Use pedal washers where required. 


Using your hands, thread the pedal spindle into the crank arm by turning it toward the front of the bike. 


Once the threads catch use your pedal wrench to finish tightening down the pedals. See Figure P. 


Torque down the pedals to a minimum of 300 in-lbs of torque. 


Summary of Contents for Eco-Delta

Page 1: ...Eco Delta Supplemental Owner s Manual Find us online at SunSeeker bike Revised 12 2014...

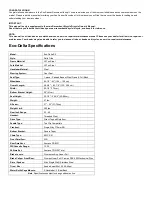
Page 2: ...ations Model Eco Delta SX Style Delta Trike Frame Material Hi Ten Steel Fork Material Hi Ten Steel Handlebar Material Steel Steering System Over Seat Seat Type 1 piece Padded Base w Steel Frame Full M...

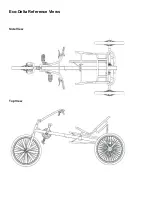
Page 3: ...Eco Delta Reference Views Side View Top View...

Page 4: ...h Not Pictured Above 1 11 Upper Seat Strut 5 8 x 150mm 1 12 Lower Seat Strut 1 2 x 400mm 2 13 Rear Derailleur 2 14 Pedals 1 15 Quick Release Seat Pin M8 95mm 1 16 Headset Bearing 2 17 Headset Lock Nut...

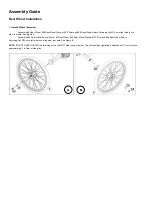
Page 5: ...ive side rear axle See Figure A Assemble 26 Rear Wheel Spacer 23mm 5 Rear Wheel 25 Rear Wheel Washer M15 2mm and 24 Rear Wheel Nylock Retaining Nut M14 onto left side non drive side rear axle See Figu...

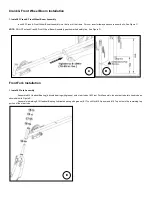
Page 6: ...ont Wheel Boom Assembly past its marked safety line See Figure D Front Fork Installation 1 Install 2 Fork Assembly Assemble 16 Headset Bearing lubricate bearing with grease onto steer tube of 2 Front...

Page 7: ...1 Install 4 Front Wheel Assembly Insert 4 Front Wheel onto the 2 Fork drop outs See Figure F Derailleur Installation 1 Install 3 Rear Derailleur Install 3 Rear Derailleur onto the rear frame deraille...

Page 8: ...hain Through Derailleur Route the open end of the chain through the derailleur then close the chain 4 Install Chain Tube Bracket Secure the brackets to the frame NOTE Chain length is set for crank boo...

Page 9: ...r Stem Installation 1 Handlebar Stem Install 8 Handlebar Stem into 2 Fork See Figure J Handlebar Assembly Installation 1 Handlebar Assembly Install 7 Handlebar Assembly onto 8 handlebar Stem See Figur...

Page 10: ...L 2 Install Upper Struts Install 2 11 Upper Seat Struts and moon washers to the seat frame with the provided hardware See Figure M 3 Install Lower Struts Install 2 12 Lower Seat Struts to the lower fr...

Page 11: ...stallation 1 Installing Pedals Apply grease to the threads of the pedal spindle This will protect both the threads of the pedal and crank arm over time Use pedal washers where required Using your hand...

Page 12: ...s if necessary See Figure Q 3 Loosen the Crank Boom Clamp Bolts and position the boom so that when seated your knee should be just slightly bent when the forward foot is in the farthest position See F...

Page 13: ...t To prevent numbness of the hands or fingers be sure to keep your hand position just below the level of your heart while seated 3 Once handlebar position is set you can now adjust the controls for co...

Reviews: