


SunFounder Pironman
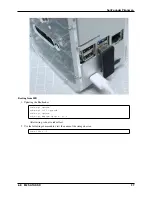
e. USB 3.0
f. Gigabit LAN port
g. USB Type C Raspberry Pi power supply (direct power to Raspberry Pi, not recommended)
h. micro HDMI x 2
i. 3.5mm headphone jack
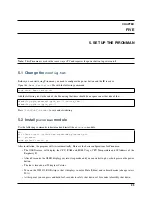
7. Power button
8. OLED screen: 0.96” 128x64 resolution
9. Infrared receiver: 38KHz
10. Cooling fan: size 40x40x10mm
11. WS2812 RGB LED: 16xWS2812B-5050
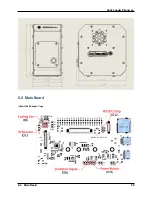
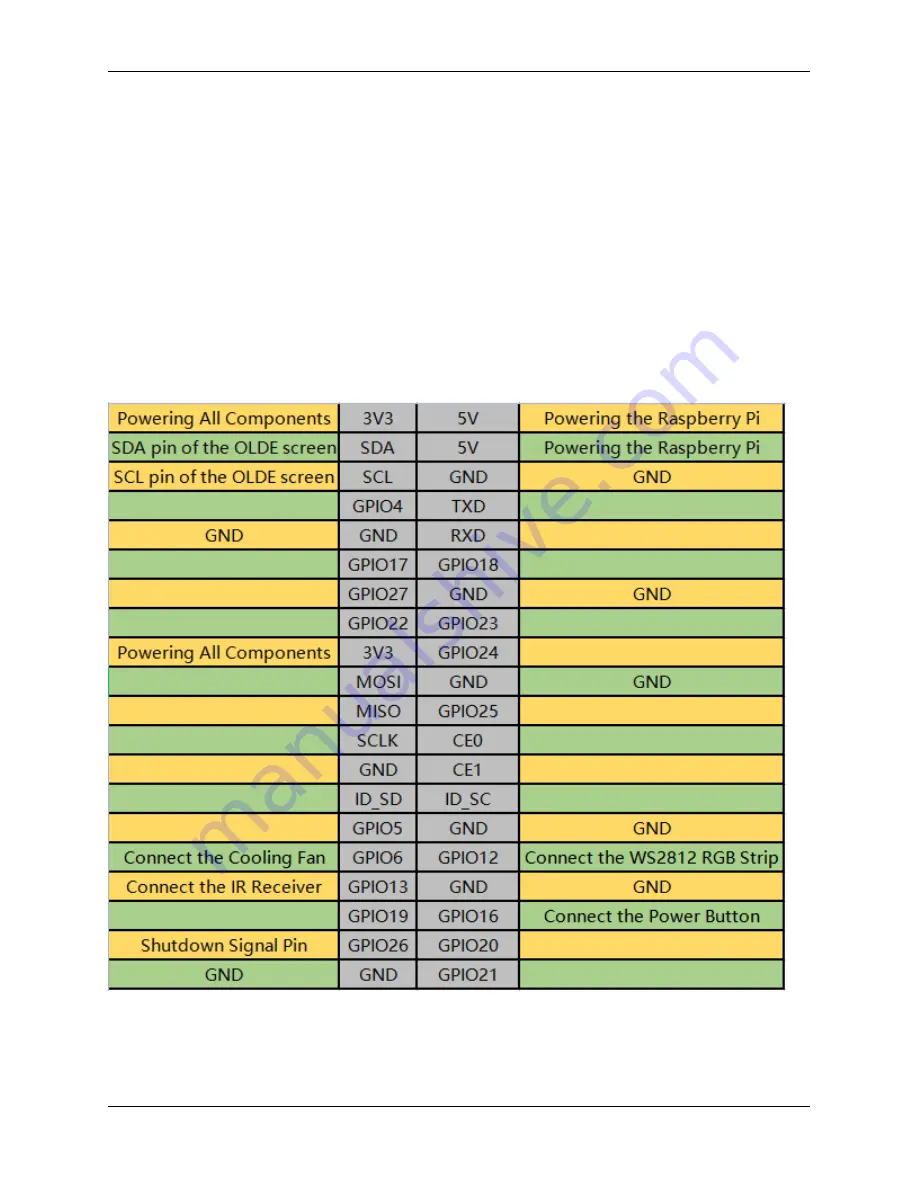
Pin Functions
•
Shutdown Signal Pin
: By pressing the power button, the Raspberry Pi will power off, while setting GPIO26 to
a high level, and if the Main Board detects this high level, it will power cut.
Dimensional Drawing
28
Chapter 6. 6. About Hardware
Summary of Contents for Pironman
Page 1: ...SunFounder Pironman www sunfounder com Nov 01 2022 ...
Page 2: ......
Page 4: ...ii ...
Page 6: ...SunFounder Pironman 2 CONTENTS ...
Page 10: ...SunFounder Pironman 6 Chapter 2 2 Component List and Assembly Instructions ...
Page 17: ...SunFounder Pironman 13 ...
Page 18: ...SunFounder Pironman 14 Chapter 3 3 Installing the OS ...
Page 30: ...SunFounder Pironman 26 Chapter 5 5 Set up the Pironman ...
Page 33: ...SunFounder Pironman 6 2 Main Board About the Jumper Caps 6 2 Main Board 29 ...
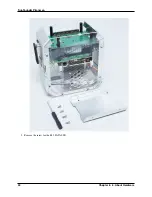
Page 38: ...SunFounder Pironman 2 Remove the screw for the M 2 SATA SSD 34 Chapter 6 6 About Hardware ...
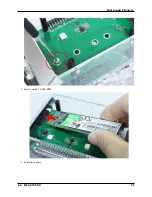
Page 39: ...SunFounder Pironman 3 Insert your M 2 SATA SSD 4 Screwed in place 6 8 M 2 SATA SSD 35 ...
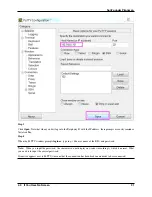
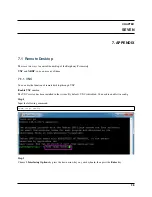
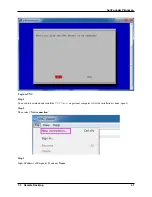
Page 46: ...SunFounder Pironman Step 4 Double click the connection just created 42 Chapter 7 7 Appendix ...
Page 66: ...SunFounder Pironman 2 Select Samba SMB Server 3 Select Install 62 Chapter 7 7 Appendix ...


