ROLLBOTMICRO
28
Program Explanation
Through the explanation previously, you should already have a general understanding of the
robot. Next we will come to the most important part - theory and program. Most of the programs
provided are compiled as libraries and you just need to call them in the Arduino IDE. So in the
following let's focus on how to compile them.
7.1 Smiling Face with LEDs
The smiling face of the robot is displayed with 16 yellow LEDs. They are controlled directly by the
74HC595 chip. In the code, change the parameter in the output function
Dataout()
to
0xff
, so
the LEDs forming a smiling face will light up. Change it to
0x00
, and the LEDs will go out.
/*********Output of data control***********/
void
RollbotLED
::
DataOut
(
int
val
)
{
for
(
int
i
=
0
;
i
<
8
;
i
++)
{
if
(
val
&
0x80
)
digitalWrite
(
dataPin
,
1
);
else
digitalWrite
(
dataPin
,
0
);
val
<<=
1
;
digitalWrite
(
clockPin
,
HIGH
);
delayMicroseconds
(
10
);
digitalWrite
(
clockPin
,
LOW
);
}
digitalWrite
(
latchPin
,
LOW
);
delayMicroseconds
(
10
);
digitalWrite
(
latchPin
,
HIGH
);
}
7.2 Sensor Signal Intensity on OLED Screen
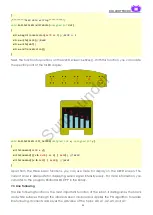
The OLED screen can display characters, letters, and patterns. It is used in the robot for your
better interaction with the robot. How to use it? Here IIC is used in hardware. First, initialize the
OLED screen. For use, two functions are indispensable:
WriteCommand()
and
WriteData()
.
/*********OLED command writing***********/
void
RollbotOLED
::
WriteCommand
(
unsigned
int
ins
)
{
Wire
.
beginTransmission
(
0x78
>>
1
);
//0x78 >> 1
Wire
.
write
(
0x00
);
//0x00
Wire
.
write
(
ins
);
Wire
.
endTransmission
();
SunFounder

