55
step 3
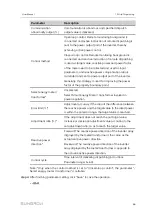
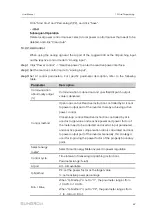
Optional) When "PLC access" is set to "Enable", click "Set PLC Net ID". In the pop-up
window, follow the interface prompts to set the master node, set the slave node, restart
the master node, and restart the slave node. Then, click "Save and Exit".
-- -- E
En
nd
d
9.10.13.2 Ethernet
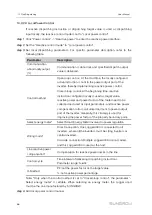
Perform Ethernet settings on this interface.
step 1
Click "System" -> "Interface" -> "Ethernet" to enter the corresponding interface.
step 2
If auto IP allocation is
, it is recommended to obtain the current IP address of the
ETH port by connecting the WiFi module and logging into 11.11.11.1.
P
Po
orrtt
D
De
effa
au
ulltt IIP
P
V
Viirrttu
ua
all IIP
P
ETH1
12.12.12.12
14.14.14.14
ETH2
13.13.13.13
15.15.15.15
step 3
If the parameter "Automatically obtain IP settings (DHCP)" is set to
, fill in the
information such as the IP address, subnet mask, and default gateway, and click the
button
to save the operation.
-- -- E
En
nd
d
9.10.13.3 AI
step 1
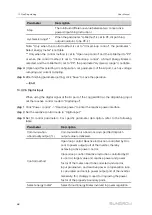
Click "System" -> "Interface" -> "AI" to enter the corresponding interface.
step 2
Select an input type, set the lower limit and upper limit, and click the button to save the
operation.
A
AII P
Po
orrtt
IIn
np
pu
utt T
Tyyp
pe
e
L
Lo
ow
we
err S
Sa
am
mp
plliin
ng
g
L
Liim
miitt
U
Up
pp
pe
err S
Sa
am
mp
plliin
ng
g
L
Liim
miitt
AI1
Voltage (V)
0
10
Current (mA)
4
20
AI2
Voltage (V)
0
10
Current (mA)
4
20
AI3
Voltage (mV)
0
100
AI4
Voltage (mV)
0
100
-- -- E
En
nd
d
9.10.13.4 DI
step 1
Click "System" -> "Interface" -> "DI" to enter the corresponding interface.
step 2
Set the initial status to "NO" or "NC", and click the button to save the operation.
User Manual
Summary of Contents for Logger3000
Page 2: ......
Page 6: ......
Page 14: ...8 f fiig gu ur re e 3 3 2 2 Star networking 3 Product Introduction User Manual...


