19
Turn on the vacuum cleaner and wear safety goggles and dust mask
throughout the drilling process to avoid dust inhalation or contact with eyes.
Installation component parts
•
Marker (beyond the delivery scope)
•
Hammer drill (beyond the delivery scope)
•
Bottom supporter (in the delivery scope)
•
Mounting ear (in the delivery scope)
•
Expansion bolt (in the delivery scope)
•
Tapping screw (in the delivery scope)
•
Screwdriver (beyond the delivery scope)
IIn
nsstta
allll M
Mo
ou
un
nttiin
ng
g E
Ea
arrss a
an
nd
d B
Bo
otttto
om
m S
Su
up
pp
po
orrtte
errss
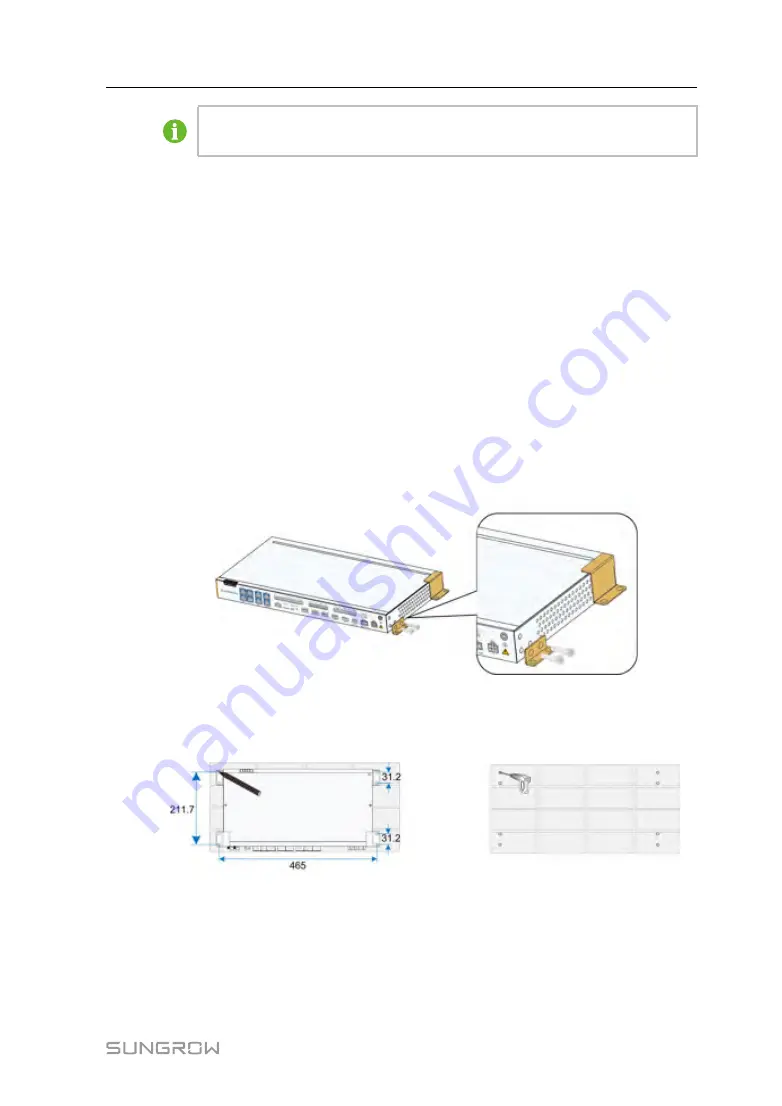
Anchor the mounting ears and bottom supporters to the Logger4000 with supplied
M4x8 cross recessed countersunk head screws. The fastening torque is 1.8-2.4N·m,
and the anchoring method is as follows:
M
Mo
ou
un
ntt tth
he
e L
Lo
og
gg
ge
err4
40
00
00
0 tto
o tth
he
e W
Wa
allll
step 1
Mark positions for drilling holes on the installation wall. Drill the holes with a hammer drill
of φ6mm. (Note: Reserve sufficient clearances around the Logger4000.)
step 2
Insert the expansion sleeve into the drilled hole, and make it completely embedded in
the wall with a rubber hammer.
User Manual


